Toyota RAV4 (XA40) 2013-2018 Service Manual: Differential oil seal
Components
Replacement
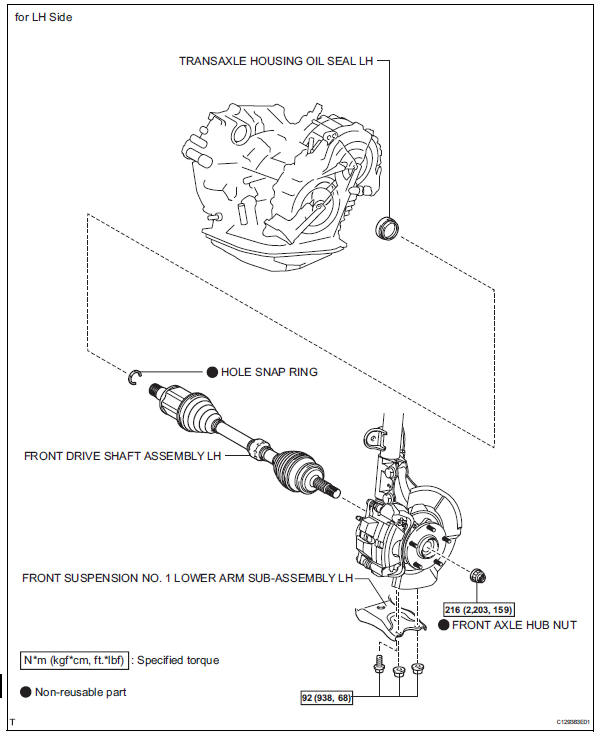
- Replace transaxle housing oil seal lh
- Drain the automatic transaxle fluid.
- Remove the drain plug and gasket, and drain atf.
- Install a new gasket and drain plug.
Torque: 47 n*m (479 kgf*cm, 35 ft.*Lbf)
- Remove the front drive shaft lh (see page ds-41).
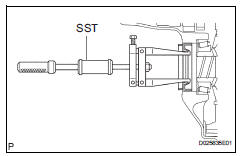
- Remove the transaxle housing oil seal lh.
- Using sst, tap out the oil seal.
Sst 09308-00010
- Install a new transaxle housing oil seal lh.
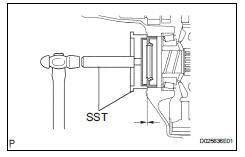
- Coat the lip of a new oil seal with mp grease.
- Using sst and a hammer, tap in the oil seal.
Sst 09726-27012 (09726-02041), 09950- 70010 (09951-07200, 09951-07200)
Standard depth: 0 +-0.5 Mm (0 +-0.020 In.)
- Install the front drive shaft lh (see page ds-65).
- Add automatic transaxle fluid.
Fluid type: toyota genuine atf ws
- Inspect the transaxle fluid level (see page ax-102).
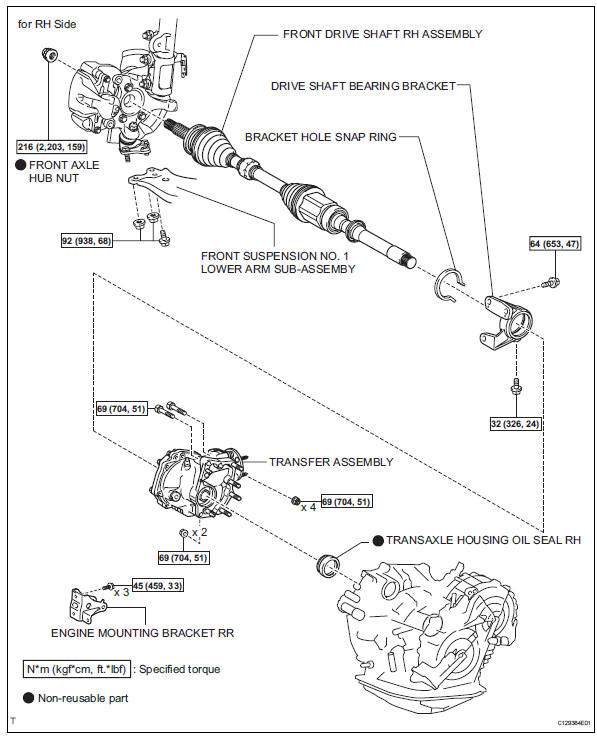
- Replace transaxle housing oil seal rh
- Remove the engine with transaxle (see page em- 98).
- Drain the automatic transaxle fluid.
- Remove the drain plug and gasket, and drain atf.
- Install a new gasket and the drain plug.
Torque: 47 n*m (479 kgf*cm, 35 ft.*Lbf)
- Remove the 3 bolts and drive shaft bearing bracket.
- Remove the 3 bolts and engine mount bracket rr.
- Remove the transfer assembly (see page tf-59).
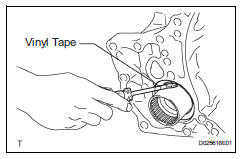
- Remove the transaxle housing oil seal rh.
- Using a screwdriver with vinyl tape wound around its tip, remove the oil seal.
Notice:
Be careful not to damage the housing.
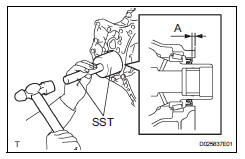
- Install a new transaxle housing oil seal rh.
- Coat the lip of a new oil seal with mp grease.
- Using sst and a hammer, tap in the oil seal.
Sst 09309-37010 standard depth: 6.0 +-0.5 Mm (0.236 +-0.020 In.)
- Install the transfer assembly (see page tf-75).
- Install the engine mount bracket rr with the 3 bolts.
Torque: 64 n*m (652 kgf*cm, 47 ft.*Lbf)
- Install the drive shaft bearing bracket with the 3 bolts.
Torque: 64 n*m (653 kgf*cm, 47 ft.*Lbf)
- Install the engine with transaxle (see page em-105).
- Add automatic transaxle fluid.
Fluid type: toyota genuine atf ws
- Inspect the fluid level (see page ax-102).
 Floor shift assembly
Components
Removal
Disconnect cable from negative battery
terminal
Caution:
Wait at least 90 seconds after disconnecting the
cable from the negative (-) battery terminal to
preven ...
 Automatic transaxle assembly
Components
Removal
Remove engine assembly with transaxle
Remove the engine with transaxle (see page em-
98).
Drain automatic transaxle fluid
Remove the drain plug and gask ...
Other materials:
Front power seat control system
Parts location
System diagram
Problem symptoms table
Hint:
Use the table below to help determine the cause of the
problem symptom. The potential causes of the symptoms are
listed in order of probability in the "suspected area" column
of the table. Check each symptom by check ...
Unmatched key code
Description
This dtc is output when a key code that has not been registered in the
transponder key ecu is inserted
into the ignition key cylinder.
Inspection procedure
Reregister key
Clear the dtc (see page ei-18).
Reregister the key code with the transponder key ecu
(see ...
Data list / active test
Read data list
Hint:
Using the intelligent tester's data list allows switch,
actuator and other item values to be read without
removing any parts. Reading the data list early in
troubleshooting is one way to save time.
Connect the intelligent tester (with can vim) to the
dlc3.
Turn ...
