Toyota RAV4 (XA40) 2013-2018 Service Manual: Disassembly
Hint:
- Use the same procedures for the rh side and lh side.
- The procedures listed below are for the lh side.
- Remove no. 1 Rear seat reclining cover lh
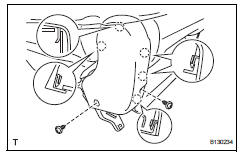
- Remove the 2 screws.
- Using a screwdriver, detach the 5 claws and remove the cover.
Hint:
Tape the screwdriver tip before use.
- remove no. 2 rear seat reclining cover lh
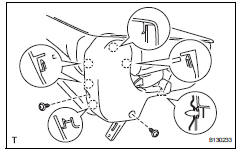
- Remove the 2 screws
- Using a screwdriver, detach the 5 claws and clip, and remove the cover.
Hint:
Tape the screwdriver tip before use.
- Remove rear no. 2 Seat cushion assembly
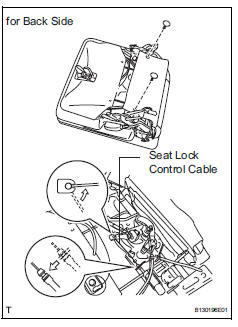
- Using a clip remover, remove the 2 clips of the seat cushion back side. Then open the seat cushion cover.
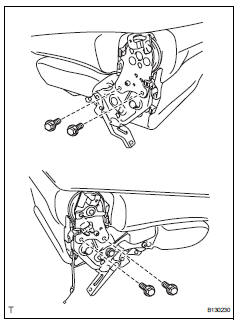
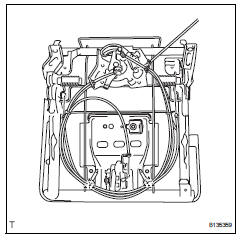
- Disconnect the seat lock control cable on the back side from the seat cushion as shown in the illustration.
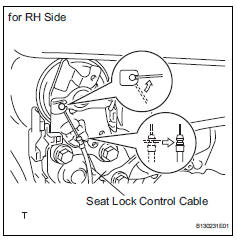
- Disconnect the seat lock control cable on the rh side from the seatback as shown in the illustration.
- Remove the 4 bolts and seat cushion.
- Remove rear no. 2 Seat inner belt assembly lh (see page se-110)
- Remove rear no. 2 Seat cushion cover lh
- Using a clip remover, remove the 2 clips.
- Using a screwdriver, detach the 5 hooks.
Hint:
Tape the screwdriver tip before use.
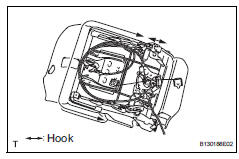
- Using a screwdriver, detach the hooks and remove the seat cushion cover (with pad) from the seat cushion spring.
- Remove the 5 hog rings and seat cushion cover from the seat cushion pad.
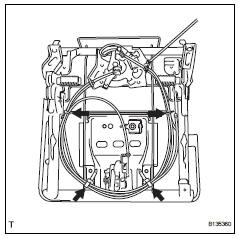
- Remove seat lock control cable assembly
- Using a screwdriver, detach the 2 clamps of the cable tie.
- Cut the 4 cable ties.
- Remove the 5 cables from the seat cushion spring.
- Remove rear seat cushion wire subassembly
- Remove the nut and wire.
- Remove rear no. 2 Seat headrest assembly
- Remove rear seatback lock control bezel
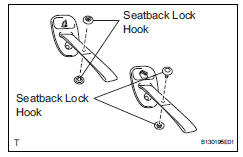
- Remove the 4 seatback lock hooks.
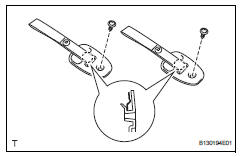
- Remove the 2 screws.
- Detach the 2 claws and remove the bezel.
- Remove rear seatback board carpet assembly lh
- Using a clip remover, detach the 9 clips and remove the seatback board carpet.
Notice:
Be careful not to damage the seatback board carpet.
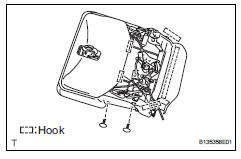
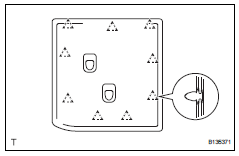
- Remove rear no. 2 Seatback cover
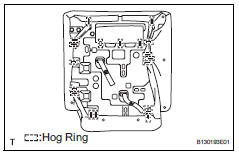
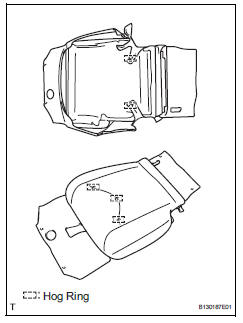
- Remove the 19 hog rings.
- Detach the 4 claws and remove the 2 headrest supports.
- Remove the seatback cover (with pad) from the seatback frame.
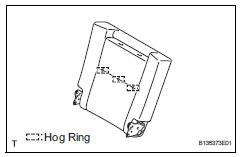
- Remove the 3 hog rings and seatback cover from the seatback pad.
- Remove rear seat reclining inner cover lh
- Using a screwdriver, detach the 2 claws and remove the inner cover.

Hint:
Tape the screwdriver tip before use
- Remove rear seat reclining inner cover rh
Hint:
Use the same procedures described for the lh side.
- Remove seatback lock control cable assembly

- Remove the cable from the seatback frame as shown in the illustration.
- Remove reclining lock release band
- Remove the nut and band.
- Remove seat lock release band
- Remove the nut and band.
 Removal
Hint:
Use the same procedures for the rh side and lh side.
The procedures listed below are for the rh side.
Remove no. 2 Seat hinge cover lh
Fully tilt the seatback forward.
At ...
 Reassembly
Hint:
Use the same procedures for the rh side and lh side.
The procedures listed below are for the lh side.
Install seat lock release band
Install the band with nut.
Hint:
After ...
Other materials:
Power steering ecu
Components
Removal
Disconnect cable from negative battery
terminal
Remove instrument panel sub-assembly
upper
Remove the instrument panel (see page ip-4).
Remove power steering ecu
Disconnect the 4 connectors.
Remove the 3 nuts and remove the power steering
e ...
Fuel tank cap
Inspection
Inspect fuel tank cap assembly
Visually check that the cap and gasket are not
deformed or damaged.
If the result is not as specified, replace the cap
assembly or gasket.
Remove the gasket from the exhaust manifold.
...
Programming HomeLink
â– Before programming
HomeLink
During programming, it is possible
that garage doors,
gates, or other devices may
operate. For this reason,
make sure that people and
objects are clear of the
garage door or other devices
to prevent injury or other
potential harm.
It is recommended that a n ...
