
Toyota RAV4 (XA40) 2013-2018 Service Manual: High pitched horn
Components
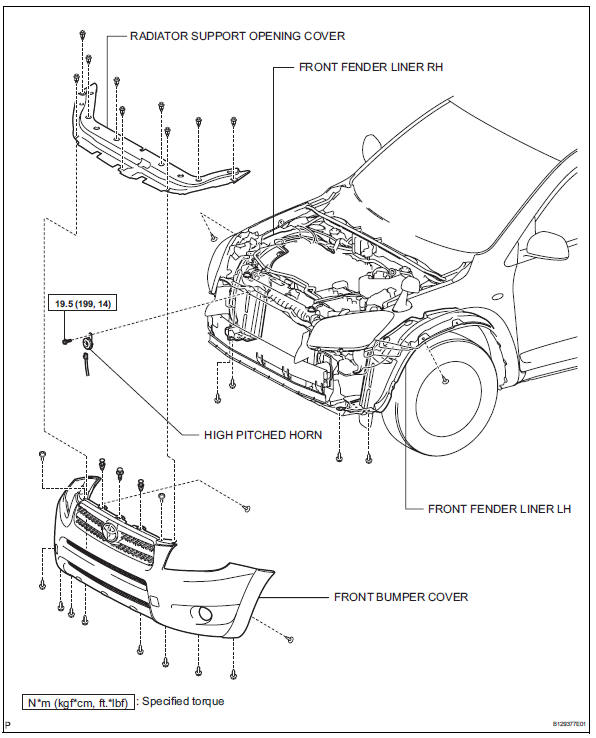
Removal
- Remove radiator support opening cover (see page et-4)
- Remove front fender liner lh (see page et-4)
- Remove front fender liner rh (see page et-4)
- Remove front bumper cover (see page et-5)
- Remove high pitched horn
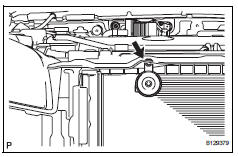
- Disconnect the horn connector.
- Remove the bolt and horn.
Inspection
- Inspect high pitched horn
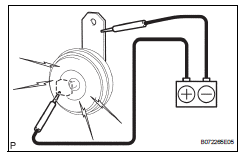
- Apply battery voltage to the horn and check the operation of the horn.
Ok 
If the result is not as specified, replace the horn.
Installation
- Install high pitched horn
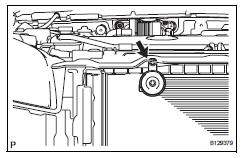
- Place the stay onto the baffle part of the radiator
support upper, and then install the horn with the
bolt.
Torque: 19.5 N*m (199 kgf*cm, 14 ft.*Lbf)
- Connect the horn connector.
- Install front bumper cover (see page et-11)
- Install front fender liner rh (see page et- 12)
- Remove front fender liner lh (see page et- 12)
- Remove radiator support opening cover (see page et-12)
 Low pitched horn
Components
Removal
Remove radiator support opening cover
(see page et-4)
Remove front fender liner lh (see page et-4)
Remove front fender liner rh (see page et-4)
Remove front bumper ...

Other materials:
Installation (2006/01- )
Install front drive shaft assembly lh
Coat the spline of the inboard joint shaft with gear
oil.
Align the shaft splines and tap in the drive shaft with
a brass bar and hammer.
Notice:
Set the snap ring with the opening side facing
downwards.
Be careful not to damage the ...
Disassembly
Fix differential carrier sub-assembly
Fix the rear differential carrier in place with the
overhaul attachment.
Remove stud bolt
Remove the 4 stud bolts from the transmission
coupling.
Remove differential drain plug
Using a 10 mm socket hexagon wrench, remove ...
Fog light switch
The fog lights secure excellent visibility in difficult driving
conditions,
such as in rain and fog.
(U.S.A.) Or (canada)
turns the fog lights off
Turns the fog lights on
Fog lights can be used when
The headlights are on in low beam. ...
