Toyota RAV4 (XA40) 2013-2018 Service Manual: Rear combination light assembly
Components
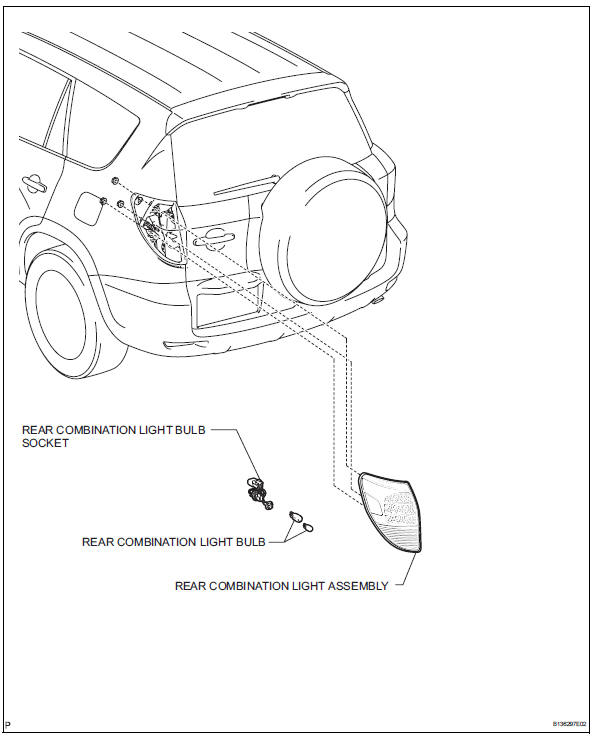
Removal
Hint:
- Use the same procedures for the rh and lh sides.
- The procedures listed below are for the lh side.
- Disconnect cable from negative battery terminal
Caution:
Wait at least 90 seconds after disconnecting the cable from the negative (-) battery terminal to prevent airbag and seat belt pretensioner activation.
- Remove rear combination light assembly

- Remove the 3 nuts and disconnect the connector.
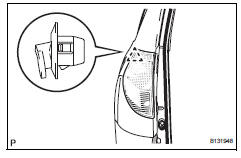
- Detach the clip and remove the light.
Disassembly
Hint:
- Use the same procedures for the rh and lh sides.
- The procedures listed below are for the lh side.
- Remove rear combination light bulb
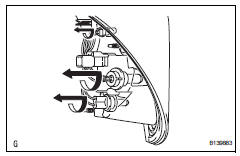
- Turn the 3 bulbs in the direction indicated by the arrows and pull to remove them.
Reassembly
Hint:
- Use the same procedures for the rh and lh sides.
- The procedures listed below are for the lh side.
- Install rear combination light bulb
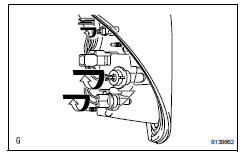
- Turn the 3 bulbs in the direction indicated by the arrows to install them.
 Fog light assembly
Components
Removal
Hint:
Use the same procedures for the rh and lh sides.
The procedures listed below are for the lh side.
Disconnect cable from negative battery terminal
Caution: ...
 License plate light assembly
Components
Removal
Disconnect cable from negative battery
terminal
Caution:
Wait at least 90 seconds after disconnecting the
cable from the negative (-) battery terminal to
prevent ai ...
Other materials:
Rear axle hub and bearing
Components
On-vehicle inspection
Remove rear wheel
Disconnect rear drive shaft assembly lh
(for 4wd)
Disconnect the drive shaft (see page ds-69).
Remove rear disc brake cylinder assembly
lh (see page br-55)
Remove rear disc (see page br-57)
Check bearing backlash a ...
Motor terminal voltage malfunction
Description
The power steering ecu supplies the current to the power steering motor
through the motor circuit.
Wiring diagram
Inspection procedure
Read value of intelligent tester (motor voltage)
Connect the intelligent tester (with can vim) to the
dlc3.
Turn the ignitio ...
Removal (2005/11-2006/01)
Disconnect cable from negative battery
terminal
Caution:
Wait at least 90 seconds after disconnecting the
cable from the negative (-) battery terminal to
prevent airbag and seat belt pretensioner activation.
Remove front door scuff plate lh
Using a screwdriver, detach the 10 cla ...
