Toyota RAV4 Service Manual: Reassembly
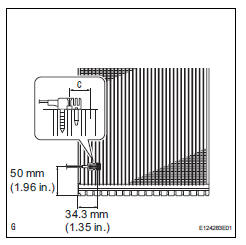
- Install evaporator temperature sensor
Notice:
If reusing the evaporator, do not insert the sensor to a location where the sensor was previously inserted.
Insert the sensor within range c shown in the illustration.
- Install the evaporator temperature sensor as shown in the illustration.
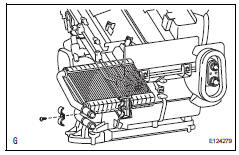
- Install no. 1 Cooler evaporator subassembly
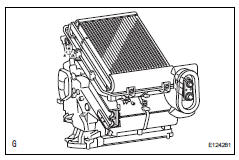
- Install the cooler thermistor and cooler evaporator on the case.
- Attach the temperature sensor clamp.
- Attach the 2 claws to install the cover.
- Install the 4 screws.
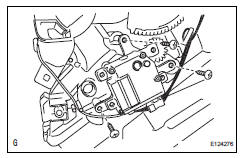
- Install cooler expansion valve
- Sufficiently apply compressor oil to 2 new o-rings and the fitting surface of the hose joint.
Compressor oil: nd-oil 8 or equivalent
- Install the 2 o-rings to the cooler evaporator.
- Install the cooler expansion valve.
- Using a 4 mm hexagon wrench, install the a/c tube with the 2 hexagon bolts.
Torque: 3.5 N*m (35 kgf*cm, 30 in.*Lbf)
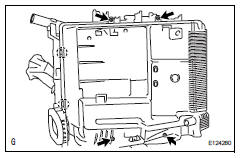
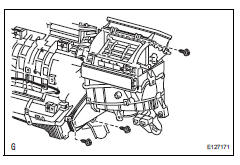
- Install heater radiator unit sub-assembly
- Install the heater radiator with the clamp and screw.
- Install airmix damper control cable subassembly (for manual air conditioning system)
- Attach the 3 claws to install the cable.
- Install mode control cable assembly (for manual air conditioning system)
- Attach the 3 claws to install the cable.
- Attach the evaporator case to the blower case.
- Install the cable with the 3 screws.
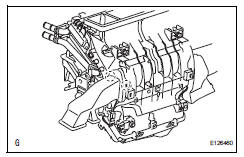
- Install air mix control servo motor
- Install the air mix control servo motor with the 3 screws and connect the connector.
- Install air outlet control servo motor

- Install the air outlet control servo motor with the 3 screws and connect the connector.
- Attach the evaporator case to the blower case.
- Install the 3 screws.
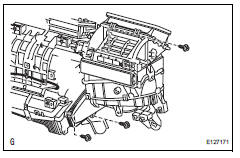
- Install air duct
- Attach the 2 claws and install the air duct.
- Install no. 3 Heater to register duct
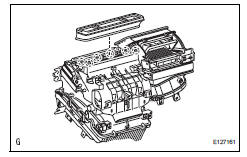
- Attach the 6 claws and install the heater to register duct.
 Disassembly
Remove no. 3 Heater to register duct
Detach the 6 claws and remove the heater to
register duct.
Remove air duct
Detach the 2 claws and remove the air duct.
Remove ...
 Installation
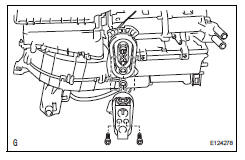
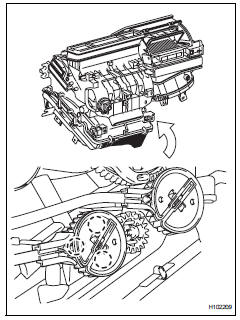
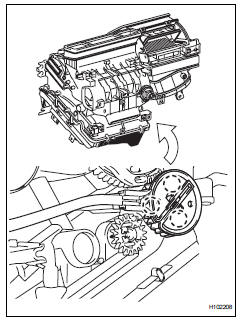
Install air conditioner unit assembly
Install the a/c unit with the bolt and nut.
Torque: 9.8 N*m (100 kgf*cm, 7 ft.*Lbf)
Install instrument panel reinforcement
Install th ...
Other materials:
Reassembly
Caution:
Wear protective gloves. Sharp areas on the seat frame
(with adjuster) may injure your hands.
Hint:
Use the same procedures for the rh side and lh side.
The procedures listed below are for the lh side.
Install occupant classification ecu (for
driver side) (see page rs-394)
...
Reassembly
Hint:
Use high-temperature grease to lubricate the bearings,
gears, return spring and steel ball when assembling the
starter.
Install planetary gear
Apply grease to the planetary gears and pin parts of
the planetary shaft.
Install the 3 planetary gears.
Install starter arm ...
Installation
Install engine coolant temperature
sensor
Install a new gasket onto the sensor.
Using sst, install the sensor.
Sst 09817-33190
torque: 19.6 N*m (200 kgf*cm, 14 ft.*Lbf)
Connect the sensor connector.
Install air cleaner case (see page es-431)
Install air cleaner cap ( ...
