
Toyota RAV4 (XA40) 2013-2018 Service Manual: Thermostat
Components
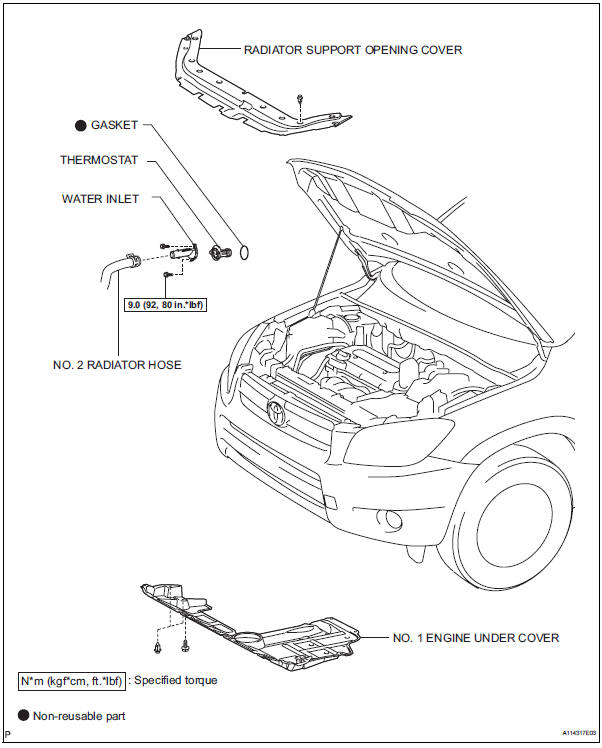
Removal
- Remove no. 1 Engine under cover
- Drain engine coolant (see page co-6)
- Remove radiator support opening cover
- Disconnect no. 2 Radiator hose
- Remove water inlet
- Remove the 2 nuts and disconnect the water inlet from the cylinder block.
- Remove thermostat
- Remove the gasket from the thermostat.
Inspection
- Inspect thermostat
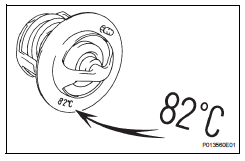
Hint:
The valve opening temperature is inscribed on the thermostat.
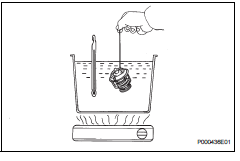
- Immerse the thermostat in water, and then gradually heat the water.
- Check the valve opening temperature of the thermostat.
Standard valve opening temperature: 80 to 84°c (176 to 183°f)
If the valve opening temperature is not as specified, replace the thermostat.
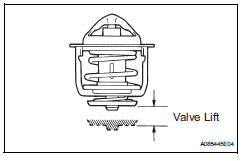
- Check the valve lift.
Standard valve lift: 10 mm (0.39 In.) Or more at 95°c (203°f)
If the valve lift is not as specified, replace the thermostat.
- Check that the valve is fully closed when the thermostat is at low temperatures (below 77°c (171°f).
If it is not fully closed, replace the thermostat.
Installation
- Install thermostat
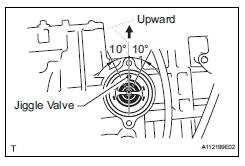
- Install a new gasket onto the thermostat.
- Install the thermostat with the jiggle valve upward.
Hint:
The jiggle valve may be set to within 10° on either side of the prescribed position.
- Install water inlet
- Install the water inlet with the 2 nuts.
Torque: 9.0 N*m (92 kgf*cm, 80 in.*Lbf)
- Connect no. 2 Radiator hose
- Add engine coolant (see page co-6)
- Check for engine coolant leaks (see page co-1)
- Install radiator support opening cover
- Install no. 1 Engine under cover
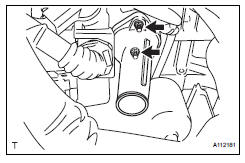
 Installation
Install water pump assembly
Remove any old seal packing material from the
contact surface.
Apply a continuous line of seal packing as shown in
the illustration.
Seal packing:
to ...
 Cooling fan motor
On-vehicle inspection
Inspect no. 1 Cooling fan motor
Disconnect the no. 1 Fan connector.
Connect the battery and ammeter to the no. 1 Fan
motor connector.
Check th ...
Other materials:
Removal
Hint:
Use the same procedures for the rh side and lh side.
The procedures listed below are for the lh side.
Remove roof drip side finish moulding lh
Remove the 2 roof drip moulding joint covers from
the vehicle body.
Remove the roof drip side finish moulding and no. 2
Center ...
Rear seat inner belt assembly
Components
Removal
Remove rear seat leg cover
Remove rear no. 2 Seat leg side cover
Remove rear no. 3 Seat leg side cover (w/
rear no. 2 Seat) (see page se-81)
Remove rear no. 3 Seat leg side cover (w/o
rear no. 2 Seat) (see page se-81)
Remove rear no. 4 Seat leg side co ...
Parking brake cable
Components
Removal
Remove rear console box sub-assembly
Remove the rear console box (see page ip-16).
Hint:
Refer to the procedures from the removal of the no.
1 Console upper panel garnish up until the removal
of the rear console box sub-assembly.
Loosen lock nut and no. ...
