Toyota RAV4 (XA40) 2013-2018 Service Manual: Vanity light
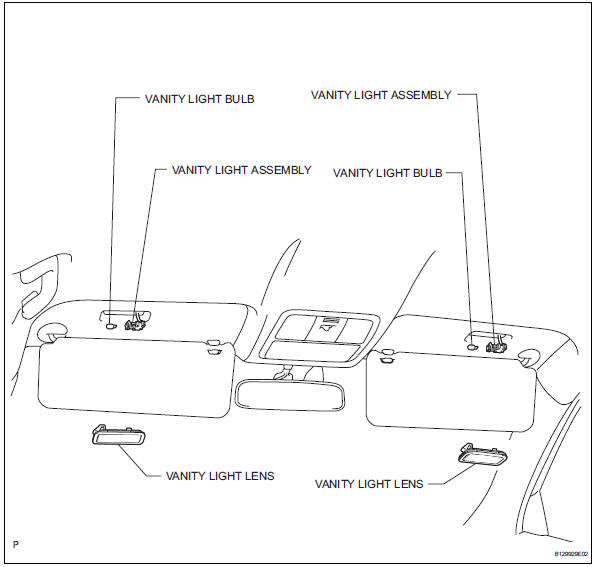
Components
Removal
Hint:
- Use the same procedures for the rh and lh sides.
- The procedures listed below are for the lh side.
- Disconnect cable from negative battery terminal
Caution:
Wait at least 90 seconds after disconnecting the cable from the negative (-) battery terminal to prevent airbag and seat belt pretensioner activation.
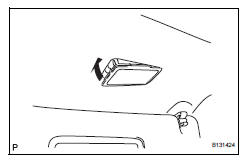
- Remove vanity light assembly
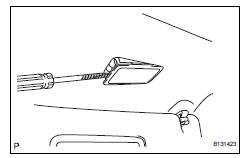
- Using a screwdriver, pry out the vanity light.
Hint:
Tape the screwdriver tip before use.
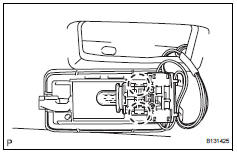
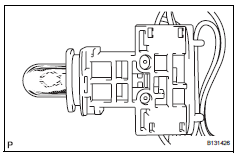
- Remove vanity light bulb

- Remove the light bulb from the vanity light.
Inspection
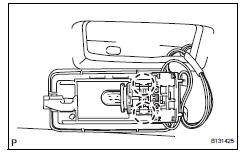
- Inspect visor assembly
- Remove the visor assembly.
- Inspect vanity light switch.
Standard resistance 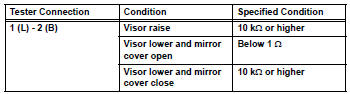
If the result is not as specified, replace the visor assembly.
Installation
- Install vanity light bulb
- Install the light bulb to the vanity light.
- Install vanity light assembly
- Attach the 2 claws and install the vanity light lens to the vanity light.
- Install the vanity light.
- Connect cable to negative battery terminal
 Ignition key cylinder light
Components
Removal
Disconnect cable from negative battery
Caution:
Wait at least 90 seconds after disconnecting the
cable from the negative (-) battery terminal to
prevent airbag and se ...
 Front console illumination
On-vehicle inspection
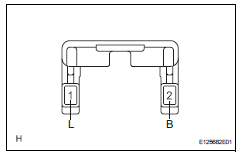
Inspect front console illumination
Connect the battery's positive (+) lead to terminal 1
and the negative (-) lead to terminal 2, then check
that the light come ...
Other materials:
Diagnosis system
Diagnosis
If the skid control ecu detects a malfunction, the abs,
vsc and brake warning lights and the slip, downhill
assist control and auto lsd indicator lights come on in
accordance with the trouble area to warn the driver.
The table below indicates which lights come on when
there ar ...
Inspection
Inspect no. 1 Chain tensioner
Check that the plunger moves smoothly when the
ratchet pawl is raised with your finger.
Release the ratchet pawl, then check that the
plunger is locked in place by the ratchet pawl and
does not move when pushed with your finger.
Inspect chain ...
Bluetooth® phone
settings
You can adjust the hands-free system to your desired settings.
ÔÇťPhone/message settingsÔÇŁ screen
To display the screen shown below, press the ÔÇťsetupÔÇŁ button, and
select ÔÇťphoneÔÇŁ on the ÔÇťsetupÔÇŁ screen.
Set the phone connection
Setting the sound
Contact/call history settings
...
