Toyota RAV4 (XA40) 2013-2018 Service Manual: Emission control system
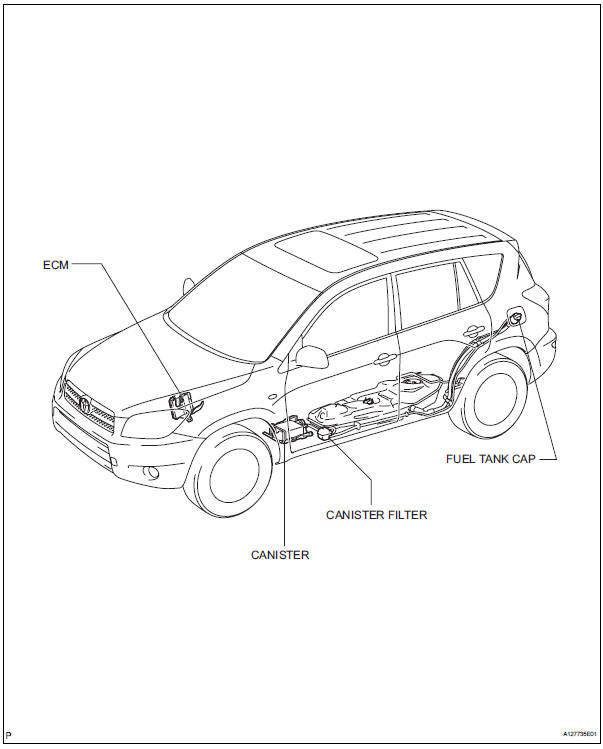
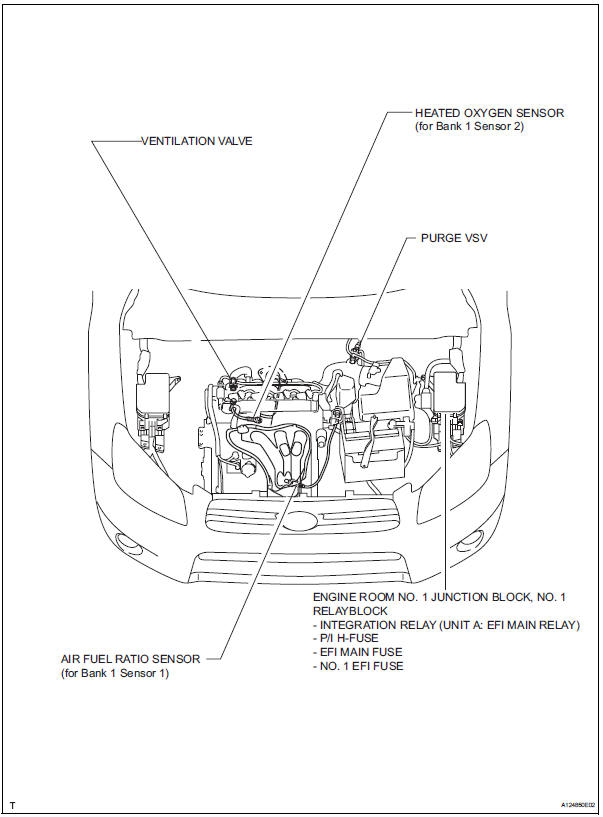
Parts location
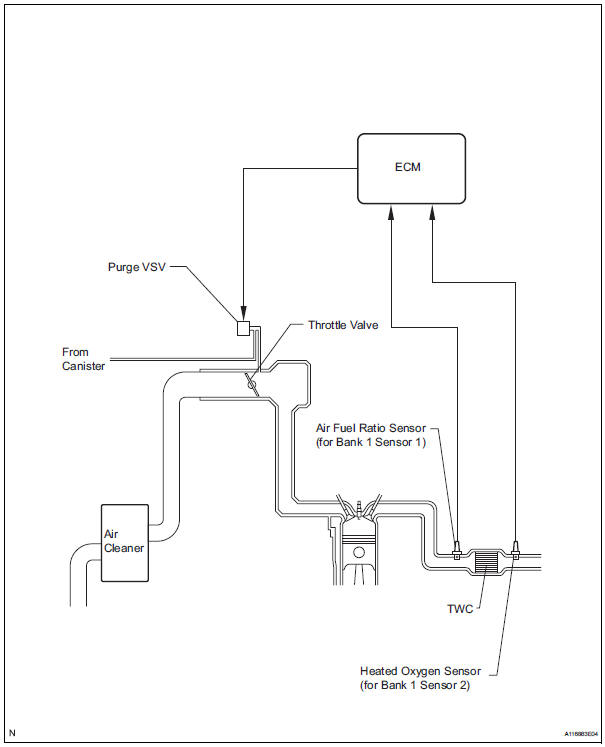
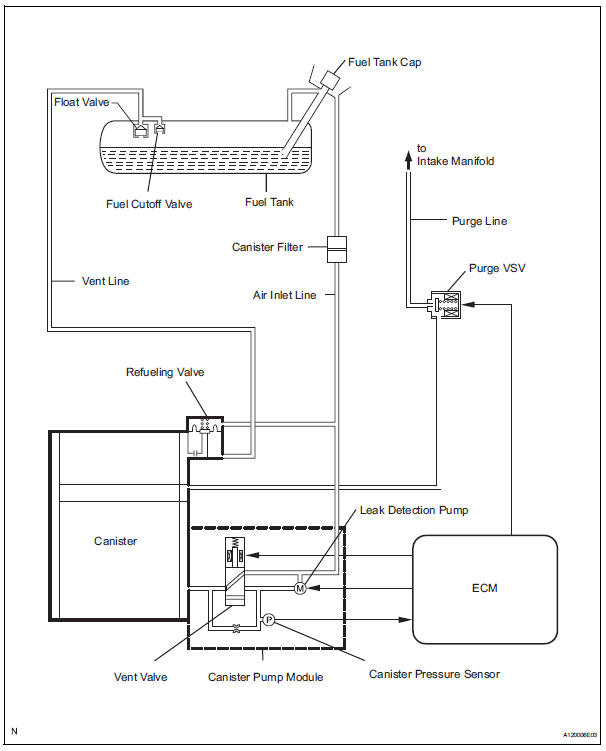
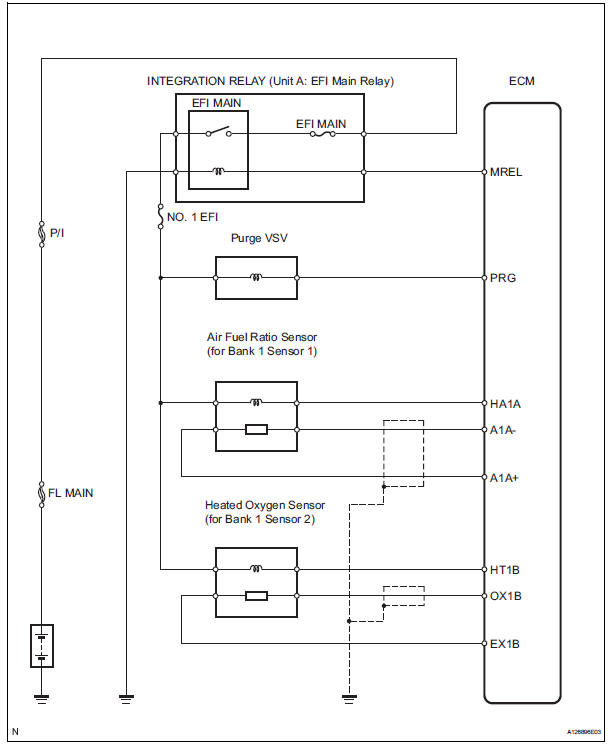
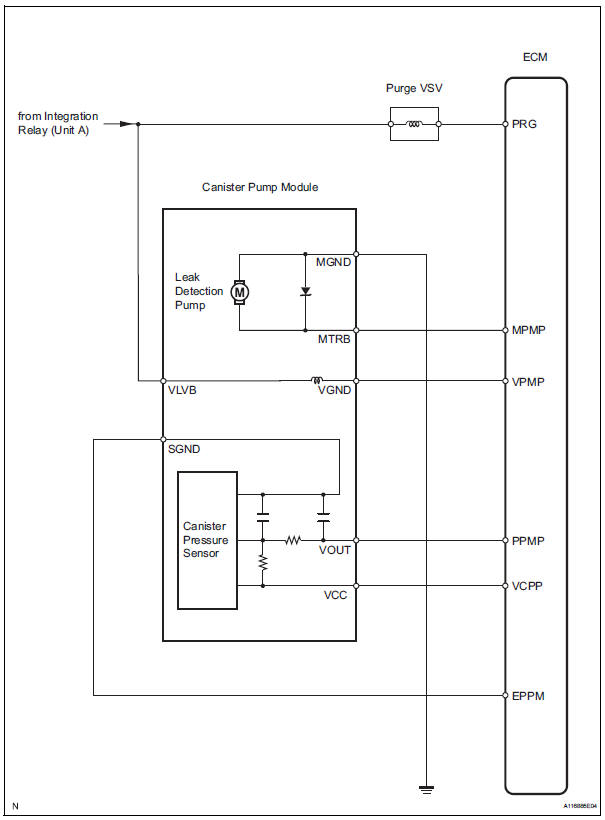
System diagram
On-vehicle inspection
- Check fuel cut rpm
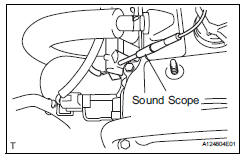
- Increase the engine speed to at least 3,500 rpm.
- Use a sound scope to check for injector operating noise.
- Check that the operating sounds stop momentarily and then resume when the throttle lever is released.
Hint:
Measure with the a/c off.
Fuel return rpm: 1,400 rpm
- Check for leaks
- Visually check that the hoses, connections and gaskets have no cracks, leaks or damage.
Notice:
- Detachment or other problems with the engine oil dipstick, filler cap, pcv hose and other components may cause the engine to run improperly.
- Disconnection, looseness or cracks in the parts of the air induction system between the throttle body and cylinder head will allow air suction and cause an engine failure or engine malfunctions.
If the result is not as specified, replace parts as necessary.
- Check line and connectors
- Visually check for loose connections, sharp bends or damage.
- Check fuel tank assembly
- Visually check for deformation, cracks or fuel leakage.
- Check fuel tank and vent line
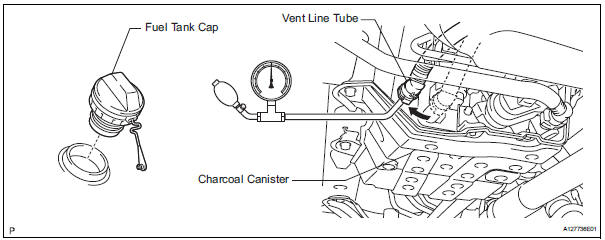
- Disconnect the vent line tube from the canister.
- Connect a pressure gauge to the vent line tube.
- Apply 4 kpa (41 kgf/cm2, 30 mmhg) of pressure to the vent line of the fuel tank.
Hint:
Perform this inspection with the fuel tank less than 90% full. When the fuel tank is full, the fuel cutoff valve closes and pressure is released through the 1.5 Mm orifice. As a result, when the fuel tank cap is removed, the pressure does not decrease smoothly.
- Check that the fuel tank pressure is maintained for some time, and does not decrease immediately.
Hint:
If the pressure decreases immediately, one of the following may be the cause:
- The fuel tank cap is not completely tightened.
- The fuel tank cap is damaged.
- Air is leaking from the vent line.
- The fuel tank is damaged.
- When the fuel tank cap is removed, check that pressure is released smoothly.
Hint:
If the pressure does not drop, replace the fuel tank assembly.
- Reconnect the vent line tube to the canister.
- Check air inlet line
- Disconnect the air inlet line hose from the charcoal canister.
- Check that air flows freely into the air inlet line.
Hint:
If air does not flow freely into the air inlet line, repair or replace it.
- Reconnect the air inlet line hose to the charcoal canister.

 Canister
Components
removal
Disconnect cable from negative battery
terminal
Caution:
Wait at least 90 seconds after disconnecting the
cable from the negative (-) battery terminal to
prevent ai ...
Other materials:
Short to b+ in can bus line
Description
There may be a short circuit between the can bus line and +b when there is
resistance between
terminals 6 (canh) and 16 (bat) or terminals 14 (canl) and 16 (bat) of the dlc3.
Wiring diagram
Inspection procedure
Notice:
Turn the ignition switch off before measuring ...
Vehicle speed sensor
Description
Refer to the sfi system (see page es-224).
Wiring diagram
Refer to the sfi system (see page es-224).
Inspection procedure
Refer to the sfi system (see page es-224). ...
Stop light switch circuit
Description
When the stop light switch is turned on, current flows to the stop lights to
illuminate them.
Wiring diagram
Inspection procedure
Inspect fuse (stop)
Remove the stop fuse from the instrument panel
junction block.
Measure the resistance of the fuse.
Standard resi ...
