Toyota RAV4 (XA40) 2013-2018 Service Manual: Rear door courtesy switch
Components
Removal
Hint:
- Use the same procedures for the rh and lh sides.
- The procedures listed below are for the lh side.
- Disconnect cable from negative battery terminal
Caution:
Wait at least 90 seconds after disconnecting the cable from the negative (-) battery terminal to prevent airbag and seat belt pretensioner activation.
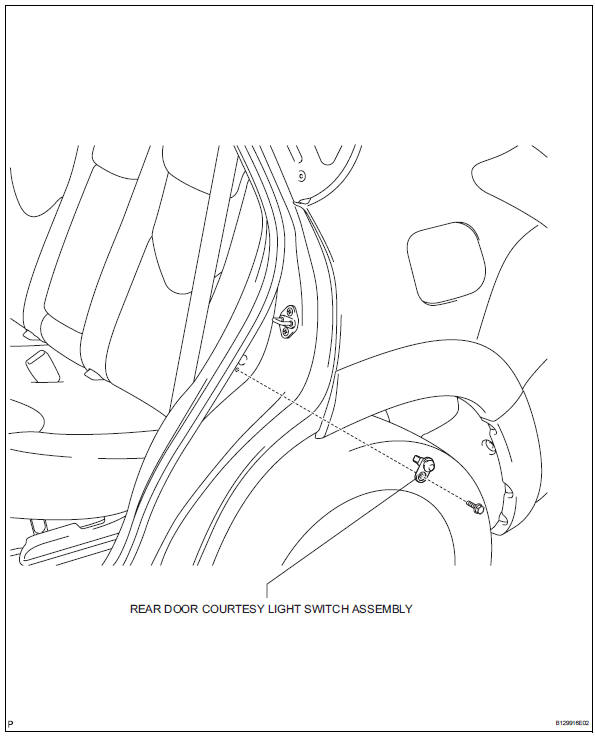
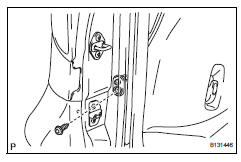
- Remove rear door courtesy light switch assembly
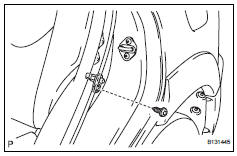
- Remove the bolt and switch.
- Disconnect the connector.
Inspection
- Inspect rear door courtesy light switch assembly
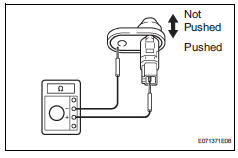
- Measure the resistance of the switch.
Standard resistance
If the result is not as specified, replace the switch assembly
Installation
Hint:
- Use the same procedures for the rh and lh sides.
- The procedures listed below are for the lh side.
- A bolt without a torque specification is shown in the standard bolt chart (see page ss-2).
- Install rear door courtesy light switch assembly
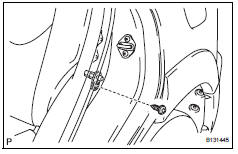
- Connect the connector.
- Install the switch with the bolt.
- Connect cable to negative battery terminal
Installation
Hint:
- Use the same procedures for the rh and lh sides.
- The procedures listed below are for the lh side.
- A bolt without a torque specification is shown in the standard bolt chart (see page ss-2).
- Install back door courtesy light switch assembly
- Connect the connector.
- Install the switch with the bolt.
- Connect cable to negative battery terminal
 Front door courtesy switch
Components
Removal
Hint:
Use the same procedures for the rh and lh sides.
The procedures listed below are for the lh side.
Disconnect cable from negative battery
terminal
Cautio ...
 Headlight relay
On-vehicle inspection
Remove headlight relay
Remove the headlight relay from the engine room
no. 2 Relay block.
Measure the resistance of the relay.
Standard resistance
If resul ...
Other materials:
Parking Support Brake function
(static objects)
If the sensors detect a static object, such as a wall, in the
traveling direction of the vehicle and the system determines
that a collision may occur due to the vehicle suddenly moving
forward due to an accidental accelerator pedal operation, the
vehicle moving the unintended direction due to the wr ...
Precaution
Caution:
Replace the faulty parts of the seat belt systems (outer
belt, inner belt, bolts, nuts, adjustable shoulder anchor,
tether anchor hardware and other related parts). When
inspecting a vehicle that was in a collision, be sure to
check all of the seat belt systems regardless of whethe ...
Removal (2005/11-2006/01)
Disconnect cable from negative battery
terminal
Caution:
Wait at least 90 seconds after disconnecting the
cable from the negative (-) battery terminal to
prevent airbag and seat belt pretensioner activation.
Remove roof headlining assembly
Remove the roof headlining (see page ir ...
