Toyota RAV4 (XA40) 2013-2018 Service Manual: Front axle hub bolt
Components
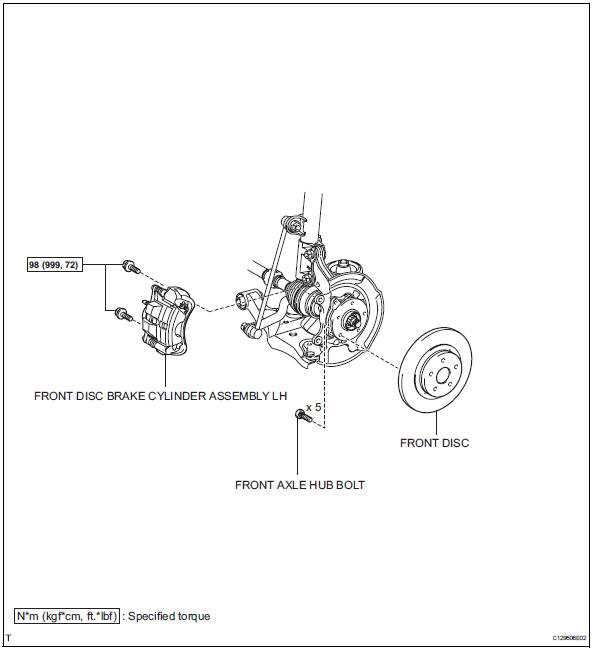
Replacement
Hint
- Use the same procedures for the rh side and lh side.
- The procedures listed below are the lh side.
- Remove front wheel
- Remove front disc brake cylinder assembly lh (see page br-40)
- Remove front disc (see page br-42)
- Remove front axle hub bolt
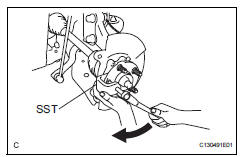
- Using sst, remove the hub bolt that needs to be replaced.
Sst 09650-17011
- Install front axle hub bolt
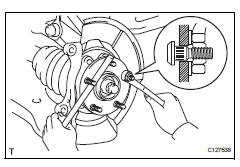
- Insert a new hub bolt into the bolt hole. Set a plate washer and nut on the hub bolt end.
- Using a brass bar or equivalent to hold the front axle, install the hub bolt by tightening the nut. Then remove the nut and plate washer.
- Install front disc (see page br-43)
- Install front disc brake cylinder assembly lh (see page br-46)
- Install front wheel torque: 103 n*m (1,050 kgf*cm, 76 ft.*Lbf)
 Axle system
Problem symptoms table
Hint:
Use the table below to help determine the cause of the
problem symptom. The potential causes of the symptoms are
listed in order of probability in the "suspected ...
 Front axle hub
Components (2005/11-2006/01)
Components (2006/01- )
On-vehicle inspection
Check front axle hub bearing
Remove the front wheel.
Disconnect the front disc brake cylinder (see p ...
Other materials:
Diagnosis system
Description
When troubleshooting obd ii (on-board diagnostics)
vehicles, the intelligent tester (complying with sae
j1987) must be connected to the dlc3 (data link
connector 3) of the vehicle. Various data in the vehicle's
ecm (engine control module) can be then read.
Obd ii regulations ...
Driver side rear airbag sensor circuit malfunction
Description
The rear airbag sensor lh consists of parts including the diagnostic circuit
and the lateral deceleration
sensor.
When the center airbag sensor receives signals from the lateral deceleration
sensor, it determines
whether or not the srs should be activated.
Dtc b1630/23 i ...
When towing active torque control 4wd vehicles
Use one of the methods shown below to tow the
vehicle.
If the vehicle has trouble in the chassis and drivetrain,
use method 1 (flat bed truck).
Notice:
Do not use any towing method other than those
shown above.
For example, the towing methods shown below are
dangerous or dama ...
