Toyota RAV4 (XA40) 2013-2018 Service Manual: Problem symptoms table (2005/11-2006/01)
Hint:
Use the table below to help determine the cause of the problem symptom. The potential causes of the symptoms are listed in order of probability in the "suspected area" column of the table. Check each symptom by checking the suspected areas in the order they are listed. Replace parts as necessary.
 Customize parameters
Hint:
The following items can be customized.
Notice:
When the customer requests a change in a function,
first make sure that the function can be customized.
Be sure to make a note of the cur ...
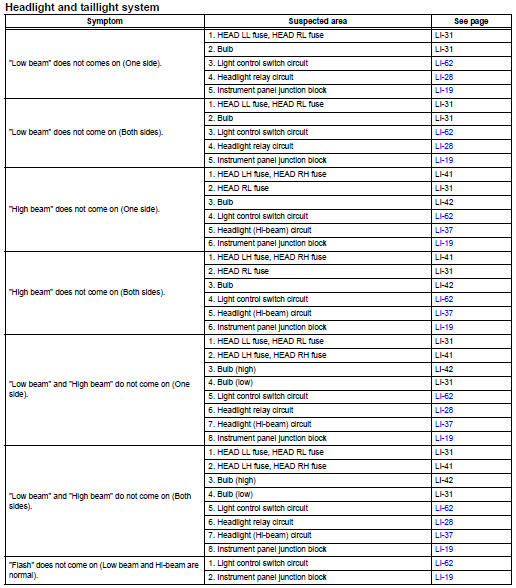
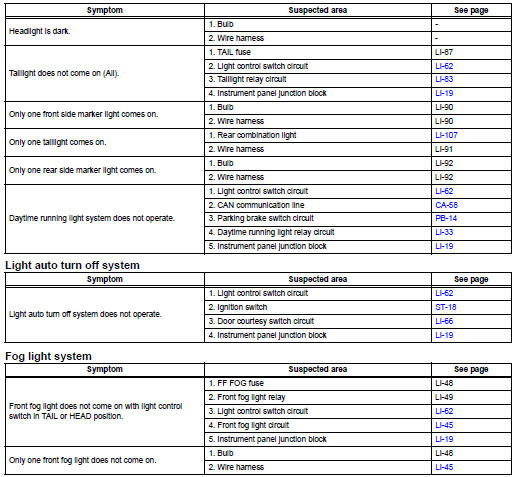
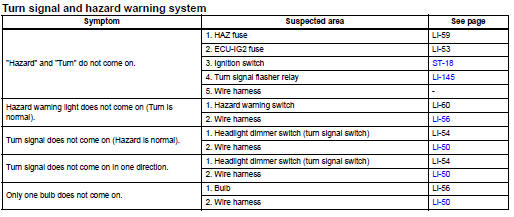
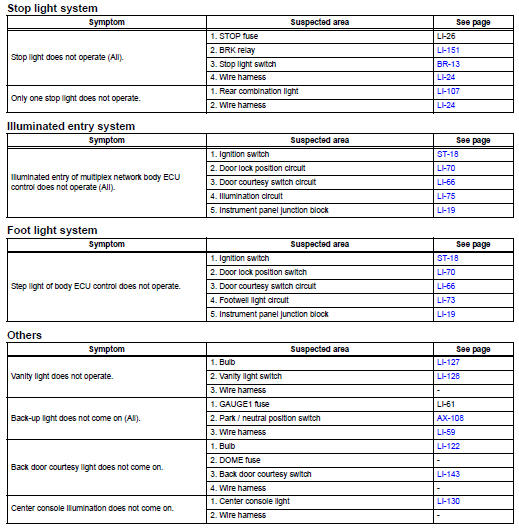
 Problem symptoms table (2006/01- )
Hint:
Use the table below to help determine the cause of the
problem symptom. The potential causes of the symptoms are
listed in order of probability in the "suspected area" column
of th ...
Other materials:
Front console illumination
On-vehicle inspection
Inspect front console illumination
Connect the battery's positive (+) lead to terminal 1
and the negative (-) lead to terminal 2, then check
that the light comes on.
Ok:
light comes on.
If the result is not as specified, replace the front
console illumin ...
Rear axle hub and bearing
Components
On-vehicle inspection
Remove rear wheel
Disconnect rear drive shaft assembly lh
(for 4wd)
Disconnect the drive shaft (see page ds-69).
Remove rear disc brake cylinder assembly
lh (see page br-55)
Remove rear disc (see page br-57)
Check bearing backlash a ...
If the vehicle becomes
stuck
Carry out the following procedures
if the tires spin or
the vehicle becomes stuck
in mud, dirt or snow:
Recovering procedure
1. Stop the engine. Set the
parking brake and shift the
shift lever to P.
2. Remove the mud, snow or
sand from around the stuck
tire.
3. Place wood, stones or some
other mat ...
