Toyota RAV4 (XA40) 2013-2018 Service Manual: Rear differential side gear shaft oil seal
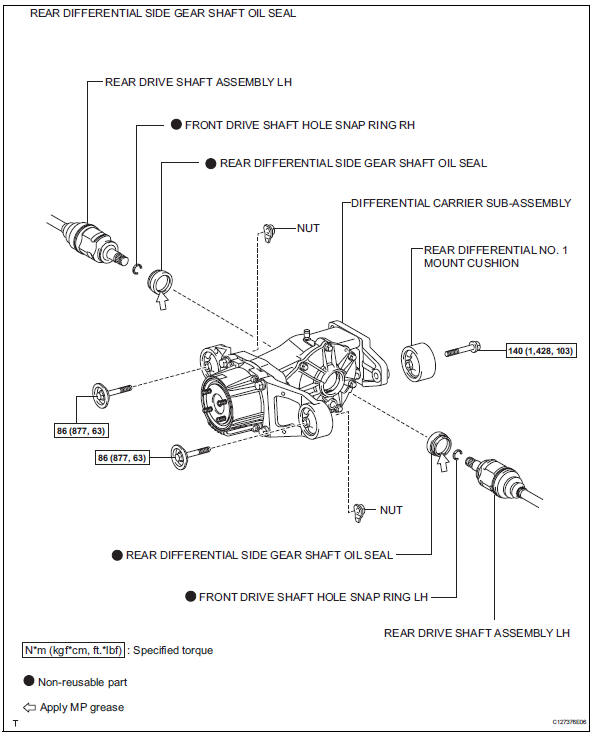
Components
Removal
- Drain differential oil (see page df-10)
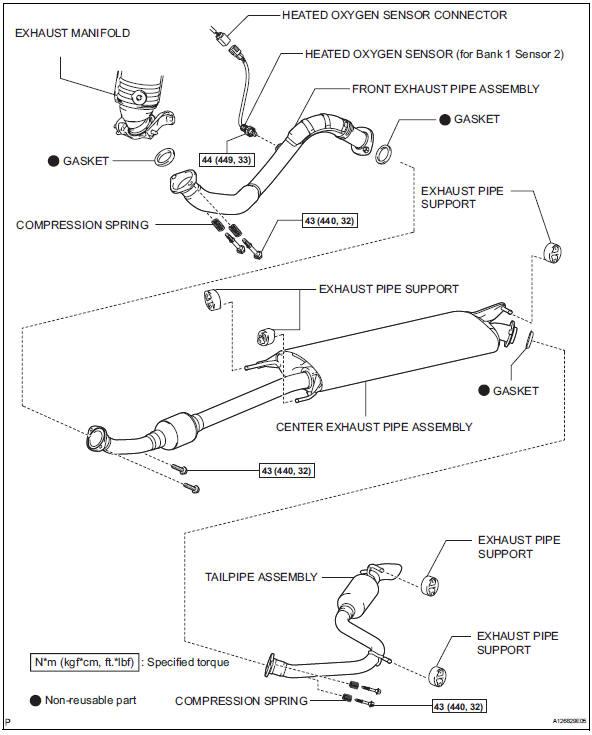
- Remove tailpipe assembly
- Remove the tailpipe (see page ex-2).
- Remove center exhaust assembly
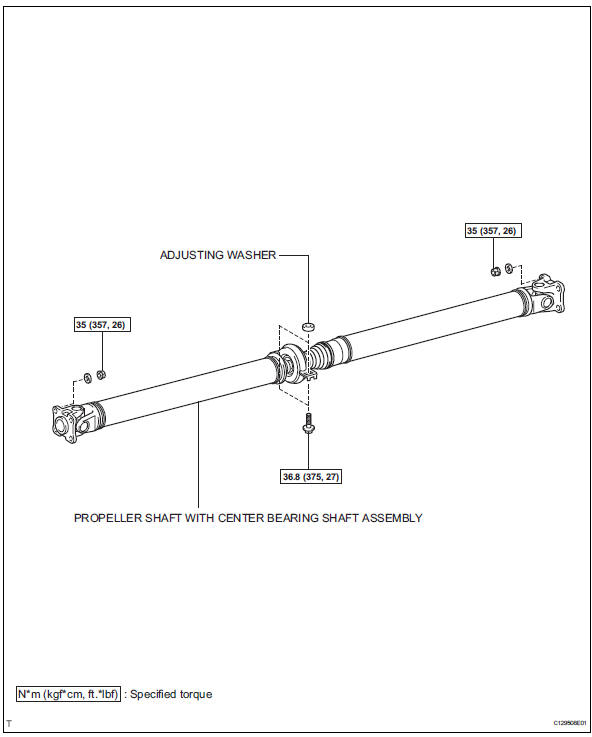
- Remove propeller with center bearing shaft assembly (see page pr-3)
- Remove rear differential carrier subassembly (see page df-18)
- Remove rear differential side gear shaft oil seal
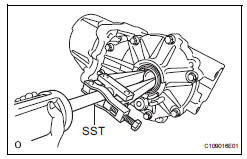
- Using a sst, tap out the 2 oil seals.
Sst 09308-00010
Installation
- Install rear differential side gear shaft oil seal
- Apply a light coat of mp grease to the lip of a new rear differential side gear shaft oil seal.
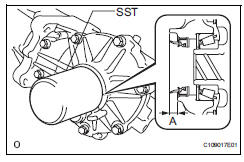
- Using sst and a hammer, tap the 2 rear differential side gear shaft oil seals into the rear differential carrier and differential side bearing retainer according to the specification.
Sst 09223-00010
Standard oil seal tapping amount (a value): 7.2 +-0.5 Mm (0.28 +-0.02 In.)
- Install rear differential carrier assembly (see page df-44)
- Temporarily install propeller with center bearing shaft assembly (see page pr-5)
- Tighten propeller with center bearing shaft assembly (see page pr-6)
- Inspect and adjust joint angle (see page pr- 4)
- Install center exhaust pipe assembly
- Install the center pipe (see page ex-5).
- Install tailpipe assembly
- Install the tailpipe (see page ex-6).
- Add differential oil
- Add differential oil (see page df-3).
- Check for differential oil leakage
- Check for exhaust gas leakage
If gas is leaking, tighten the areas necessary to stop the leak. Replace damaged parts as necessary.
 Differential oil
On-vehicle inspection
Check differential oil
Stop the vehicle on a level surface.
Using a 10 mm socket hexagon wrench, remove the
rear differential filler plug and gasket.
...
 Diaphragm oil seal
Components
Removal
Drain differential oil
Using a 10 mm socket hexagon wrench, remove the
rear differential drain plug and gasket, and drain the
oil.
Install a new gasket to t ...
Other materials:
List screen operation
When a list screen is displayed, use the appropriate buttons to
scroll through the list.
How to scroll
Select to scroll to the next
or previous page.
Appears to the right of
titles, the complete titles are
too long for the display. Select
this button to scroll the title.
Turn th ...
Bluetooth®
When using the bluetooth® audio system
In the following conditions, the system may not function.
If the portable audio player is turned off
If the portable audio player is not connected
If the portable audio player’s battery is low
There may be a delay if a cellular phone connection i ...
Front passenger side - side airbag sensor assembly initialization incomplete
Description
The side airbag sensor rh consists of parts including the diagnostic circuit
and the lateral deceleration
sensor.
When the center airbag sensor receives signals from the lateral deceleration
sensor, it determines
whether or not the srs should be activated.
Dtc b1628/82, ...
