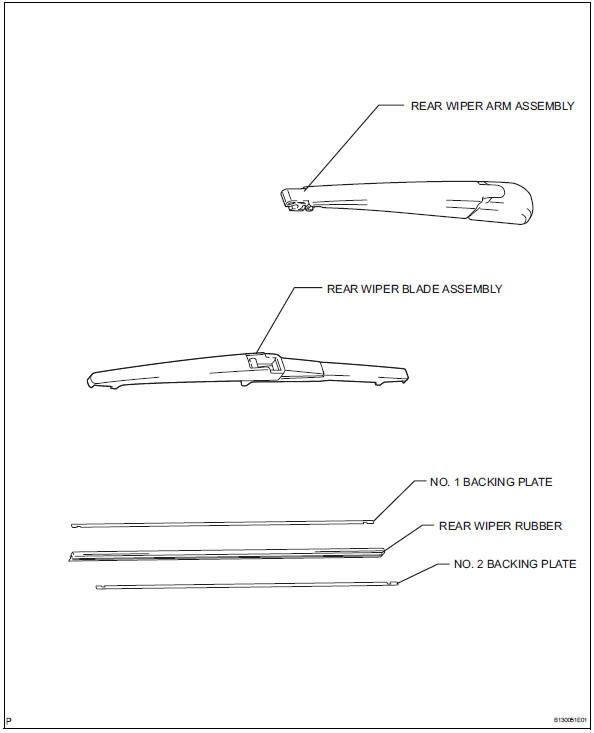
Toyota RAV4 (XA40) 2013-2018 Service Manual: Rear wiper rubber
Components
Removal
- Remove rear wiper blade assembly
- Rotate and remove the cap as described in the "remove" procedures.
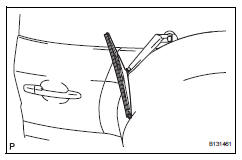
- Raise the arm and blade.
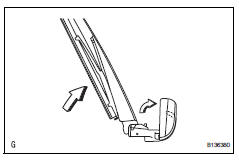
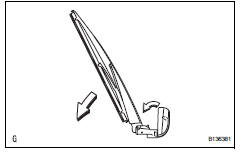
- Raise the wiper blade to the position where the claw detach with a ''click'' sound, as shown in the illustration.
Notice:
Be careful not to damage the claw.
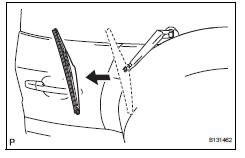
- Pull the wiper blade straight toward the left side of the vehicle to remove it from the wiper arm.
Notice:
Do not fold the wiper arm with the wiper blade removed. The arm tip may damage the back door glass surface.
- Remove rear wiper rubber
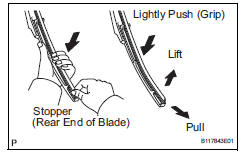
- Lift and pull the end of the wiper rubber protruding from the blade stopper as shown in the illustration.
Notice:
Do not forcibly pull out the wiper rubber. The backing plates will be deformed or the blade claws will be damaged.
Hint:
Lightly pushing the rubber between the ends and middle will allow it to be removed more easily.
Installation
- Install rear wiper rubber
- Install the no. 1 And no. 2 Backing plates as shown in the illustration.

Notice:
Install the backing plates facing the correct direction.
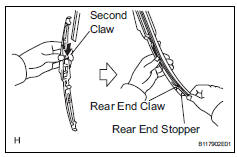
- Insert the wiper rubber from the front end of the wiper blade to the rear end through the second claw.
- After pushing the wiper rubber through the rear end claw, allow it to stick out from the rear end stopper.
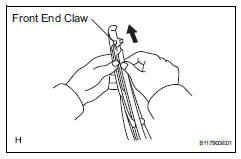
- Slide the wiper rubber through the front end claw.
- Install rear wiper blade assembly
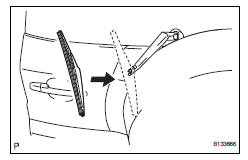
- Push the wiper blade straight toward the right side of the vehicle to install it to the wiper arm.
- Lower the arm and blade.
- Rotate and install the cap.
 Rear wiper motor
Components
Removal
Disconnect cable from negative battery
terminal
Caution:
Wait at least 90 seconds after disconnecting the
cable from the negative (-) battery terminal to
prevent ai ...
 Wiper switch
Precaution
Precaution for vehicle with srs
Some procedures in this section may affect the
supplemental restraint system (srs). Prior to
performing the procedures, read the srs section's
...
Other materials:
Installation
Install starter assembly
Install the starter with the 2 bolts.
Torque: 37 n*m (377 kgf*cm, 27 ft.*Lbf)
Connect the starter connector.
Install the terminal nut and cover the nut with the
cap.
Torque: 9.8 N*m (100 kgf*cm, 7 ft.*Lbf)
Install battery bracket reinfor ...
Evap system
Related dtcs
If any evap system dtcs are set, the malfunctioning area can be determined
using the table below.
Notice:
If the reference pressure difference between the first and second checks
is greater than the
specification, all the dtcs relating to the reference pressure (p043e, p ...
Dtc check / clear
Check dtc
Connect the intelligent tester to the dlc3.
Turn the ignition switch on and turn the tester on.
Select the following menu item: body / sliding roof /
dtc.
Check the dtc(s).
Clear dtc
Connect the intelligent tester to the dlc3.
Turn the ignition switch on ...
