Toyota RAV4 (XA40) 2013-2018 Service Manual: Rear brake
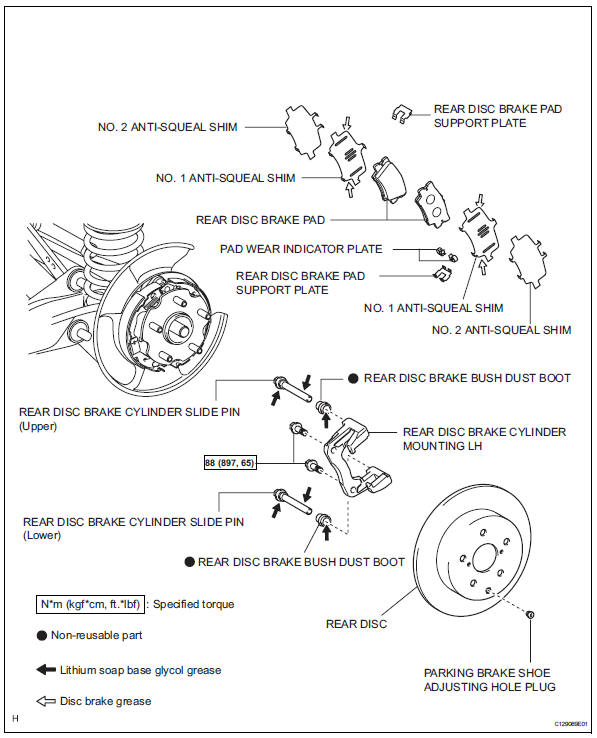
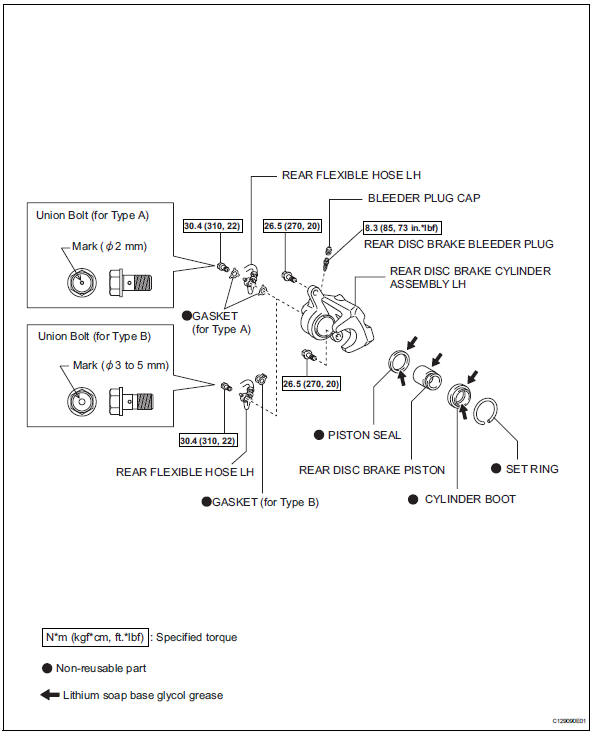
Components
Removal
Hint:
- Use the same procedures for the lh side and rh side.
- The procedures listed below are for the lh side.
- Remove rear wheel
- Drain brake fluid
Notice:
Wash off brake fluid immediately if it comes in contact with any painted surface.
- Disconnect rear flexible hose lh
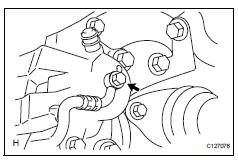
- Remove the union bolt and gasket(s).
- Disconnect the flexible hose from the brake cylinder.
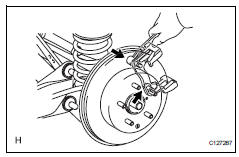
- Remove rear disc brake cylinder assembly lh
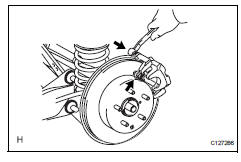
- Remove the 2 bolts and cylinder.
Disassembly
Hint:
- Use the same procedures for the lh side and rh side.
- The procedures listed below are for the lh side.
- Remove rear disc brake pad
- Remove the 2 disc brake pads.
- Remove anti-squeal shim
- Remove the shims from each pad.
- Remove pad wear indicator plate
- Remove the indicator plates from each pad.
- Remove rear disc brake pad support plate
- Remove the 2 plates from the brake cylinder mounting.
- Remove rear disc brake cylinder mounting lh
- Remove the 2 bolts and cylinder mounting.
- Remove rear disc brake cylinder slide pin
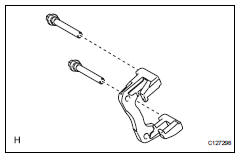
- Remove the 2 pins (upper and lower) from the mounting.
- Remove rear disc brake bush dust boot
- Remove the 2 boots from the mounting.
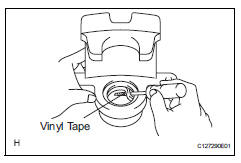
- Remove cylinder boot
- Using a screwdriver, pry out the set ring and boot.
Notice:
Be careful not to damage the brake piston and cylinder.
Hint:
Tape the screwdriver tip before use.
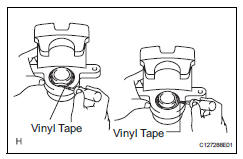
- Remove rear disc brake piston

- Place a shop rag or piece of cloth between the piston and disc brake cylinder.
- Apply compressed air to remove the piston from the disc brake cylinder.
Caution:
Do not place your fingers in front of the piston when applying compressed air.
Notice:
Be careful not to spatter the brake fluid.
- Remove piston seal
- Using a screwdriver, pry out the seal from the cylinder.
Notice:
Be careful not to damage the inner cylinder and piston seal groove.
Hint:
Tape the screwdriver tip before use.
- Remove rear disc brake bleeder plug
- Remove the bleeder plug cap and bleeder plug from the cylinder.
- Remove parking brake shoe adjusting hole plug
- Remove the shoe adjusting hole plug from the rear disc.
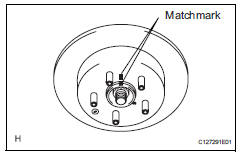
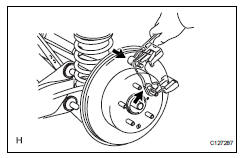
- Remove rear disc
- Put matchmarks on the disc and axle hub.
- Release the parking brake.
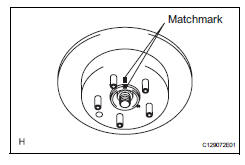
- Turn the shoe adjuster until the disc turns freely, and then remove the disc.
- Install the shoe adjusting hole plug from the rear disc.
Inspection
- Check brake cylinder and piston
- Check the cylinder bore and piston for rust or scoring.
If necessary, replace the cylinder and piston.
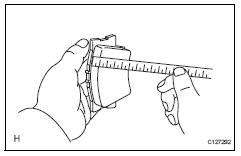
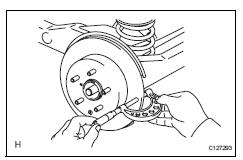
- Check pad lining thickness
- Using a ruler, measure the pad lining thickness.
Standard thickness: 10.5 Mm (0.413 In.)
Minimum thickness: 1.0 Mm (0.039 In.)
If the pad lining thickness is equal to or less than the minimum, replace the pad.
- Check rear disc brake pad support plate
- Check the 2 plates as follows. If necessary, replace the plates.
- Use brake cleaner to clean the pad support plate's pad and cylinder mounting contact surface. Inspect for deformation, cracks, rust and foreign matter that is difficult to remove.
- Use brake cleaner to clean the cylinder
mounting's pad support plate contact surface.
After installing the pad support plate to the cylinder mounting, inspect for looseness and deformation.
- After installing the pad, inspect if the pad falls off easily (due to the spring force of the pad support plate).
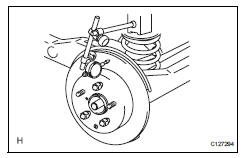
- Check disc thickness
- Using a micrometer, measure the disc thickness.
Standard thickness: 12.0 Mm (0.472 In.)
Minimum thickness: 10.5 Mm (0.413 In.)
If the disc thickness is less than the minimum, replace the disc.
- Check disc runout
- Check the bearing backlash and axle hub deviation (see page ah-16).
- Tighten the disc with the 3 hub nuts.
Torque: 103 n*m (1,050 kgf*cm, 76 ft.*Lbf)
- Using a dial indicator, measure the disc runout 10 mm (0.39 In.) From the outer edge of the disc.
Maximum disc runout: 0.15 Mm (0.0059 In.)
If the runout is greater than the maximum, change the installation positions of the disc and axle so that the runout will become minimal.
If the runout is greater than the maximum even when the installation positions are changed, grind the disc.
If the disc thickness is less than the minimum, replace the disc.
- Remove the 3 hub nuts.
Reassembly
Hint:
- Use the same procedures for the lh side and rh side.
- The procedures listed below are for the lh side.
- Install rear disc
- Align the matchmarks and install the disc.
Hint:
When replacing the disc with a new one, select the installation position where the disc has the minimum runout.
- Install parking brake shoe adjusting hole plug
- Install the adjusting hole plug to the rear disc.
- Check disc runout (see page br-58)
- Adjust parking brake shoe clearance (see page pb-17)
- Temporarily tighten rear disc brake bleeder plug
- Install the bleeder plug to the brake cylinder.
Hint:
The bleeder plug will be tightened to a torque specification in the "bleed air from brake line" procedures.
- Install the bleeder plug cap to the bleeder plug.
- Install piston seal
- Apply lithium soap base glycol grease to a new piston seal.
- Install the piston seal to the brake cylinder.
Notice:
Securely install the piston seal into the groove of the disc brake cylinder.
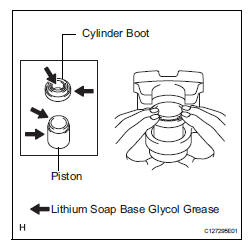
- Install rear disc brake piston
- Apply lithium soap base glycol grease to the brake piston and a new cylinder boot.
- Install the cylinder boot to the brake piston.
- Install the brake piston (with the cylinder boot) to the brake cylinder.
Notice:
Do not forcibly install the brake piston to the brake cylinder.
- Install cylinder boot
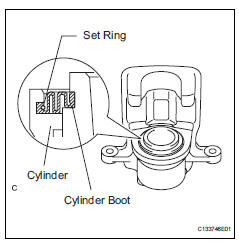
- Install the cylinder boot to the cylinder.
Notice:
- Install the boot securely into the grooves of the brake cylinder and brake piston.
- Be careful not to damage the boot.
- Using a screwdriver, install a new set ring.
Notice:
Be careful not to damage the boot.
Hint:
Tape the screwdriver tip before use.
- Install rear disc brake bush dust boot
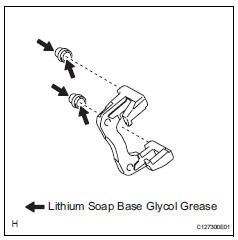
- Apply lithium soap base glycol grease to 2 new boots.
- Install the 2 boots to the mounting.
- Install rear disc brake cylinder slide pin
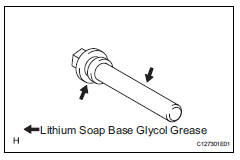
- Apply lithium soap base glycol grease to the pins.
- Install the 2 pins (upper and lower) to the mounting.
- Install rear disc brake cylinder mounting lh
- Install the cylinder mounting with the 2 bolts.
Torque: 88 n*m (897 kgf*cm, 65 ft.*Lbf)
- Install rear disc brake pad support plate
- Install the 2 plates to the mounting.
- Install pad wear indicator plate
- Install the 2 indicator plates to the lower side of each pad.
- Install anti-squeal shim
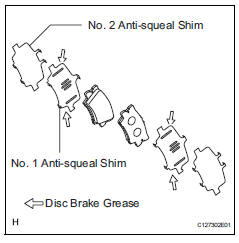
- Apply disc brake grease to both sides of each no. 1 Shim.
- Install the no. 1 And no. 2 Shims to each pad.
Notice:
- When replacing a worn pad, the shims must be replaced together with the pads.
- Install the shims in the correct positions and direction.
- Install rear disc brake pad
- Install the 2 disc brake pads to the mounting.
Notice:
There should be no oil or grease on the friction surface of the pads and disc.
 Brake front brake flexible hose
Components
Removal
Hint:
Use the same procedures for the lh side and rh side.
The procedures listed below are for the lh side.
Remove front wheel
Drain brake fluid
Notice:
Wash ...
 Brake rear brake flexible hose
Components
Removal
Hint:
Use the same procedures for the lh side and rh side.
The procedures listed below are for the lh side.
Remove rear wheel
Drain brake fluid
Notice:
Wash ...
Other materials:
Random / multiple cylinder misfire detected
Description
When the engine misfires, high concentrations of hydrocarbons (hc) enter the
exhaust gas. Extremely
high hc concentration levels can cause increases in exhaust emission levels.
High concentrations of hc
can also cause increases in the three-way catalytic converter (twc) te ...
Tc and cg terminal circuit
Description
Dtc output mode is set by connecting terminals 13 (tc) and 4 (cg) of the
dlc3. The dtcs are indicated
by the blinking of the tire pressure warning light.
Wiring diagram
Hint:
When each warning light continues blinking, a ground short in the wiring of
terminal tc of the dlc3 ...
The rear cross traffic
alert function
The areas that vehicles can be detected in are outlined below.
The range of the detection area
extends to:
Approximately 11.5 Ft. (3.5 M)
from the side of the vehicle
The first 1.6 Ft. (0.5 M) from the
side of the vehicle is not in the
detection area
Approximately 9.8 Ft. (3 M) fr ...
