
Toyota RAV4 (XA40) 2013-2018 Service Manual: Blower motor circuit
Description
The blower motor is operated by signals from the air conditioning amplifier. Blower motor speed signals are transmitted in accordance with changes in the duty ratio.
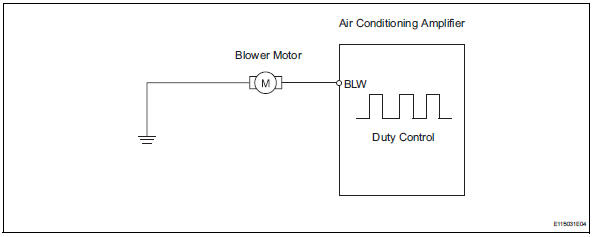
Wiring diagram
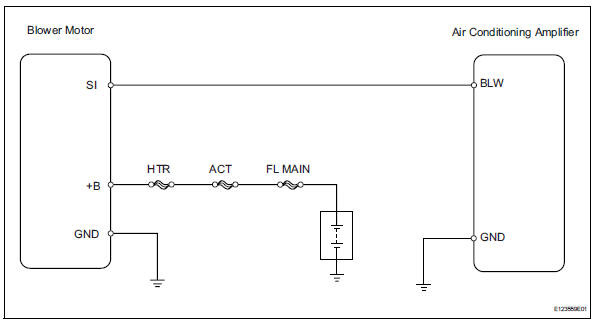
Inspection procedure
- Perform active test by intelligent tester (blower motor)
- Connect the intelligent tester to (with can vim) the dlc3.
- Turn the ignition switch on and turn the intelligent tester main switch on.
- Select the item below in the active test, and then check that the blower motor operates.
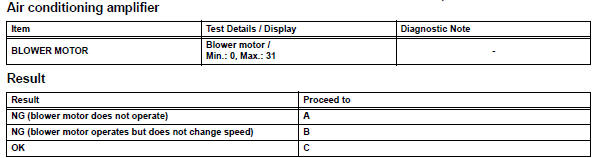

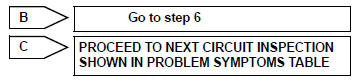
- Inspect fuse (htr)
- Remove the htr h-fuse from the engine room no. 2 Relay block.
- Measure the resistance of the h-fuse.
Standard resistance:
below 1 


- Check wire harness (blower motor - body ground)
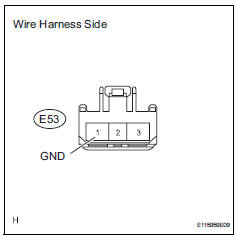
- Disconnect the e53 motor connector.
- Measure the resistance of the wire harness side connector.
Standard resistance



- Check wire harness (blower motor - battery)
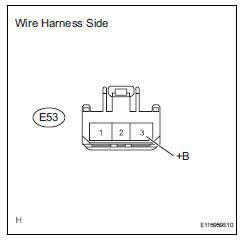
- Disconnect the e53 motor connector.
- Measure the voltage of the wire harness side connector.
Standard voltage



- Check blower w/ fan motor sub-assembly
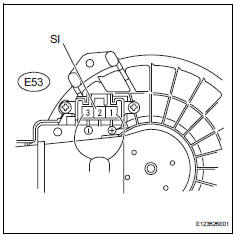
- Disconnect the e37 amplifier connector.
- Connect the e53 motor connector.
- Measure the voltage of the connector.
Standard voltage



- Check wire harness (air conditioning amplifier - body ground)
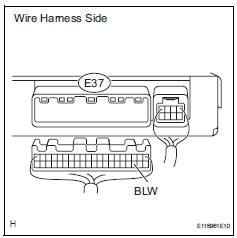
- Disconnect the e37 amplifier connector.
- Measure the voltage of the wire harness side connector
Standard voltage



- Check air conditioning amplifier
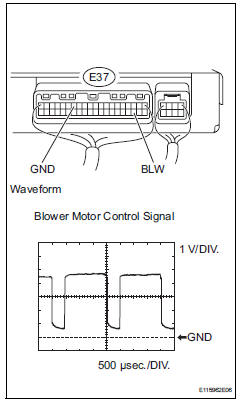
- Remove the air conditioning amplifier with its connectors still connected.
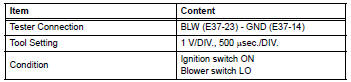
- Check the waveform of the amplifier connector.
Ok: waveform is as shown in the illustration.
Hint:
The waveform varies with the blower level.


Replace blower w/ fan motor sub-assembly
 Air conditioning control panel does not operate
Description
This circuit consists of the air conditioning control and the air
conditioning amplifier. When the air
conditioning control is operated, signals are transmitted to the air
conditioni ...
 Compressor circuit
Description
When the a/c switch is turned on, the magnetic clutch on signal is sent from
the air conditioning
amplifier. Then the mg clt relay turns on to operate the magnetic clutch.
Wiring diag ...
Other materials:
Deterioration of battery
Description
The ecm determines the battery power according to the voltage of the batt
terminal while the engine is
running (not cranking).
Inspection procedure
Inspect battery
Inspect the battery specific gravity.
Check the specific gravity of each cell.
Standard gravity: ...
Inspection
Inspect oil pump assembly
Turn the drive gear with 2 screwdrivers and make
sure it rotates smoothly.
Notice:
Be careful not to damage the oil seal lip.
Inspect clearance of oil pump assembly
Push the driven gear to one side of the body. Using
a feeler gauge, measur ...
Exhaust pipe
Components
Removal
Disconnect cable from negative battery terminal
Caution:
Wait at least 90 seconds after disconnecting the
cable from the negative (-) battery terminal to
prevent airbag and seat belt pretensioner activation.
Remove heated oxygen sensor (for bank 1
sensor 2) (s ...
