Toyota RAV4 (XA40) 2013-2018 Service Manual: Cooling fan motor
On-vehicle inspection
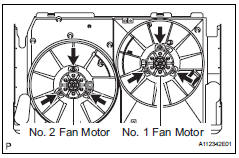
- Inspect no. 1 Cooling fan motor
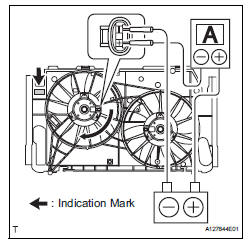
- Disconnect the no. 1 Fan connector.
- Connect the battery and ammeter to the no. 1 Fan motor connector.
- Check that the no. 1 Fan rotates smoothly, and then check the reading on the ammeter.
Standard amperage 
Hint:
Refer to the illustration for the indication mark location.
If the result is not as specified, replace the no. 1 Cooling fan motor.
- Reconnect the no. 1 Fan motor connector.
- Inspect no. 2 Cooling fan motor
- Disconnect the no. 2 Fan connector.
- Connect the battery and ammeter to the no. 2 Fan motor connector.
- Check that the no. 2 Fan rotates smoothly, and then check the reading on the ammeter.
Standard amperage 
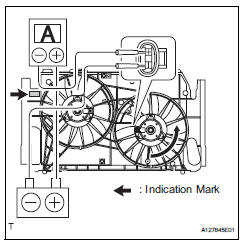
Hint:
Refer to the illustration for the indication mark location.
If the result is not as specified, replace the no. 2 Cooling fan motor.
- Reconnect the no. 2 Fan motor connector.
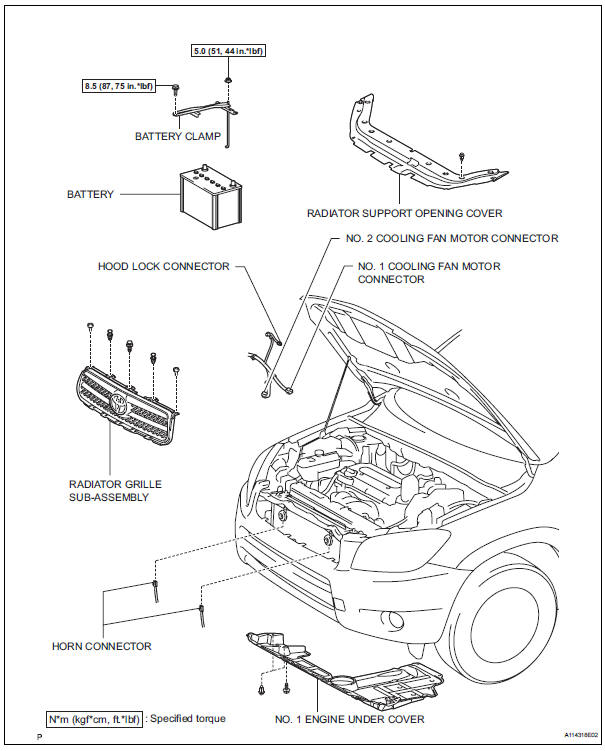
Removal
- Disconnect cable from negative battery terminal
Caution:
Wait at least 90 seconds after disconnecting the cable from the negative (-) battery terminal to prevent airbag and seat belt pretensioner activation.
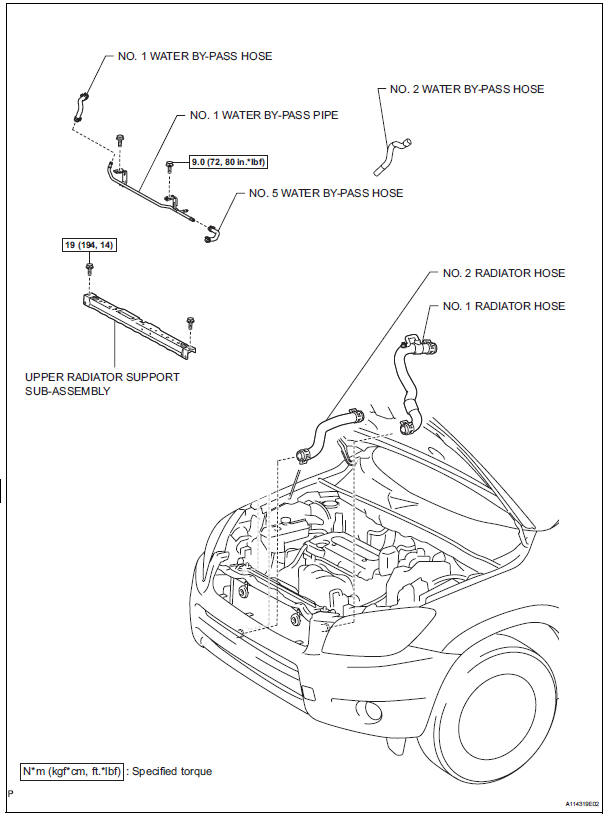
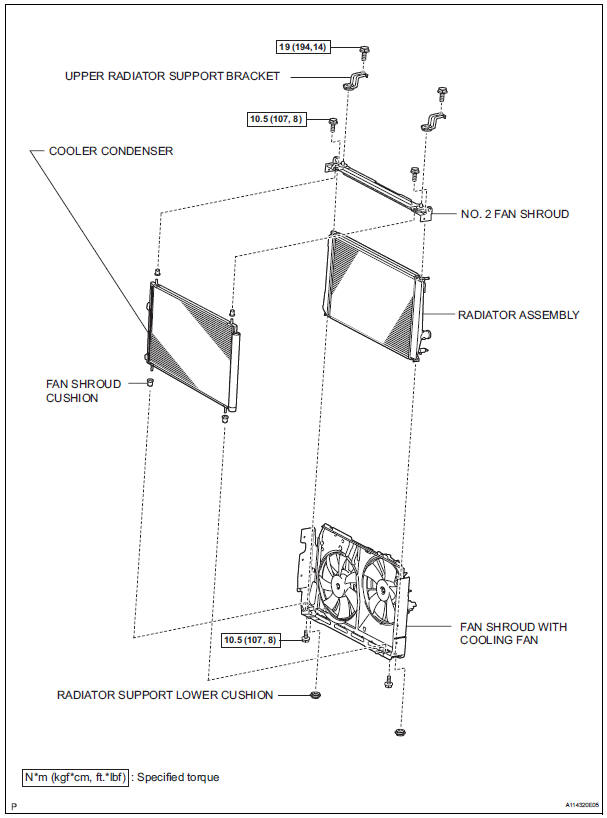
- Remove radiator assembly
- Remove the radiator (see page co-29).
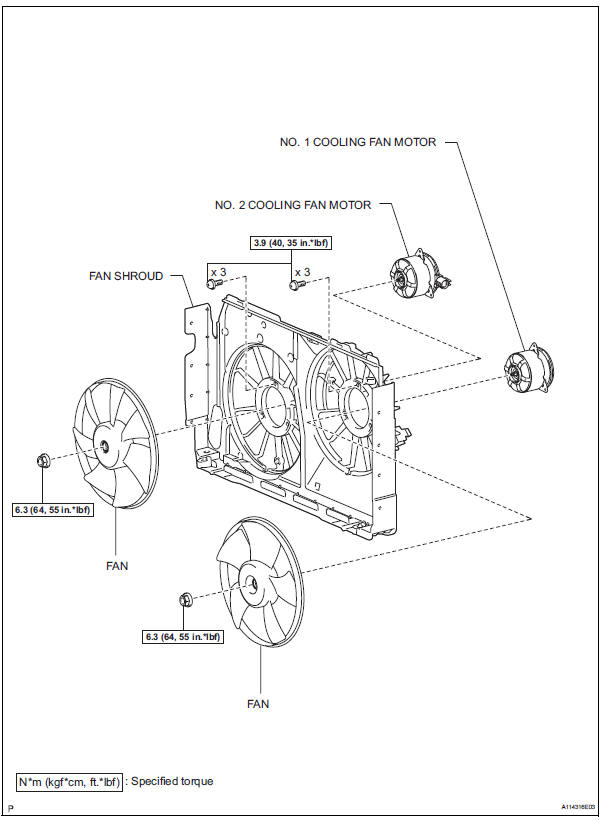
Disassembly
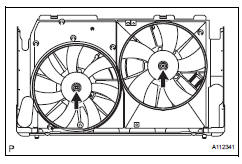
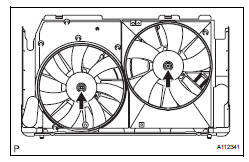
- Remove fan
- Remove the 2 nuts and 2 fans.
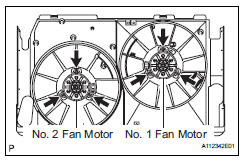
- Remove no. 1 Cooling fan motor
- Remove the 3 screws and fan motor.
- Remove no. 2 Cooling fan motor
- Remove the 3 screws and fan motor.
Reassembly
- Install no. 2 Cooling fan motor
- Install the fan motor with the 3 screws.
Torque: 3.9 N*m (40 kgf*cm, 35 in.*Lbf)
- Install no. 1 Cooling fan motor
- Install the fan motor with the 3 screws.
Torque: 3.9 N*m (40 kgf*cm, 35 in.*Lbf)
- Install fan
- Install the 2 fans with the 2 nuts.
Torque: 6.3 N*m (64 kgf*cm, 55 in.*Lbf)
- Check the fan motor operation.
Installation
- Install radiator assembly
- Install the radiator (see page co-32).
- Connect cable to negative battery terminal
- Add engine coolant (see page co-6)
- Add engine coolant (see page co-6)
 Thermostat
Components
Removal
Remove no. 1 Engine under cover
Drain engine coolant (see page co-6)
Remove radiator support opening cover
Disconnect no. 2 Radiator hose
Remove water inlet
R ...
 Cooling fan relay
On-vehicle inspection
Disconnect cable from negative battery
terminal
Caution:
Wait at least 90 seconds after disconnecting the
cable from the negative (-) battery terminal to
prevent airb ...
Other materials:
Ig power source circuit
Description
This is the main power source supplied to the air conditioning amplifier when
the ignition switch is on
(ig). This power source is used for operating components, such as the air
conditioning amplifier and
servo motors.
Wiring diagram
Inspection procedure
Inspect fuse (ec ...
Towing related terms
Gcwr (gross combination weight rating)
The maximum allowable gross
combination weight. The gross
combination weight is the sum
of the total vehicle weight
(including the occupants, cargo
and any optional equipment
installed on the vehicle) and the
weight of the trailer being towed
(inc ...
Reassembly
Install front oil pump oil seal
Using sst and a hammer, install a new oil seal to
the pump.
Sst 09350-32014 (09351-32140)
Hint:
The seal end should be flat with the outer edge of
the oil pump.
Coat the lip of the oil seal with petroleum jelly.
Install front oil pump bo ...
