Toyota RAV4 (XA40) 2013-2018 Service Manual: Map light assembly
Components
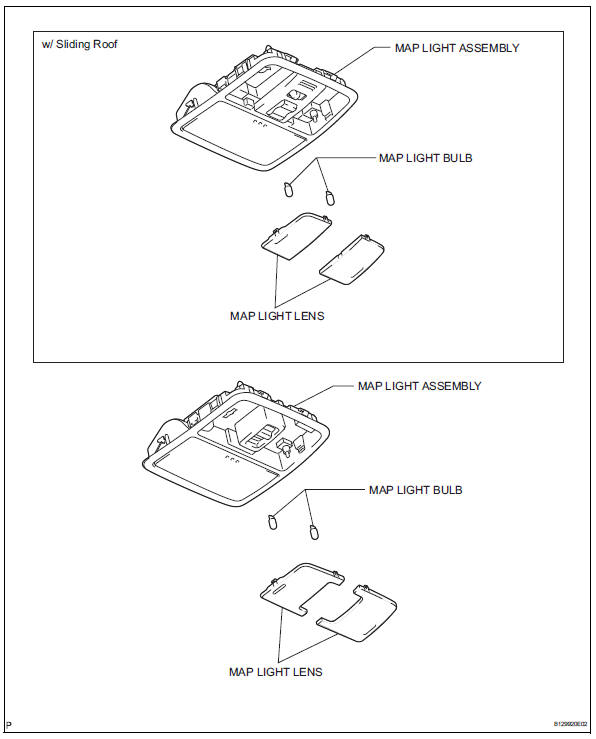
Removal
- Disconnect cable from negative battery terminal
Caution:
Wait at least 90 seconds after disconnecting the cable from the negative (-) battery terminal to prevent airbag and seat belt pretensioner activation.
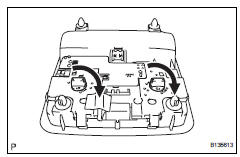
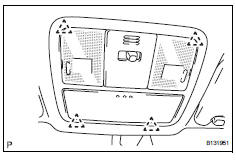
- Remove map light assembly
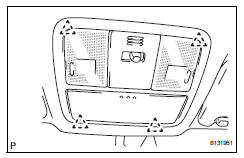
- Detach the 4 clips and remove the map light.
- Disconnect the light connector.
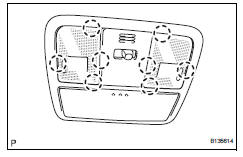
- Remove map light lens
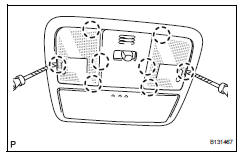
- Using a screwdriver, pry out the 8 claws and remove the map light lens.
Hint:
Tape the screwdriver tip before use.
Disassembly
- Remove map light bulb
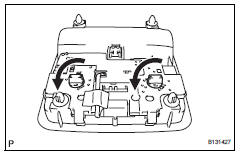
- Remove the 2 bulbs from the light.
Inspection
- Inspect map light assembly
- Connect the battery's positive (+) lead to terminal 6 and the negative (-) lead to terminal 1, and then check that the light comes on when the switch is in the door position.
Ok: light comes on.
If the result is not as specified, replace the light assembly.
- Connect the battery's positive (+) lead to terminal 6 and the negative (-) lead to terminal 7, and then check that the light comes on when the switch is in the on position.
Ok: light comes on.
If the result is not as specified, replace the light assembly.
Reassembly
- Install map light bulb
- Install the 2 bulbs to the light.
Installation
- Install map light lens
- Attach the 8 claws to install the map light lens.
- Install map light assembly
- Connect the light connector.
- Attach the 4 clips to install the map light.
- Connect cable to negative battery terminal
 High mounted stop light assembly
Components
Removal
Disconnect cable from negative battery
terminal
Caution:
Wait at least 90 seconds after disconnecting the
cable from the negative (-) battery terminal to
prevent ai ...
 Room light assembly
Components
Removal
Disconnect cable from negative battery
terminal
Caution:
Wait at least 90 seconds after disconnecting the
cable from the negative (-) battery terminal to
prevent ai ...
Other materials:
Installation (2005/11-2006/01)
Install sliding roof weatherstrip
Install the sliding roof weatherstrip.
Position the joint of the weatherstrip at the rear
center.
Align the marks on the weatherstrip with the
middle marks at the corners of the plastic on
the edge of the sliding roof panel and install the ...
Disassembly
Inspect oil pump assembly (see page ax-218)
Remove clutch drum oil seal ring
Remove the 2 clutch drum oil seal rings.
Remove stator shaft assembly
Using a t30 ''torx'' socket, remove the 11 bolts and
stator shaft. Keep the gears in assembling order.
Inspect clearan ...
Brake Hold
The brake hold system
keeps the brake applied
when the shift lever is in D,
S or N with the system on
and the brake pedal has
been depressed to stop the
vehicle. The system
releases the brake when the
accelerator pedal is
depressed with the shift
lever in D or S to allow
smooth start off.
Enabling t ...
