
Toyota RAV4 (XA40) 2013-2018 Service Manual: Terminals of ecu (2005/11-2006/01)
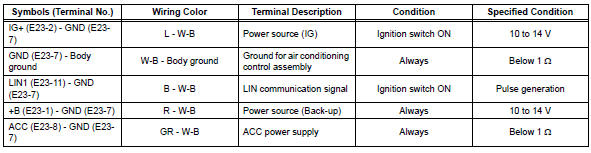
- Check air conditioning amplifier
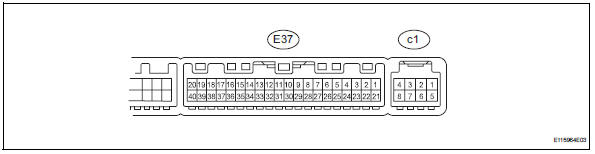
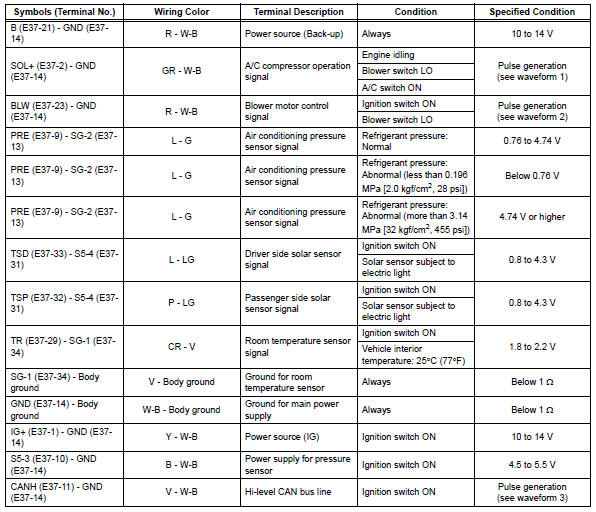
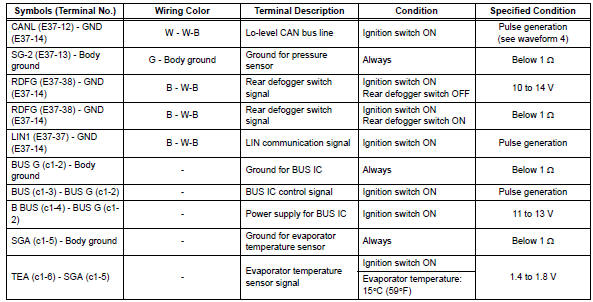
- Measure the voltage and resistance of the connectors.
Hint:
Check from the rear of the connector while it is connected to the air conditioning amplifier.
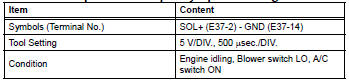
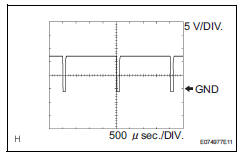
- Using an oscilloscope, check waveform 1.
Compressor and pulley operation signal
- Using an oscilloscope, check waveform 2.
Blower motor control signal 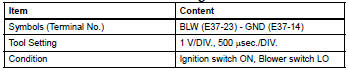
Hint:
When the blower level is increased, the duty ratio changes accordingly.
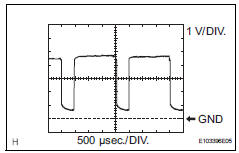
- Using an oscilloscope, check waveform 3.
Can communication signal 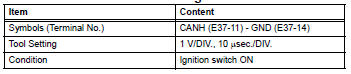
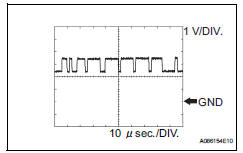
Hint:
The waveform varies depending on the can communication signal.
- Using an oscilloscope, check waveform 4.
Can communication signal 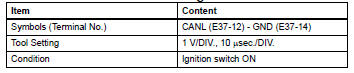
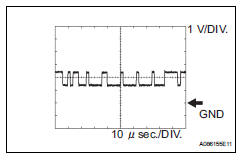
Hint:
The waveform varies depending on the can communication signal.
- Check air conditioning control
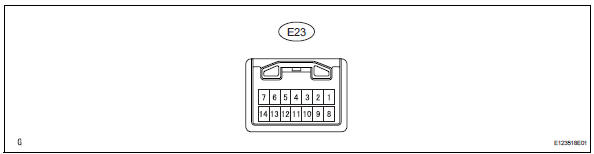
- Measure the voltage and resistance of the connectors.
 Problem symptoms table (2006/01- )
Hint:
Use the table below to help determine the cause of the
problem symptom. The potential causes of the symptoms
are listed in order of probability in the "suspected area"
column ...
 Terminals of ecu (2006/01- )
Check air conditioning amplifier
Measure the voltage and resistance of the
connectors.
Hint:
Check from the rear of the connector while it is
connected to the air conditioning ampl ...
Other materials:
Contact/call history
settings
The contact can be transferred from a bluetooth® phone to the system.
The contact also can be added, edited and deleted.
The call history can be deleted and contact and favorites can be
changed.
Display the “phone/message settings� screen.
Select “contact/call history settings� ...
Dtc check / clear
Check dtc
Connect the intelligent tester (with can vim) to the
dlc3.
Turn the ignition switch on and turn the intelligent
tester on.
Read the dtc by following the prompts on the
tester screen.
Hint:
Refer to the intelligent tester operator's manual for
further details.
...
Terminals of ecu
Check sliding roof drive gear subassembly (sliding roof ecu)
Disconnect the p6 ecu connector.
Measure the resistance and voltage of the wire
harness side connector.
Reconnect the p6 ecu connector.
Measure the voltage of the connector.
If the result is not as speci ...
