Toyota RAV4 (XA40) 2013-2018 Service Manual: Child restraint seat tether anchor
Components
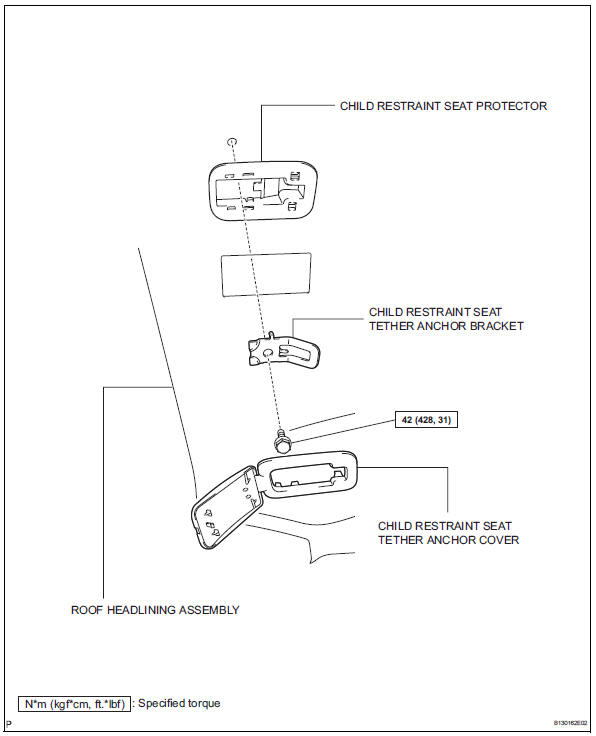


Removal
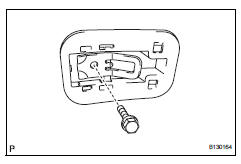
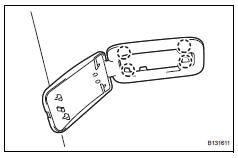
- Remove child restraint seat tether anchor cover
- Using a screwdriver, detach the 4 claws and remove the cover.
Hint:
Tape the screwdriver tip before use.
- Remove roof headlining assembly
Hint:
It is not necessary to completely remove the roof headlining. Slightly lower the rear section of the roof headlining.
- Partially remove the roof headlining (see page ir- 26).
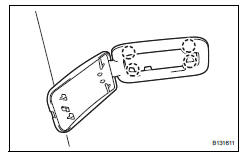
- Remove child restraint seat tether anchor bracket
- Remove the bolt and bracket.
- Remove child restraint seat protector
Installation
- Install child restraint seat protector
- Install child restraint seat tether anchor bracket
- Align the claws with the positioning holes, and install
the bracket with the bolt.
Torque: 42 n*m (428 kgf*cm, 31 ft.*Lbf)
- Install roof headlining assembly
- Install the roof headlining (see page ir-49).
- Install child restraint seat tether anchor cover
- Install the cover with the 4 claws.
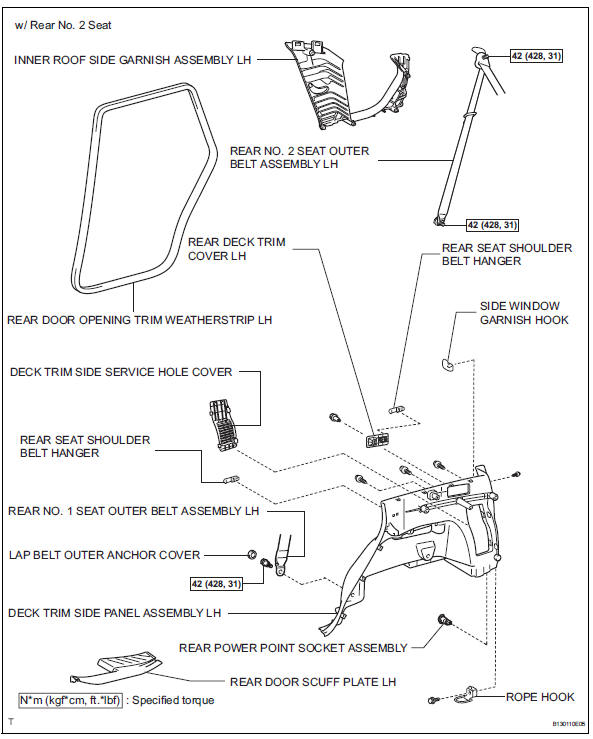
 Rear center seat outer belt assembly
Components
Removal
Caution:
Wait at least 90 seconds after disconnecting the cable
from the negative (-) battery terminal to prevent airbag
and seat be ...
 Sliding roof
...
Other materials:
Fuel injector
Components
Removal
Discharge fuel system pressure
Caution:
Discharge fuel system pressure
procedures must be performed before
disconnecting any part of the fuel system.
After performing the discharge fuel system
pressure procedures, pressure will remain in
the fuel line ...
Riding with children
Observe the following precautions
when children are
in the vehicle.
Use a child restraint system
appropriate for the child,
until the child becomes
large enough to properly
wear the vehicle's seat belt.
It is recommended that children
sit in the rear seats to
avoid accidental contact
with the ...
Installation
Install crankshaft position sensor
Notice:
Make sure that the o-ring is not cracked or jammed
when installing it.
Apply a light coat of engine oil to the o-ring of the
sensor.
Install the sensor with the bolt.
Torque: 9.0 N*m (90 kgf*cm, 80 in.*Lbf)
Install the wire ha ...
