Toyota RAV4 (XA40) 2013-2018 Service Manual: Door control receiver
Components
Removal
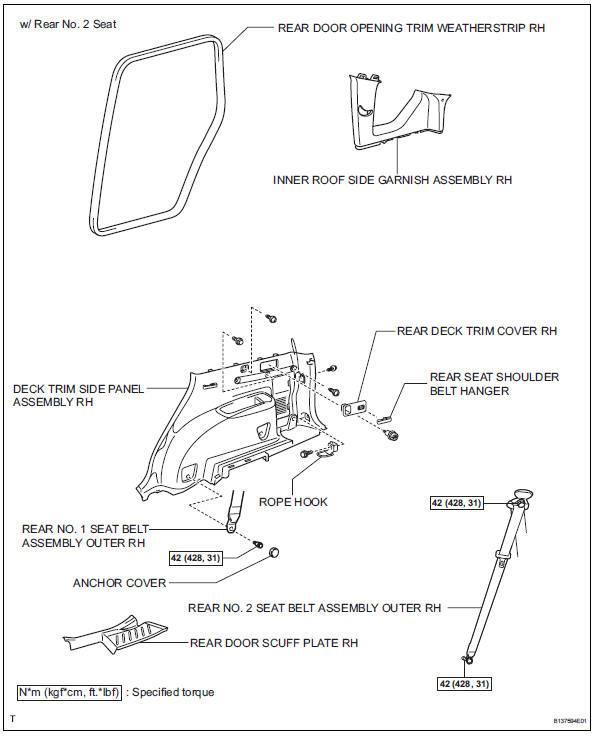
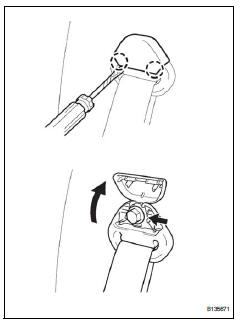
- Remove rear door scuff plate rh
- Using a screwdriver, detach the 9 claws.
Hint:
Tape the screwdriver tip before use.
- Using a clip remover, detach the 2 clips and remove the garnish.
- Remove rear door opening trim weatherstrip rh
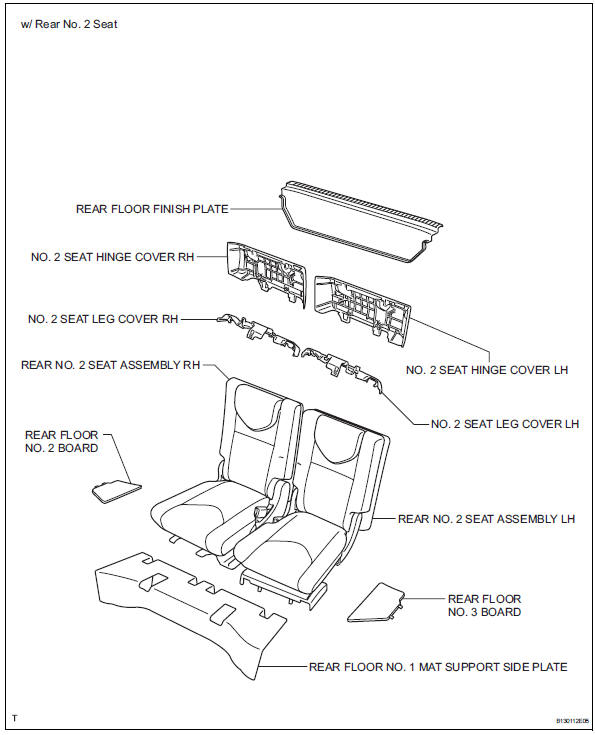
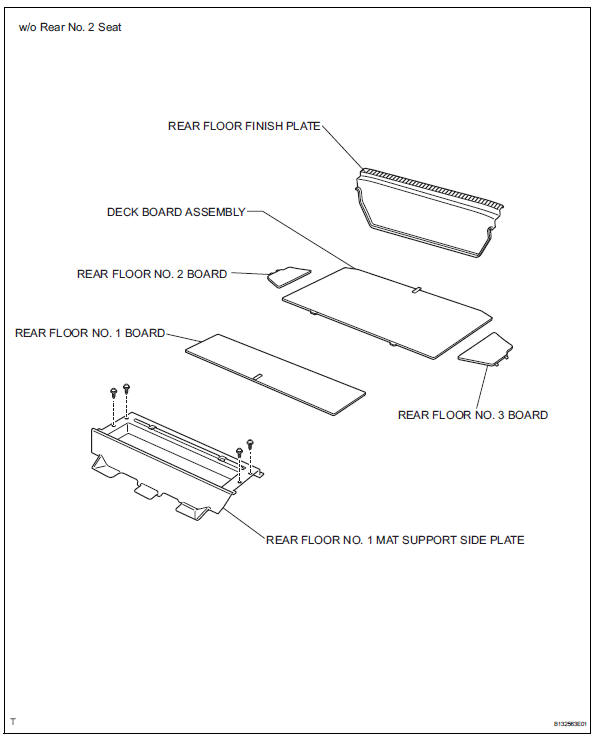
- Remove rear floor no. 1 Board (w/o rear no.
2 Seat)
- Remove deck board assembly (w/o rear no. 2 Seat)
- Remove no. 2 Seat hinge cover lh (w/ rear no.
2 Seat) (see page se-109)
- Remove no. 2 Seat hinge cover rh (w/ rear no.
2 Seat)
Hint:
Use the same procedures described for the lh side.
- Remove no. 2 Seat leg cover lh (w/ rear no. 2 Seat) (see page se-109)
- Remove no. 2 Seat leg cover rh (w/ rear no. 2 Seat)
Hint:
Use the same procedures described for the lh side.
- Remove rear no. 2 Seat assembly lh (w/ rear no. 2 Seat) (see page se-110)
- Remove rear no. 2 Seat assembly rh (w/ rear no. 2 Seat)
- Remove rear floor no. 3 Board
- Remove rear floor no. 2 Board
- Remove rear floor no. 1 Mat support side plate (see page ir-31)
- Remove rear floor finish plate (see page ir- 31)
- Remove rear deck trim cover rh (w/ rear no.
2 Seat)
- Remove the bolt.
- Using a screwdriver, detach the 4 claws and remove the trim cover.
Hint:
Tape the screwdriver tip before use.
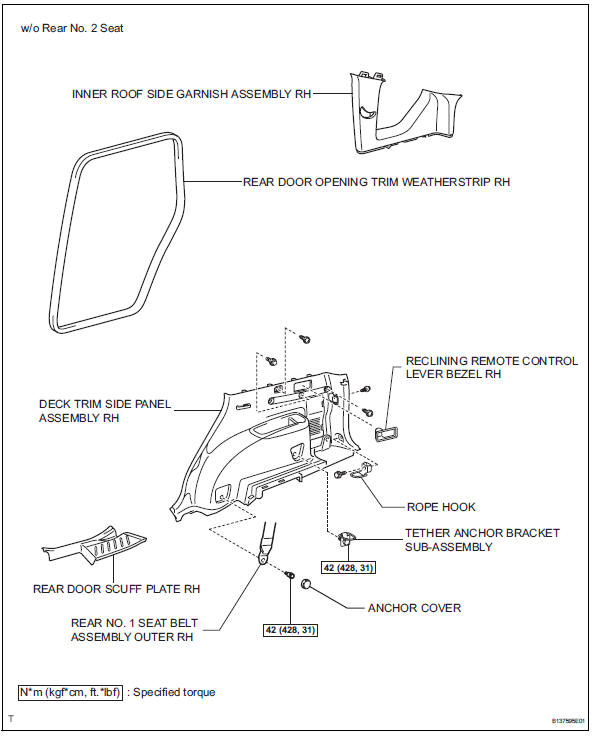
- Remove reclining remote control lever bezel rh (w/o rear no. 2 Seat) (see page se-80)
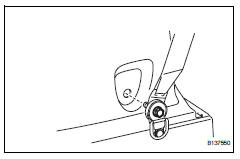
- Remove tether anchor bracket subassembly (w/o rear no. 2 Seat)
- Remove the bolt and tether anchor bracket.
- Remove deck trim side panel assembly rh (w/o rear no. 2 Seat) (see page ir-33)
- Remove deck trim side panel assembly rh (w/ rear no. 2 Seat) (see page ir-34)
- Remove inner roof side garnish assembly rh (w/o rear no. 2 Seat)
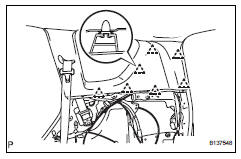
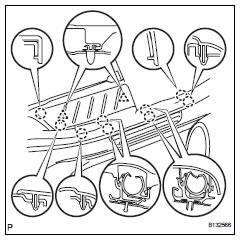
- Using a clip remover, detach the 7 clips and remove the garnish.
- Remove inner roof side garnish assembly rh (w/ rear no. 2 Seat)
- Disconnect the rear no. 2 Seat outer belt's shoulder anchor.
- Using a screwdriver, detach the 2 claws and open the seat belt anchor cover.
Hint:
Tape the screwdriver tip before use.
- Remove the bolt and disconnect the shoulder anchor.
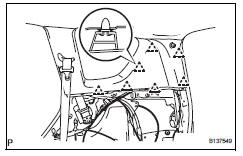
- Using a clip remover, detach the 7 clips and remove the garnish.
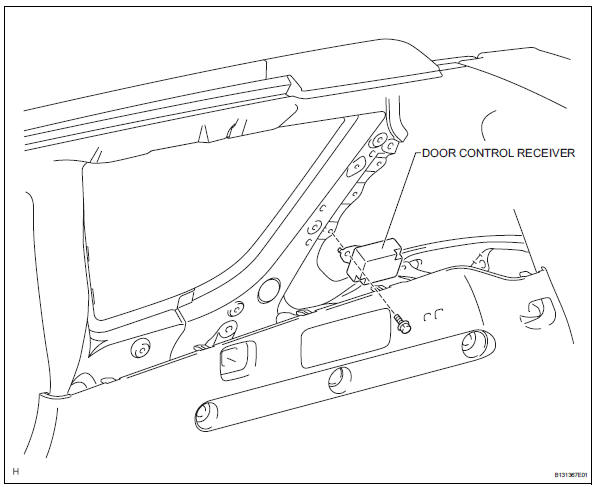
- Remove door control receiver
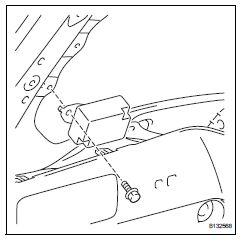
- Disconnect the receiver connector.
- Remove the bolt and receiver.
Installation
- Install door control receiver
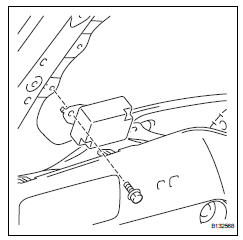
- Install the receiver with the bolt.
- Connect the receiver connector.
- Install inner roof side garnish assembly rh (w/o rear no. 2 Seat)
- Attach the 7 clips to install the garnish.
- Install inner roof side garnish assembly Rh (w/ rear no. 2 Seat)
- Attach the 7 slips to install the garnish.
- Connect the rear no. 2 Seat belt's shoulder anchor.
- Connect the shoulder anchor with the bolt.
Torque: 42 n*m (428 kgf*cm, 31 ft.*Lbf)
- Attach the claws to close the seat belt anchor cover.
- Install deck trim side panel assembly rh (w/o rear no. Seat) (see page ir-53)
- Install deck trim side panel assembly rh (w/ rear no. 2 Seat) (see page ir-54)
- Install tether anchor bracket subassembly (w/o rear no. 2 Seat)
- Install the tether anchor bracket with the bolt.
- Install reclining remote control lever bezel rh (w/o rear no. 2 Seat) (see page se-105)
- Install rear deck trim cover rh (w/ rear no.
2 Seat)
- Attach the 4 claws to install the trim cover.
- Install the belt.
- Install rear floor finish plate (see page ir- 55)
- Install rear floor no. 1 Mat support side plate (see page ir-55)
- Install rear floor no. 3 Board
- Install rear floor no. 2 Board
- Install rear no. 2 Seat assembly lh (w/ rear no. 2 Seat) (see page se-121)
- Install rear no. 2 Seat assembly rh (w/ rear no. 2 Seat)
Hint:
Use the same procedures described for the lh side.
- Install no. 2 Seat leg cover lh (w/ rear no. 2 Seat) (see page se-123)
- Install no. 2 Seat leg cover rh (w/ rear no. 2 Seat)
Hint:
Use the same procedures described for the lh side.
- Install no. 2 Seat hinge cover lh (w/ rear no.
2 Seat) (see page se-123)
- Install no. 2 Seat hinge cover rh (w/ rear no.
2 Seat)
Hint:
Use the same procedures described for the lh side.
- Install deck board assembly (w/o rear no. 2 Seat)
- Install rear floor no. 1 Board (w/o rear no.
2 Seat)
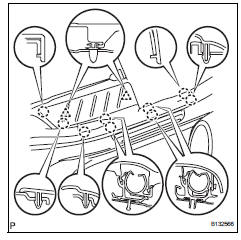
- Install rear door opening trim weatherstrip rh
- Install rear door scuff plate rh
- Attach the 9 claws and 2 clips to install the scuff plate.
 Back door lock
Inspection
Inspect back door with motor lock assembly
Apply the battery voltage to the door lock motor and
check the operation of the door lock motor.
Ok
If the result is not as sp ...

Other materials:
Terminals of ecu (2005/11-2006/01)
Check air conditioning amplifier
Measure the voltage and resistance of the
connectors.
Hint:
Check from the rear of the connector while it is
connected to the air conditioning amplifier.
using an oscilloscope, check waveform 1.
Can communication signal
Hint:
...
Checking and replacing
fuses
If any of the electrical components do not operate, a fuse may
have blown. If this happens, check and replace the fuses as necessary.
Vehicles without a smart key system:
turn the engine switch to the ŌĆ£lockŌĆØ position.
Vehicles with a smart key system:
turn the engine switch off.
Aft ...
Cooling fan system
Parts location
System diagram
On-vehicle inspection
Hint:
It is normal for the cooling fan to sometimes rotate when the
ignition switch is turned from acc to on.
Check cooling fan operation at low temperatures (below 94┬░c (201┬░f))
Turn the ignition switch on with the a/c ...
