
Toyota RAV4 (XA50) 2019-2026 Owners Manual: Head restraints
Head restraints are provided for all seats.
WARNING
â– Head restraint precautions
Observe the following precautions regarding the head restraints.
Failure to do so may result in death or serious injury.
- Use the head restraints designed for each respective seat.
- Adjust the head restraints to the correct position at all times.
- After adjusting the head restraints, push down on them and make sure they are locked in position.
- Do not drive with the head restraints removed.
Vertical adjustment
â– Front seats
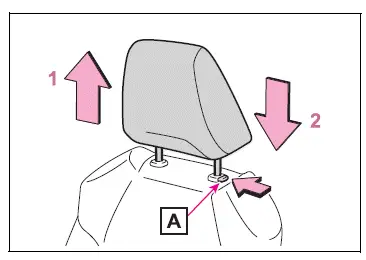
- Up
Pull the head restraints up. - Down
Push the head restraint down while pressing the lock release button A.
â– Center rear seat
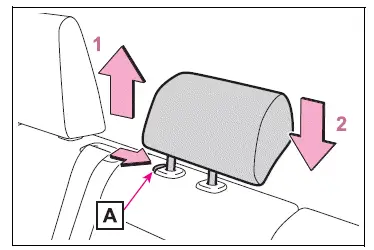
- Up
Pull the head restraints up. - Down
Push the head restraint down while pressing the lock release button A.
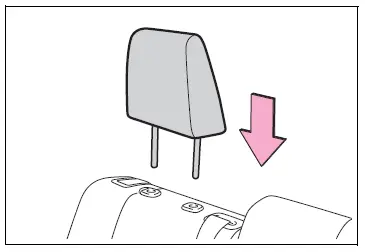
â– Outboard rear seats
Head restraints cannot be adjusted.
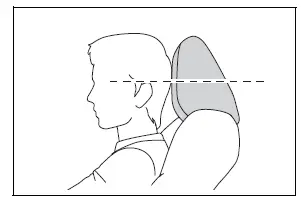
â– Adjusting the height of the head restraints (front seats)
Make sure that the head restraints are adjusted so that the center of the head restraint is closest to the top of your ears.
â– Adjusting the center rear seat head restraint
Always raise the head restraint one level from the stowed position when using.
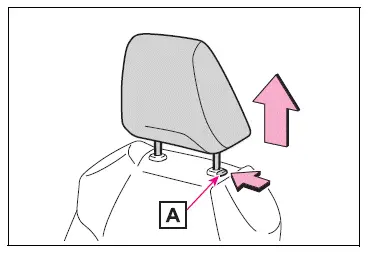
Removing the head restraints
Pull the head restraint up while pressing the lock release button A.
If the head restraint touches the ceiling, making the removal difficult, change the seat height or angle.
Installing the head restraints
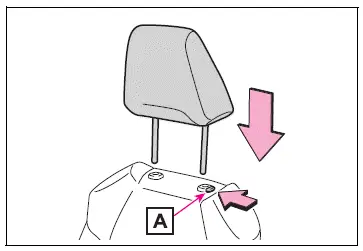
â– Front and center rear seats
Align the head restraint with the installation holes and push it down to the lock position.
Press and hold the lock release button A when lowering the head restraint.
â– Outboard rear seats
Align the head restraint with the installation holes and push it down to the lowest lock position.
 Driving position memory
This feature automatically
adjusts the driver's seat to
suit your preferences.
Your preferred driving position
(the position of the
driver's seat) can be
recorded and recalled by
pressing a button.
...

Other materials:
Road test
Problem symptom confirmation
Based on the result of the customer problem
analysis, try to reproduce the symptoms. If the
problem is that the transaxle does not shift up, shift
down, or the shift point is too high or too low,
conduct the following road test referring to the
automat ...
Pressure control solenoid "d" electrical (shift solenoid valve slt)
Description
Refer to dtc p2714 (see page ax-91).
Monitor description
When an open or short in the shift solenoid valve slt circuit is detected,
the ecm interprets this as a fault.
The ecm will illuminate the mil and store the dtc.
Monitor strategy
Typical enabling conditions
...
Removal
Disconnect cable from negative battery
terminal
Caution:
Wait at least 90 seconds after disconnecting the
cable from the negative (-) battery terminal to
prevent airbag and seat belt pretensioner activation.
Remove front fender liner lh
Remove front fender liner lh
Remove the ...
