Toyota RAV4 (XA40) 2013-2018 Service Manual: Installation (2006/01- )
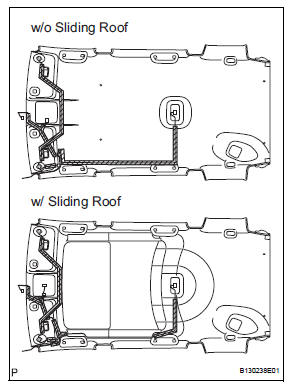
- Install no. 1 Roof silencer pad
- W/o sliding roof:
- Install the 5 silencer pads.
- W/ sliding roof:
- Install the 2 silencer pads.
- Install no. 3 Roof silencer pad
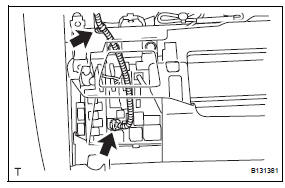
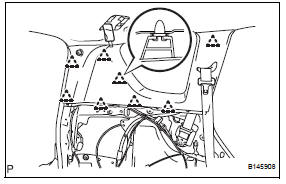
- Install no. 1 Roof wire
- Only when replacing the roof headlining:
- Align the marking, and then install the wire harness with tape.
Hint:
Be careful that dirt or foreign objects do not stick to the adhesive part when peeling off the double-sided tape.
- Attach the roof wire harness along the adhesive part.
Notice:
The roof wire harness should be attached securely.
- Install no. 1 Roof headlining support
- Install no. 2 Roof headlining support
- Install no. 3 Roof headlining support
- Install no. 4 Roof headlining support
- Install roof headlining assembly
- W/o sliding roof:
- Install the headlining with the 4 clips.
- W/ sliding roof:
- Install the headlining with the 2 clips.
- Connect the connector to the sliding roof drive gear.
- Connect the connector to the roof wire.
- Attach the clamp of the roof wire.
- Install sun roof opening trim moulding
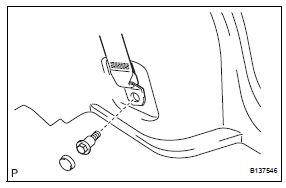
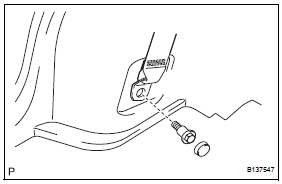
- Install shoulder belt anchor cover rh (see page sb-65)
- Install child restraint seat tether anchor cover (see page sb-77)
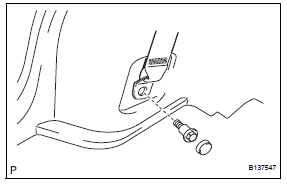
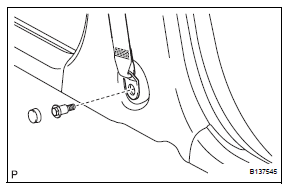
- Install rear assist grip assembly
- Attach the 4 claws to install the assist grip.
- Install assist grip cover (for rear grip)
- Attach the 4 claws to install the 2 assist grip covers.
- Install assist grip sub-assembly
- Attach the 4 claws to install the assist grip.
- Install assist grip cover (for front grip)
- Attach the 4 claws to install the 2 assist grip covers.
- Install television display assembly (w/ television display) (see page av-166)
- Install television garnish (w/ television display) (see page av-166)
- Install room light assembly (see page li-119)
- Install map light assembly (see page li-116)
- Install vanity light assembly (see page li- 129)
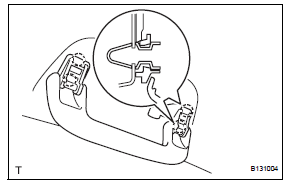
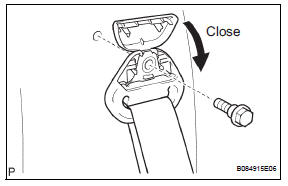
- Install visor holder
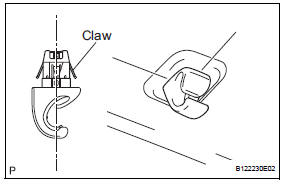
- Set the claws of the visor holder as shown in the illustration.
- Insert the visor holder to install it.
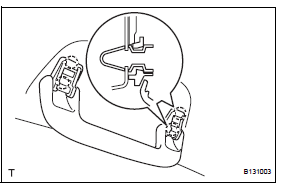
- Install visor assembly lh
- Attach the 2 claws to install the visor.
- Install portion a of the visor onto the visor holder.
- Attach the 4 claws to install the visor bracket cover.
- Install visor assembly rh
Hint:
Use the same procedures described for the lh side.
- Install rear room partition net hook lh
- Install the net hook with the 2 screws.
- Install rear room partition net hook rh
Hint:
Use the same procedures described for the lh side.
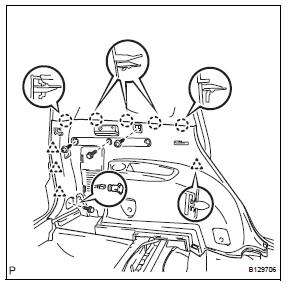
- Install inner roof side garnish assembly lh (w/o rear no. 2 Seat)
- Attach the 8 clips to install the garnish.
- Install inner roof side garnish assembly lh (w/ rear no. 2 Seat)
- Attach the 8 clips to install the garnish.
- Connect the rear no. 2 Seat belt's shoulder anchor.
- Connect the shoulder anchor with the bolt.
Torque: 42 n*m (428 kgf*cm, 31 ft.*Lbf)
- Attach the 2 claws to close the seat belt anchor cover.
- Install inner roof side garnish assembly rh
Hint:
Use the same procedures described for the lh side.
- Install deck trim side panel assembly lh (w/ o rear no. 2 Seat)

- Install the belt hanger to the trim board.
- Connect the power outlet socket connector.
- Attach the 4 clips and 5 claws to install the trim board.
- Install the 2 screws and 2 bolts.
- Connect the rear no. 1 Seat belt's floor anchor.

- Connect the floor anchor with the bolt.
Torque: 42 n*m (428 kgf*cm, 31 ft.*Lbf)
- Install the anchor cover.
- Install deck trim side panel assembly lh (w/ rear no. 2 Seat)
- Install the belt hanger to the trim board.
- Connect the power outlet socket connector.
- Attach the 4 clips and 5 claws to install the trim board.
- Install the 2 screws and 2 bolts.
- Connect the rear no. 2 Seat belt's floor anchor.
- Connect the floor anchor with the bolt.
Torque: 42 n*m (428 kgf*cm, 31 ft.*Lbf)
- Connect the rear no. 1 Seat belt's floor anchor.
- Connect the floor anchor with the bolt.
Torque: 42 n*m (428 kgf*cm, 31 ft.*Lbf)
- Install the anchor cover.
- Install deck trim side panel assembly rh (w/o rear no. 2 Seat)
- Install the belt hanger to the trim board.
- Attach the 4 clips and 5 claws to install the trim board.
- Install the 2 screws and 2 bolts.
- Connect the rear no. 1 Seat belt's floor anchor.
- Connect the floor anchor with the bolt.
Torque: 42 n*m (428 kgf*cm, 31 ft.*Lbf)
- Install the anchor cover.
- Install deck trim side panel assembly rh (w/ rear no. 2 Seat)
- Install the belt hanger to the trim board.
- Attach the 4 clips and 5 claws to install the trim board.
- Install the 2 screws and 2 bolts.
- Connect the rear no. 2 Seat belt's floor anchor.
- Connect the floor anchor with the bolt.
Torque: 42 n*m (428 kgf*cm, 31 ft.*Lbf)
- Connect the rear no. 1 Seat belt's floor anchor.
- Connect the floor anchor with the bolt.
Torque: 42 n*m (428 kgf*cm, 31 ft.*Lbf)
- Install the anchor cover.
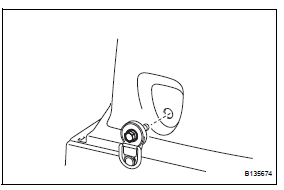
- Install tether anchor bracket subassembly (w/o rear no. 2 Seat)
- Install the tether anchor bracket with the bolt.
Torque: 42 n*m (428 kgf*cm, 31 ft.*Lbf)
- Install reclining remote control lever bezel lh (w/o rear no. 2 Seat) (see page se-73)
- Install reclining remote control lever bezel rh (w/o rear no. 2 Seat) (see page se-105)
- Install rear deck trim cover lh (w/ rear no.
2 Seat)
- Attach the 4 claws to install the trim cover.
- Install the bolt.
- Install rear deck trim cover rh (w/ rear no. 2 Seat)
Hint:
Use the same procedures described for the lh side.
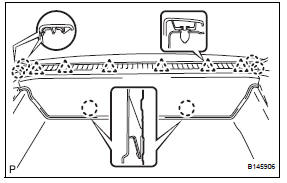
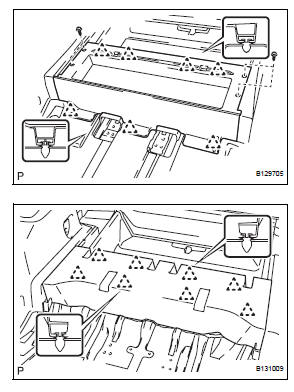
- Install rear floor finish plate
- Attach the 6 claws and 6 clips to install the finish plate.
- Install back door weatherstrip
- Install rear floor no. 1 Mat support side plate
- W/o rear no. 2 Seat:
- Attach the 7 clips to install the side plate.
- Install the 4 screws.
- W/ rear no. 2 Seat:
- Attach the 8 clips to install the side plate.
- Install rear floor no. 3 Board
- Install rear floor no. 2 Board
- Install rear no. 2 Seat assembly lh (w/ rear no. 2 Seat) (see page se-121)
- Install rear no. 2 Seat assembly rh (w/ rear no. 2 Seat)
Hint:
Use the same procedures described for the lh side.
- Install no. 2 Seat leg cover lh (w/ rear no. 2 Seat) (see page se-123)
- Install no. 2 Seat leg cover rh (w/ rear no. 2 Seat)
Hint:
Use the same procedures described for the lh side.
- Install no. 2 Seat hinge cover lh (w/ rear no.
2 Seat) (see page se-123)
- Install no. 2 Seat hinge cover rh (w/ rear no.
2 Seat)
Hint:
Use the same procedures described for the lh side.
- Install deck board assembly (w/o rear no. 2 Seat)
- Install rear floor no. 1 Board (w/o rear no.
2 Seat)
- Install tonneau cover assembly (w/o rear no. 2 Seat)
- Install package tray trim pocket subassembly (w/o rear no. 2 Seat)
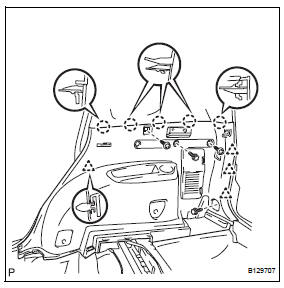
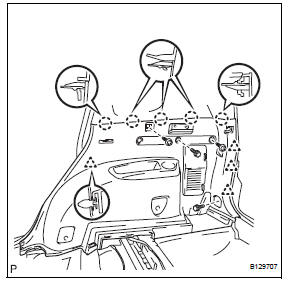
- Install center pillar garnish lh
- Attach the clip to install the garnish.
- Install the 2 screws.
- Install center pillar garnish rh
Hint:
Use the same procedures described for the lh side.

- Install lower center pillar garnish lh
- Attach the 2 claws and 2 clips to install the garnish.

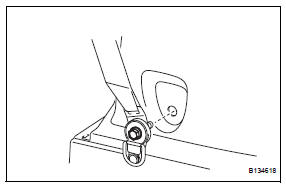
- Connect the front seat outer belt's floor anchor.
- Connect the floor anchor with the bolt.
Torque: 42 n*m (428 kgf*cm, 31 ft.*Lbf)
- Install the anchor cover.
- Install lower center pillar garnish rh
Hint:
Use the same procedures described for the lh side.
- Install rear door opening trim weatherstrip lh
- Install rear door opening trim weatherstrip rh
- Install rear door scuff plate lh
- Attach the 9 claws and 2 clips to install the scuff plate.
- Install rear door scuff plate rh
Hint:
Use the same procedures described for the lh side.
- Install instrument panel sub-assembly (see page ip-9)
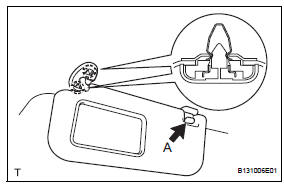
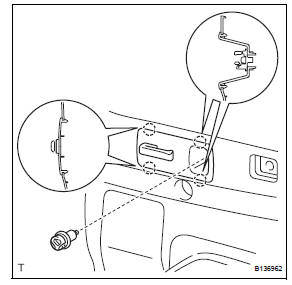
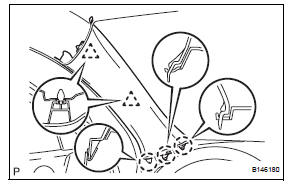
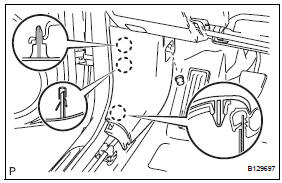
- Install front pillar garnish lh
- W/ curtain shield airbag:
- Remove the piece of cloth or nylon.
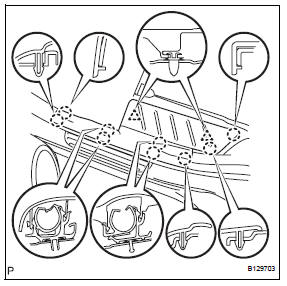
- Install the 4 wire harness clamps.
- W/ curtain shield airbag:
- Install 2 new clips labeled a to the vehicle body.
- Set the 3 claws of the pillar garnish to the area labeled b.
- Insert the tips of the clips labeled a into the pillar garnish's holes.
- Using needle-nose pliers, rotate the tips of clips labeled a 90°. Then push the pillar garnish toward the vehicle body to attach the base of the 2 clips labeled a.
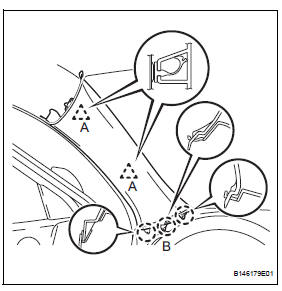
- W/o curtain shield airbag:
- Attach the 2 clips and 3 claws to install the garnish.
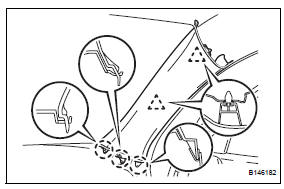
- W/ curtain shield airbag:
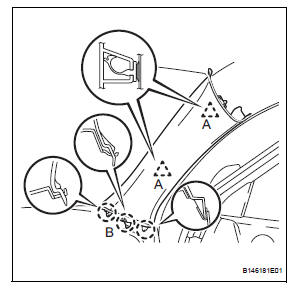
- Install 2 new clips labeled a to the vehicle body.
- Set the 3 claws of the pillar garnish to the area labeled b.
- Insert the tips of the clips labeled a into the pillar garnish's holes.
- Using needle-nose pliers, rotate the tips of clips labeled a 90°. Then push the pillar garnish toward the vehicle body to attach the base of the 2 clips labeled a.
- W/o curtain shield airbag:
- Attach the 2 clips and 3 claws to install the garnish.
- Install glove compartment door assembly (see page ip-25)
- Install instrument panel register assembly center (see page ip-10)
- Install radio receiver (see page ip-10)
- Install no. 2 Instrument cluster finish panel center (see page ip-10)
- Install no. 1 Instrument cluster finish panel center (see page ip-10)
- Install combination meter assembly (see page ip-11)
- Install instrument cluster finish panel assembly (see page ip-11)
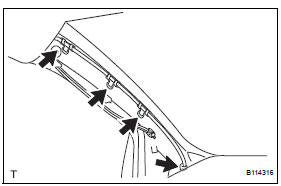
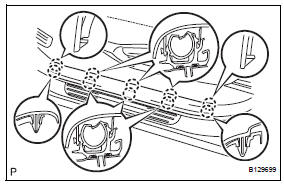
- Install front door opening trim weatherstrip lh
- Install front door opening trim weatherstrip rh
- Install cowl side trim board lh
- Attach the 3 claws to install the trim board.
- Attach the 3 claws to install the trim board.
- Install cowl side trim board rh
Hint:
Use the same procedures described for the lh side.
- Install front door scuff plate lh
- Attach the 10 claws to install the scuff plate.
- Install front door scuff plate rh
Hint:
Use the same procedures described for the lh side.
- Connect cable to negative battery terminal
 Installation (2005/11-2006/01)
Install no. 1 Roof silencer pad
W/o sliding roof:
Install the 5 silencer pads.
W/ sliding roof:
Install the 2 silencer pads.
Install no. 3 Roof silencer pad
Install ...

Other materials:
Brake pedal load sensing switch
On-vehicle inspection
Inspect brake pedal load sensing switch
Hint:
Do not remove the brake pedal load sensing switch
from the brake pedal support.
When there is a malfunction in the brake pedal load
sensing switch, replace the brake pedal support.
Disconnect the brake pedal l ...
Vehicle lift and support locations
Notice about vehicle condition when
jacking up vehicle
The vehicle must be unloaded before jacking up /
lifting up the vehicle. Never jack up / lift up a heavily
loaded vehicle.
When removing heavy parts such as the engine and
transmission, the center of gravity of the vehicle
m ...
Rear coil spring
Components
Removal
Hint:
Use the same procedures for the rh side and lh side.
The procedures listed below are for the lh side.
Remove rear wheel
Remove skid control sensor wire (for 2wd)
(see page bc-198)
Remove rear speed sensor lh (for 4wd) (see
page bc-205)
Disconnect ...
