Toyota RAV4 (XA50) 2019-2026 Owners Manual: Light bulbs
You may replace the following bulbs by yourself. The difficulty level of replacement varies depending on the bulb. If necessary bulb replacement seems difficult to perform, contact your Toyota dealer.
For more information about replacing other light bulbs, contact your Toyota dealer.
Preparing for light bulb replacement
Check the wattage of the light bulb to be replaced.
Bulb location
Front (type A)
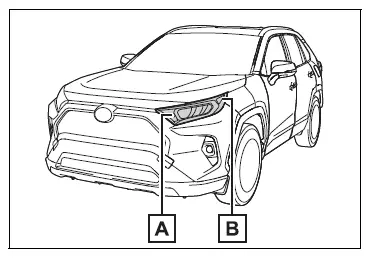
- Front turn signal/parking lights
- Front side marker lights
Front (type B)
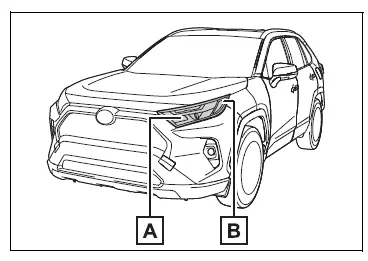
- Front turn signal lights
- Front side marker lights
Front (type C)
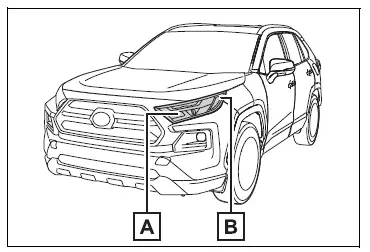
- Front turn signal lights
- Front side marker lights
Rear
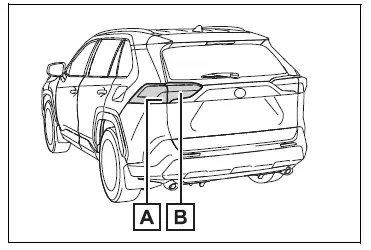
- Rear turn signal lights
- Back-up lights
Ôľá Lights that need to be replaced by your Toyota dealer
- Headlights
- Front turn signal lights (LED type)
- Daytime running lights
- Parking lights (LED type)
- Front side marker lights (LED type)
- Fog lights (if equipped)
- Side turn signal lights (if equipped)
- Tail lights
- Stop lights
- Rear side marker lights
- High mounted stoplight
- License plate lights
- Outer foot lights (if equipped)
ÔľáLED lights
The lights other than the following lights each consist of a number of LEDs. If any of the LEDs burn out, take your vehicle to your Toyota dealer to have the light replaced.
- Front turn signal lights (bulb type)
- Parking lights (type A)
- Front side marker lights (bulb type)
- Rear turn signal lights
- Back-up lights
- Outer foot lights (if equipped)
ÔľáCondensation build-up on the inside of the lens
Temporary condensation build-up on the inside of the light lens does not indicate a malfunction. Contact your Toyota dealer for more information in the following situations:
- Large drops of water have built up on the inside of the lens.
- Water has built up inside the light.
Replacing light bulb
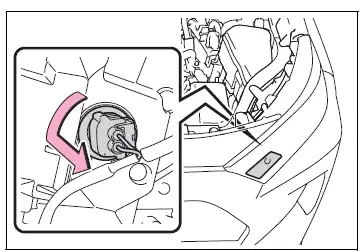
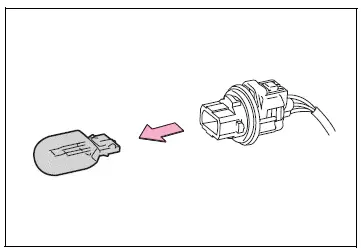
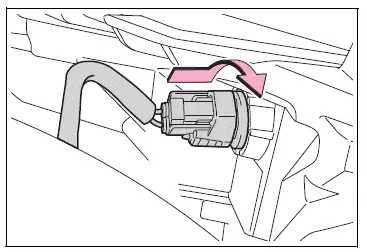
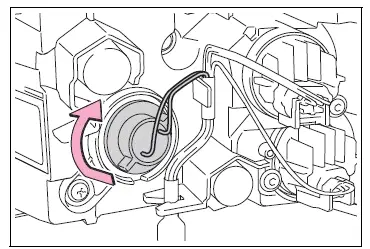
Ôľá Front turn signal/parking lights (type A)
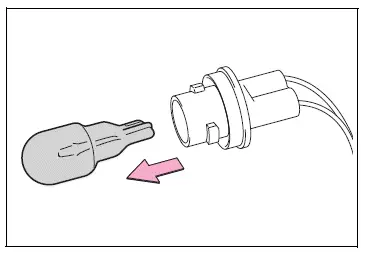
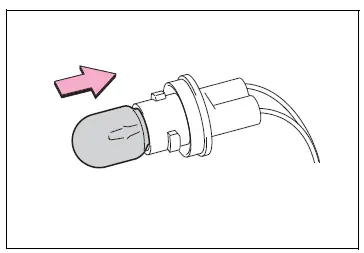
1. Turn the bulb base counterclockwise.
2. Remove the light bulb.
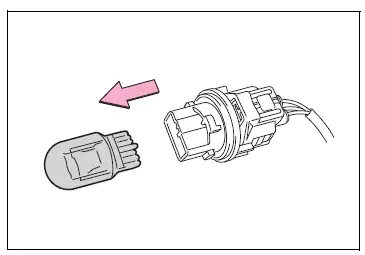
3. Install a new light bulb then install the bulb base to the light unit by inserting it and turning the bulb base clockwise.
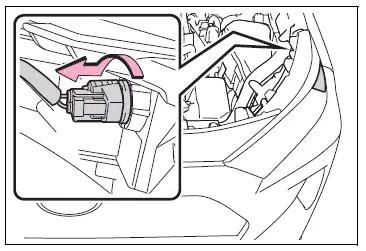
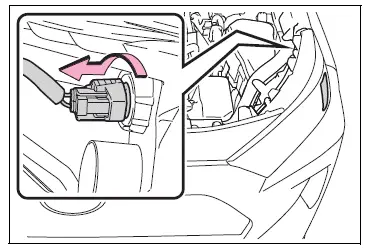
Ôľá Front turn signal lights (type B and C)
1. Turn the bulb base counterclockwise.
2. Remove the light bulb.
3. Install a new light bulb then install the bulb base to the light unit by inserting it and turning the bulb base clockwise.
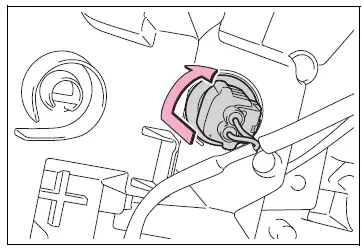
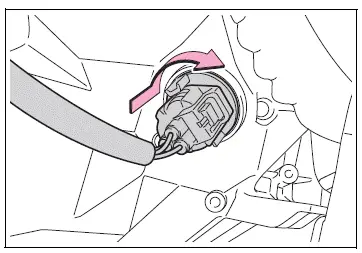
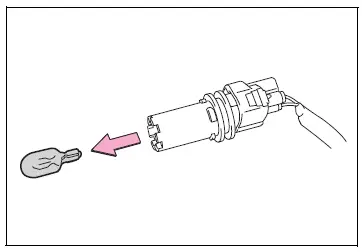
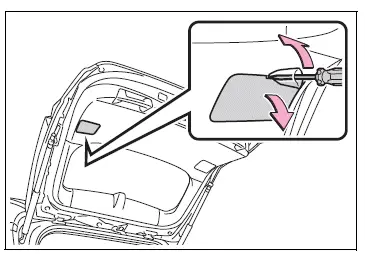
Ôľá Front side marker lights (type A)
1. Turn the bulb base counterclockwise.
2. Remove the light bulb.
3. Install a new light bulb then install the bulb base to the light unit by inserting it and turning the bulb base clockwise.
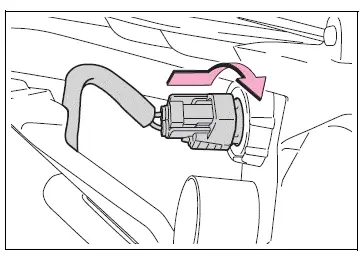
Ôľá Front side marker lights (type B and C)
1. Turn the bulb base counterclockwise.
2. Remove the light bulb.
3. Install a new light bulb then install the bulb base to the light unit by inserting it and turning the bulb base clockwise.
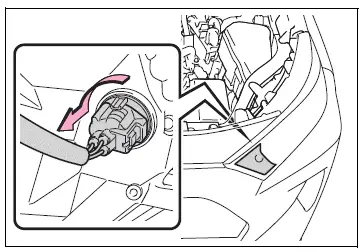
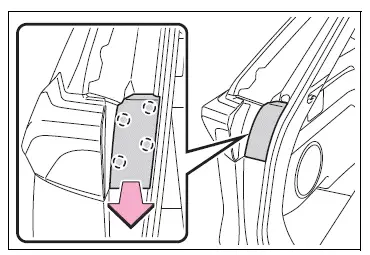
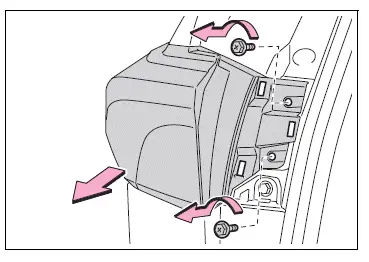
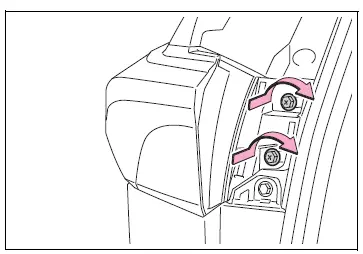
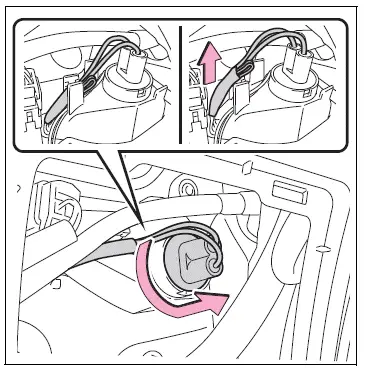
Ôľá Rear turn signal lights
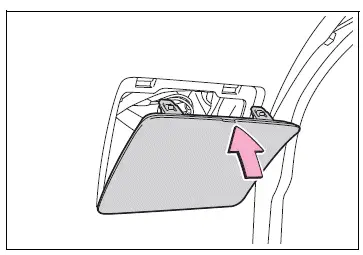
1. Open the back door and remove the cover.
2. Remove the screws and remove the unit.
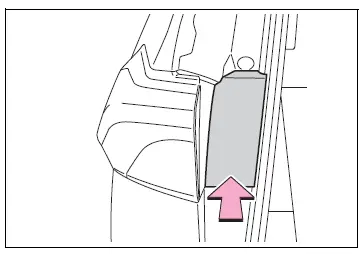
Remove the lamp assembly by pulling it directly backward from the rear of the vehicle.
3. Turn the bulb base counterclockwise.
4. Remove the light bulb.
5. Install a new light bulb then install the bulb base to the light unit by inserting it and turning the bulb base clockwise.
6. Align the grooves on the light unit with the claws, and insert the light unit straight so that the pin on the light unit fit into the hole.
Confirm that the light unit is completely secured.
7. Reinstall the screws.
8. Reinstall the cover.
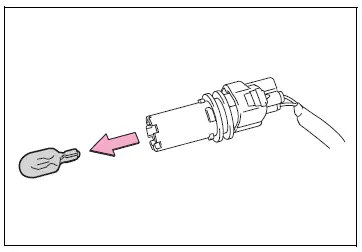
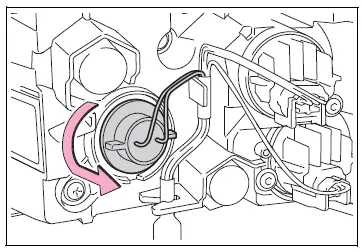
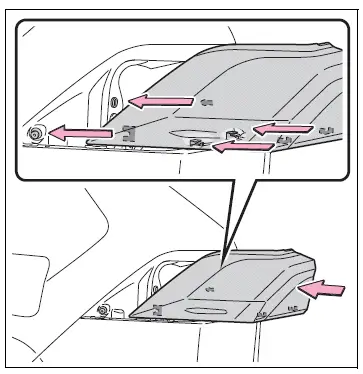
Ôľá Back-up lights
1. Open the back door and remove the cover.
To prevent damage to the cover, protect the tip of the screwdriver with a rag.
2. Turn the bulb base counterclockwise.
Remove the cord from the clip before turning the bulb base.
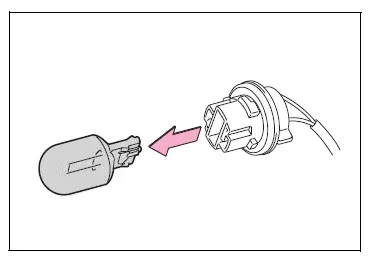
3. Remove the light bulb.
4. Install a new light bulb.
5. Install the bulb base to the light unit by inserting it and turning the bulb base clockwise.
Secure the cord with the clip back again after installing the bulb base.
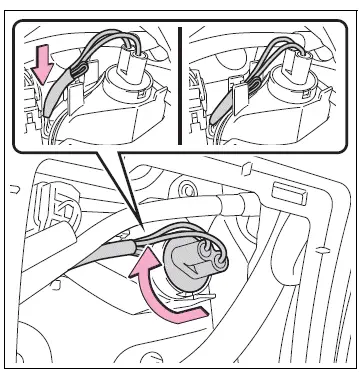
6. Reinstall the cover.
WARNING
ÔľáReplacing light bulb
- Turn off the light. Do not attempt
to replace the bulb immediately
after turning off the light.
The bulb become very hot and may cause burns.
- Do not touch the glass portion
of the light bulb with bare
hands. When it is unavoidable
to hold the glass portion, use
and hold with a clean dry cloth
to avoid getting moisture and
oils on the bulb.
Also, if the bulb is scratched or dropped, it may blow out or crack.
- Fully install light bulb and any parts used to secure it. Failure to do so may result in heat damage, fire, or water entering the light unit. This may damage the light or cause condensation to build up on the lens.
- Do not attempt to repair or disassemble
light bulbs, connectors,
electric circuits or
component parts.
Doing so may result in death or serious injury due to electric shock.
ÔľáTo prevent damage or fire
- Make sure bulb is fully seated and locked.
- Check the wattage of the bulb before installing to prevent heat damage.
 Headlight aim
Vertical movement adjusting
bolts
Adjustment bolt A
Adjustment bolt B
Before checking the headlight
aim
Make sure the vehicle has a
full tank of gasoline and the
area around the headlight is
...

Other materials:
Reassembly
Install piston
Using a small screwdriver, install a new snap ring
onto one end of the piston pin hole.
Hint:
Make sure that the end gap of the snap ring is not
aligned with the pin hole cutout portion of the piston.
Gradually heat the piston up to 80 to 90┬░c (176 to
194┬░f ...
Oxygen (a/f) sensor heater control circuit
Hint:
Although the dtc titles say oxygen sensor, these dtcs relate to the
air-fuel ratio (a/f) sensor.
Sensor 1 refers to the sensor mounted in front of the three-way
catalytic converter (twc) and
located near the engine assembly.
Description
Refer to dtc p2195 (see page es-292 ...
Using the ÔÇťsetupÔÇŁ menu (ÔÇťbluetooth*ÔÇŁ menu)
Registering a bluetooth® device in the system allows the system
to function. The following functions can be used for registered
devices:
Functions and operation procedures
Press the ÔÇťsetupÔÇŁ button and select ÔÇťbluetooth*ÔÇŁ using the
ÔÇťtuneÔÇóscrollÔÇŁ knob.
Press the knob and sele ...
