Toyota RAV4 (XA40) 2013-2018 Service Manual: Low pitched horn
Components
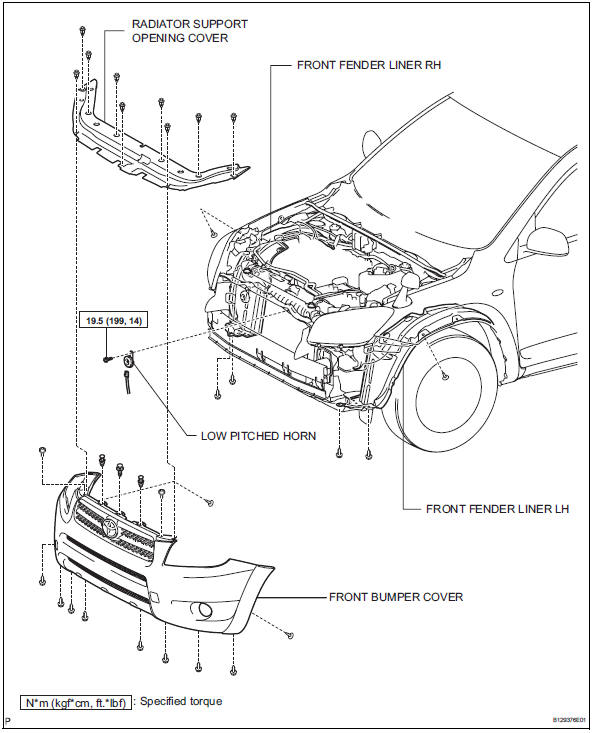
Removal
- Remove radiator support opening cover (see page et-4)
- Remove front fender liner lh (see page et-4)
- Remove front fender liner rh (see page et-4)
- Remove front bumper cover (see page et-5)
- Remove low pitched horn
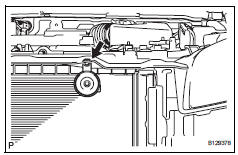
- Disconnect the horn connector.
- Remove the bolt and horn.
Inspection
- Inspect low pitched horn
- Apply battery voltage to the horn and check the operation of the horn.
Ok 
If the result is not as specified, replace the horn.
Installation
- Install low pitched horn
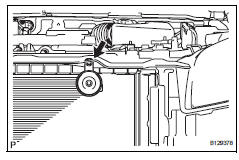
- Place the stay onto the baffle part of the radiator support upper, and then install the horn with the bolt.
Torque: 19.5 N*m (199 kgf*cm, 14 ft.*Lbf)
- Connect the horn connector.
- Install front bumper cover (see page et-11)
- Install front fender liner rh (see page et- 12)
- Install front fender liner lh (see page et- 12)
- Install radiator support opening cover (see page et-12)
 Horn relay
On-vehicle inspection
Remove engine room no. 1 Relay block cover
Inspect integration relay (unit a: horn relay)
Using a screwdriver, detach the 2 claws and
disconnect the integration ...
 High pitched horn
Components
Removal
Remove radiator support opening cover
(see page et-4)
Remove front fender liner lh (see page et-4)
Remove front fender liner rh (see page et-4)
Remove front bumper ...
Other materials:
Toyota Safety Sense 2.5
The Toyota Safety Sense
2.5 consists of the following
drive assist systems and
contributes to a safe and
comfortable driving experience:
Driving assist system
PCS (Pre-Collision System)
LTA (Lane Tracing Assist)
AHB (Automatic High
Beam)
RSA (Road Sign Assist) (if
equipped)
Dynamic radar cru ...
Installation
Hint:
Use the same procedures for the rh side and lh side.
The procedures listed below are for the lh side.
When replacing the clip, heat the clip and body using a
heat light.
Standard heating temperature
Notice:
Do not heat the clip and vehicle body excessively.
Replace roof dri ...
Diagnosis system
Description
Engine immobiliser system data and diagnostic
trouble codes (dtcs) can be read through the
vehicle's data link connector 3 (dlc3). In some
cases, a malfunction may be occurring in the engine
immobiliser system even though the security
indicator light is not illuminated ...
