Toyota RAV4 (XA40) 2013-2018 Service Manual: Forward clutch
Components
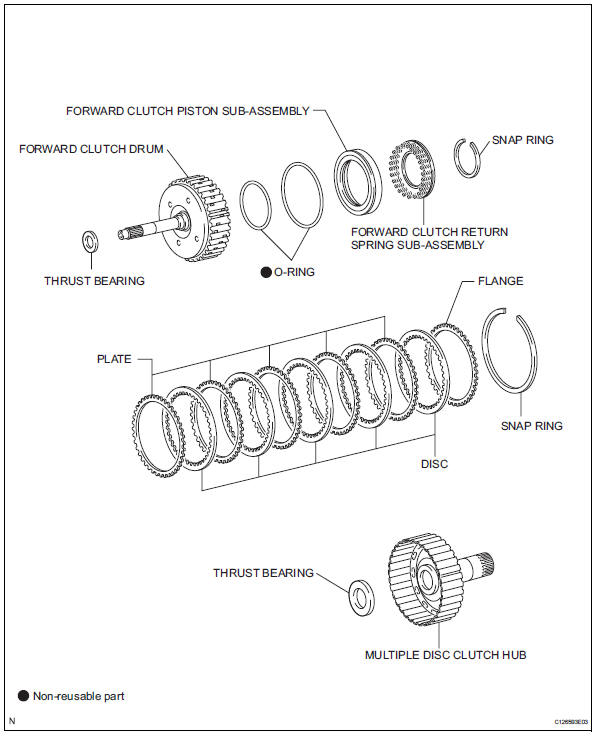
Disassembly
- Inspect forward clutch (see page ax-227)
- Remove forward multiple disc clutch disc
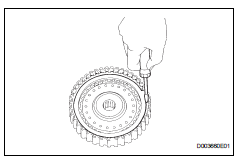
- Using a screwdriver, remove the snap ring.
- Remove the flange , 5 discs and 5 plates from the input shaft.
- Inspect forward multiple disc clutch disc (see page ax-228)
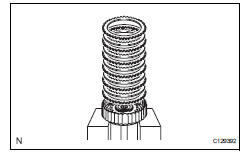
- Remove forward clutch return spring sub-assembly
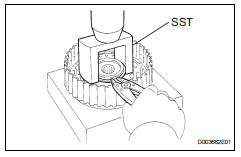
- Place sst on the spring retainer and compress the return spring with a press.
Sst 09350-32014 (09351-32070)
- Using a snap ring expander, remove the snap ring.
- Remove the piston return spring.
- Inspect forward clutch return spring sub-assembly (see page ax-228)
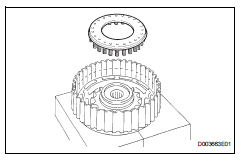
- Remove forward clutch piston subassembly
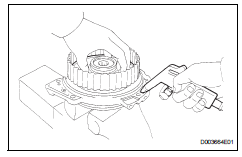
- Place the forward clutch drum onto the oil pump.
- Holding the forward clutch piston with your hand, apply compressed air (392 kpa, 4.0Kgf/cm2, 57 psi) to the oil pump to remove the forward clutch piston.
Hint:
When the piston is slanted and cannot be removed, remove it by pushing down the protruding side and applying compressed air again, or using needlenose pliers (with its tips wrapped in tape).
- Using a screwdriver, pry out the 2 o-rings.
- Remove forward clutch piston subassembly (see page ax-228)
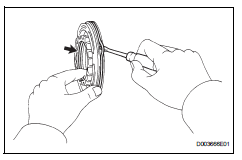
- Remove input shaft oil seal ring
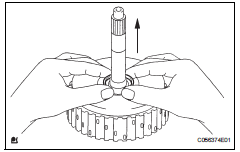
Inspection
- Inspect pack clearance of forward clutch
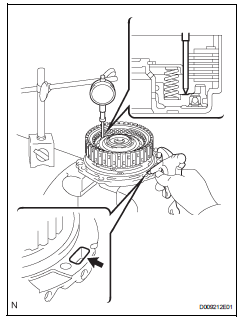
- Install the forward clutch on the oil pump.
Notice:
Be careful not to damage the oil seal ring of oil pump.
- Using a dial indicator, measure the forward clutch piston stroke while applying and releasing compressed air (392 kpa, 4.0 Kgf/cm2, 57 psi)
Standard position stroke: 1.74 To 2.08 Mm (0.0685 To 0.0819 In.)
If the piston stroke is less than the minimum, the parts may have been assembled incorrectly. Check and reassemble again.
If the clearance is not as specified, select another flange.
Hint:
As the opening is big, cover it with a shop rag to prevent the compressed air from being discharged.
- Inspect forward multiple disc clutch disc
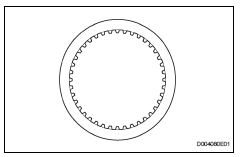
- Check to see if the sliding surface of the disc, plate
and flange are worn or burnt.
If necessary, replace them.
Hint:
- If the lining of the disc is peeling off or discolored, replace all discs.
- Before assembling new discs, soak them in atf for at least 15 minutes.
- Inspect forward clutch return spring sub-assembly
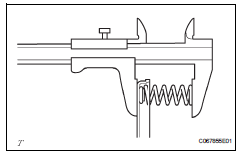
- Using a vernier caliper, measure the free length of the spring together with the spring seat.
Standard free length: 28.23 Mm (1.1102 In.)
- Inspect forward clutch piston subassembly
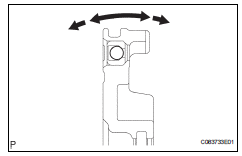
- Shake the piston to check that the check ball is not stuck.
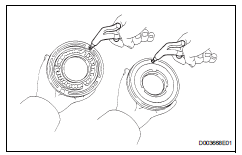
- Check that air does not leak from the valve when applying low compressed air (392 kpa, 4.0 Kgf*cm2, 57 psi)
Reassembly
- Install input shaft oil seal ring
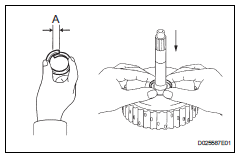
- Compress the oil seal ring from both sides to reduce dimension a
Standard dimension a: 5 mm (0.197 In.)
- Coat the oil seal ring with atf and install it to the input shaft.
- Install forward clutch piston subassembly
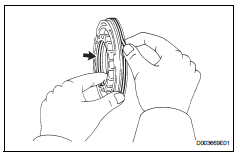
- Coat 2 new o-rings with atf, and install them to the forward clutch piston.
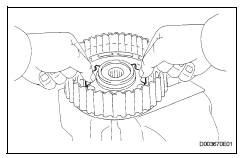
- Install the forward clutch piston to the forward clutch drum.
- Install forward clutch return spring sub-assembly
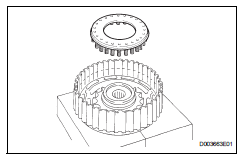
- Place the return spring onto the piston.
Sst 09350-32014 (09351-32070)
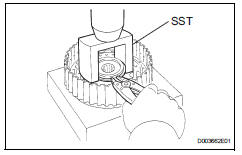
- Place sst on the return spring, and compress the return spring with a press.
- Install the snap ring with a snap ring expander. Be sure the end gap of the snap ring is not aligned with the spring retainer claw.
Notice:
- Stop the press when the spring sheet is lowered to the place 1 to 2 mm (0.039 To 0.078 In.) From the snap ring groove.
- This prevents the spring sheet from being deformed.
- Do not expand the snap ring excessively.
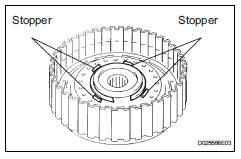
- Set the end gap of the snap ring in the piston shown in the illustration.
Notice:
The end gap of the snap ring should not coincide with any of the stoppers.
- Install forward multiple disc clutch disc
- Install the 5 plates, 5 discs and flange.
Install in order: p - d - p - d - p - d - p - d - p - d - f
Hint:
P = plate
D = disc
F = flange
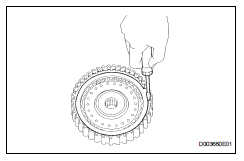
- Using a screwdriver, install the snap ring.
- Check that the end gap of the snap ring is not aligned with one of the cutouts.
- Inspect pack clearance of forward clutch
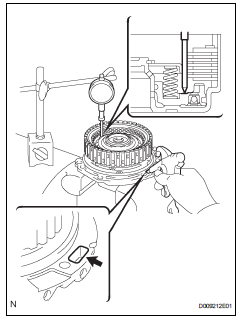
- Install the forward clutch on the oil pump.
Notice:
Be careful not to damage the oil seal ring of the oil pump.
- Using a dial indicator, measure the forward clutch piston stroke while applying and releasing compressed air (392 kgf/cm2, 4.0 Kpa, 57 psi)
Standard piston stroke: 1.74 To 2.08 Mm (0.0685 To 0.0819 In.)
If the piston stroke is less than the minimum, parts may have been assembled incorrectly. Check and reassemble again. If the clearance is not as specified, select another flange.
Notice:
There are 5 different flanges in thickness.
Standard flange thickness


- Inspect forward multiple disc clutch clutch disc
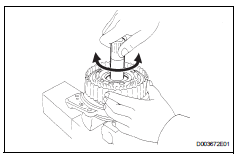
- Inspect the clutch disc rotation.
- After inserting the multiple disc clutch into the multiple disc clutch hub, rotate the forward clutch and check that the disc lightly rotates.
Notice:
Do not place the forward clutch in a vise.
 Second brake piston
Components
Disassembly
Remove 2nd brake piston return spring sub-assembly
Place sst on the return spring and compress.
Using a screwdriver, pry out the snap ring.
Remove the pis ...
 Direct clutch
Components
Disassembly
Inspect pack clearance of direct clutch
(see page ax-234)
Remove direct multiple disc clutch disc
Using a screwdriver, pry out the snap ring from the
direct ...
Other materials:
Front lower ball joint
Components
Removal
Hint:
Use the same procedures for the rh side and lh side.
The procedures listed below are for the lh side.
Remove front wheel
Remove front speed sensor lh (for 2wd) (see
page bc-191)
Remove front brake cylinder assembly lh
(see page br-40)
Remove front ...
Removal
Discharge fuel system pressure (see page
fu-9)
Disconnect cable from negative battery
terminal
Caution:
Wait at least 90 seconds after disconnecting the
cable from the negative (-) battery terminal to
prevent airbag and seat belt pretensioner activation.
Remove hood sub-assembly ( ...
Parking brake assembly
Components
Disassembly
Hint:
Use the same procedures for the lh side and rh side.
The procedures listed below are for the lh side.
Remove rear wheel
Disconnect rear disc brake cylinder
mounting lh (see page br-55)
Remove parking brake shoe adjusting
hole plug
Remove t ...
