Toyota RAV4 (XA40) 2013-2018 Service Manual: Front door courtesy switch
Components
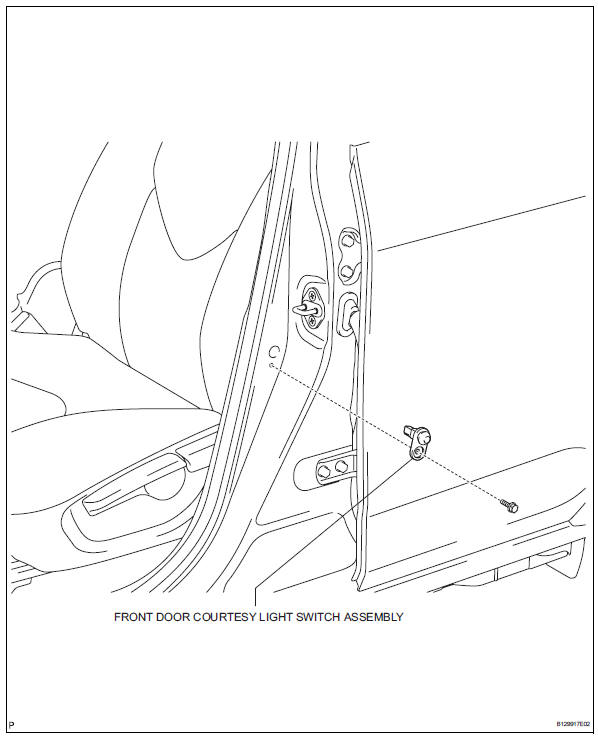
Removal
Hint:
- Use the same procedures for the rh and lh sides.
- The procedures listed below are for the lh side.
- Disconnect cable from negative battery terminal
Caution:
Wait at least 90 seconds after disconnecting the cable from the negative (-) battery terminal to prevent airbag and seat belt pretensioner activation.
- Remove front door courtesy light switch assembly
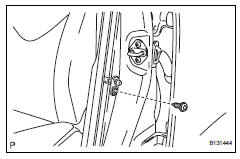
- Remove the bolt and switch.
- Disconnect the connector.
Inspection
- Inspect front door courtesy light switch assembly
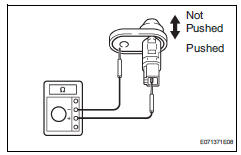
- Measure the resistance of the switch.
Standard resistance 
If the result is not as specified, replace the switch assembly.
 Hazard warning switch
Components
Removal
Disconnect cable from negative battery
terminal
Caution:
Wait at least 90 seconds after disconnecting the
cable from the negative (-) battery terminal to
prevent ai ...
 Rear door courtesy switch
Components
Removal
Hint:
Use the same procedures for the rh and lh sides.
The procedures listed below are for the lh side.
Disconnect cable from negative battery
terminal
Cautio ...
Other materials:
Cleaning and protecting the vehicle interior
Perform cleaning in a manner
appropriate to each
component and its material.
Protecting the vehicle
interior
Remove dirt and dust using a
vacuum cleaner. Wipe dirty
surfaces with a cloth dampened
with lukewarm water.
If dirt cannot be removed,
wipe it off with a soft cloth
dampened with neut ...
Rear window wiper
and washer
Turning the end of the lever turns on the rear window wiper, and pushing
the lever away from you turns on the rear window wiper and
washer.
For the u.S.A.
Intermittent operation
Normal operation
Washer/wiper dual operation
For Canada
Intermittent operation
Normal oper ...
Brake switch "B" circuit high
Description
The purpose of this circuit is to prevent the engine from stalling while
driving in the lock-up condition when
the brakes are suddenly applied.
When the brake pedal is depressed, this switch sends a signal to the ecm. Then
the ecm cancels the
operation of the lock-up clutch ...
