Toyota RAV4 (XA40) 2013-2018 Service Manual: Map light assembly
Components
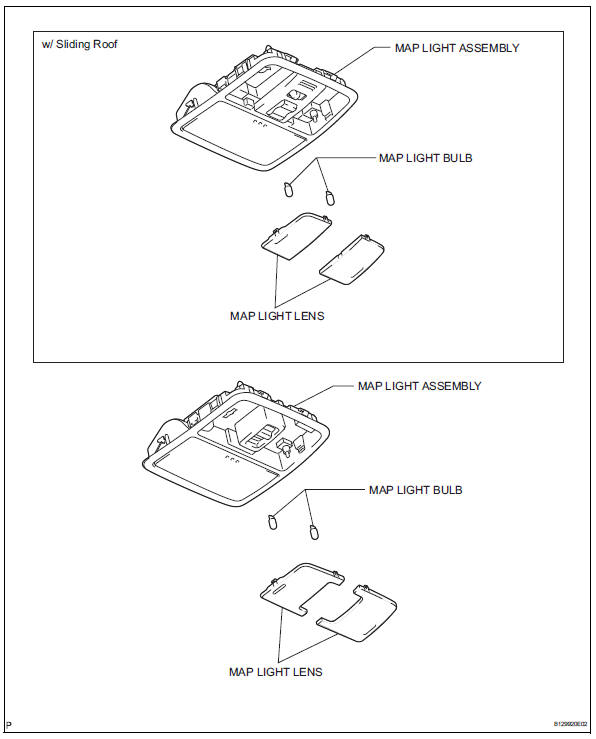
Removal
- Disconnect cable from negative battery terminal
Caution:
Wait at least 90 seconds after disconnecting the cable from the negative (-) battery terminal to prevent airbag and seat belt pretensioner activation.
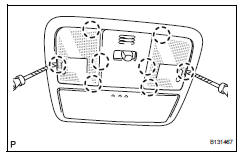
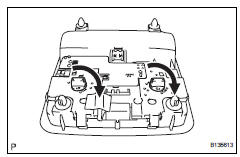
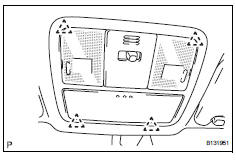
- Remove map light assembly
- Detach the 4 clips and remove the map light.
- Disconnect the light connector.
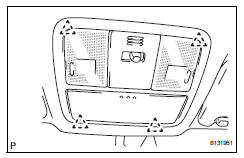
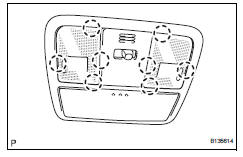
- Remove map light lens
- Using a screwdriver, pry out the 8 claws and remove the map light lens.
Hint:
Tape the screwdriver tip before use.
Disassembly
- Remove map light bulb
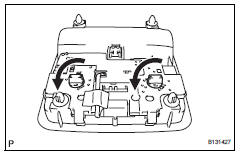
- Remove the 2 bulbs from the light.
Inspection
- Inspect map light assembly
- Connect the battery's positive (+) lead to terminal 6 and the negative (-) lead to terminal 1, and then check that the light comes on when the switch is in the door position.
Ok: light comes on.
If the result is not as specified, replace the light assembly.
- Connect the battery's positive (+) lead to terminal 6 and the negative (-) lead to terminal 7, and then check that the light comes on when the switch is in the on position.
Ok: light comes on.
If the result is not as specified, replace the light assembly.
Reassembly
- Install map light bulb
- Install the 2 bulbs to the light.
Installation
- Install map light lens
- Attach the 8 claws to install the map light lens.
- Install map light assembly
- Connect the light connector.
- Attach the 4 clips to install the map light.
- Connect cable to negative battery terminal
 High mounted stop light assembly
Components
Removal
Disconnect cable from negative battery
terminal
Caution:
Wait at least 90 seconds after disconnecting the
cable from the negative (-) battery terminal to
prevent ai ...
 Room light assembly
Components
Removal
Disconnect cable from negative battery
terminal
Caution:
Wait at least 90 seconds after disconnecting the
cable from the negative (-) battery terminal to
prevent ai ...
Other materials:
Coolant thermostat (coolant temperature below thermostat regulating
temperature)
Hint:
This dtc relates to the thermostat.
Description
This dtc is set when the engine coolant temperature (ect) does not reach 75°c
(167°f) despite
sufficient engine warm-up time having elapsed.
Monitor description
The ecm estimates the ect based on the starting temperature, en ...
Child restraint systems
Before installing a child
restraint system in the vehicle,
there are precautions
that need to be observed,
different types of child
restraint systems, as well as
installation methods, etc.,
written in this manual.
Use a child restraint system
when riding with a small child
that cannot properly use a ...
Catalyst system efficiency below threshold (bank 1)
Monitor description
The ecm uses sensors mounted in front of and behind the three-way catalytic
converter (twc) to
monitor its efficiency.
The first sensor, the air-fuel ratio (a/f) sensor, sends pre-catalyst
information to the ecm. The second
sensor, the heated oxygen (ho2) sensor, se ...
