
Toyota RAV4 (XA40) 2013-2018 Service Manual: Steering angle sensor
Components
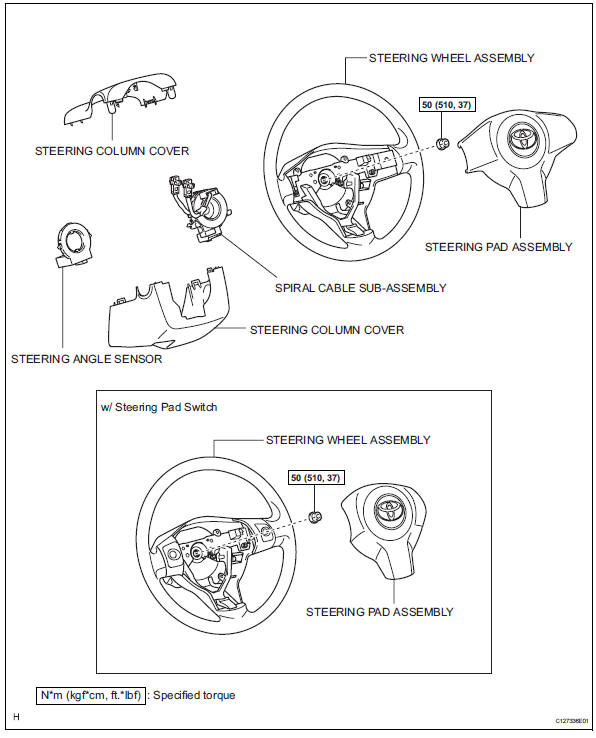
Removal
- Precaution
Caution:
Be sure to read the "precaution" thoroughly before servicing (see page rs-1).
- Disconnect cable from negative battery terminal
Caution:
Wait at least 90 seconds after disconnecting the cable from the negative (-) battery terminal to prevent airbag and seat belt pretensioner activation.
- Place front wheels facing straight ahead
- Remove steering pad assembly (see page rs- 336)
- Remove steering wheel assembly (see page sr-12)
- Remove steering column cover (see page sr-12)
- Remove spiral cable sub-assembly (see page sr-13)
- Remove steering angle sensor
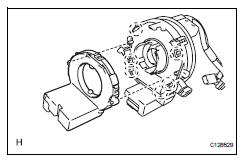
- Detach the 6 claws and remove the sensor from the spiral cable.
Inspection
- Inspect steering angle sensor
- Inspect the sensor. If any of the following occurs, replace the sensor with a new one:
- The surface of the sensor is cracked, dented, or chipped.
- The connector or wire harness is scratched, cracked, or damaged.
- The sensor has been dropped.
Installation
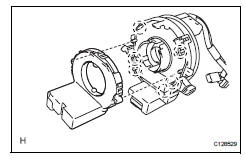
- Install steering angle sensor
- Align the locating pins, attach the 6 claws and install the sensor to the spiral cable.
- Install spiral cable sub-assembly (see page sr-20)
- Install steering column cover (see page sr- 20)
- Install steering wheel assembly (see page sr-21)
- Install steering pad assembly (see page rs- 336)
- Inspect steering wheel center point
- Connect cable to negative battery terminal
Notice:
When reconnecting the cable to the negative (-) battery terminal after installing the steering angle sensor, check that the front tires and steering wheel are kept aligned straight ahead before and after connecting the cable to the negative (-) battery terminal.
- Inspect steering pad assembly (see page rs- 337)
- Check srs warning light
- Check the srs warning light (see page rs-37).
 Yaw rate and deceleration sensor
Components
Removal
Disconnect cable from negative battery
terminal
Caution:
Wait at least 90 seconds after disconnecting the
cable from the negative (-) battery terminal to
prevent ai ...
 Brake pedal load sensing switch
On-vehicle inspection
Inspect brake pedal load sensing switch
Hint:
Do not remove the brake pedal load sensing switch
from the brake pedal support.
When there is a malfunction in the br ...
Other materials:
Short in front driver side pretensioner squib circuit
Description
The driver side front pretensioner squib circuit consists of the center
airbag sensor and the front seat
outer belt lh.
This circuit instructs the srs to deploy when the deployment conditions are met.
These dtcs are recorded when a malfunction is detected in the front prete ...
Rear differential carrier assembly
Components
...
Terminals of ecu (2005/11-2006/01)
Notice:
Turn the ignition switch off before measuring the
resistances of the main wire and the branch wire.
After the ignition switch is turned off, check that the
key reminder warning system and light reminder
warning system are not in operation.
Before measuring the resistance, leave ...
