Toyota RAV4 (XA40) 2013-2018 Service Manual: Dtc check / clear
- Check dtc
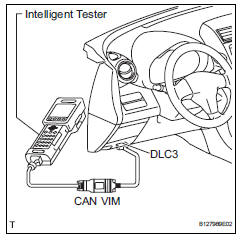
- Connect the intelligent tester (with can vim) to the dlc3.
- Turn the ignition switch on and turn the intelligent tester on.
- Select the following menu items: diagnosis / obd/mobd / immobiliser / dtc info / current codes.
- Check dtcs and then write them down.
Hint:
Refer to the intelligent tester operator's manual for further details.
- Confirm the details of the dtcs (see page ei-20).
- Clear dtc
- Connect the intelligent tester (with can vim) to the dlc3.
- Turn the ignition switch on (do not start the engine) and turn the intelligent tester on.
- Select the following menu items: diagnosis / obd/mobd / immobiliser / dtc info / clear codes.
Hint:
Refer to the intelligent tester operator's manual for further details.
- Erase dtcs by pressing the yes button on the tester.
Hint:
Refer to the intelligent tester operator's manual for further details.
 Diagnosis system
Description
Engine immobiliser system data and diagnostic
trouble codes (dtcs) can be read through the
vehicle's data link connector 3 (dlc3). In some
cases, a malfunction may be occurr ...
 Data list / active test
Read data list
Hint:
Using the intelligent tester's data list allows switch,
sensor, actuator and other item values to be read without
removing any parts. Reading the data list early in
trou ...
Other materials:
Freeze frame data
Freeze frame data
Notice:
It is difficult to show the specified values
(judgment values) clearly because freeze frame
data values change significantly due to
differences in measurement conditions,
surroundings, or vehicle conditions. For this
reason, there may be a problem even w ...
How to proceed with troubleshooting
Hint:
Use these procedures to troubleshoot the engine immobiliser
system.
*: Use the intelligent tester.
Vehicle brought to workshop
Inspect battery voltage
Standard voltage:
11 to 14 v
If the voltage is below 11 v, recharge or replace the battery
before proceeding.
cran ...
Can communication system
Precaution
Precaution
Turn the ignition switch off before measuring the
resistance of the main wire and the branch wire.
After the ignition switch is turned off, check that the
key reminder warning system and light reminder
warning system are not in operation.
Before measuring th ...
