Toyota RAV4 (XA40) 2013-2018 Service Manual: On-vehicle inspection
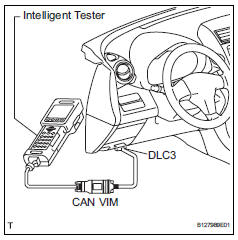
- Connect intelligent tester
- Connect the intelligent tester to the dlc3.
- Start the engine and idle it.
- Select the active test mode on the intelligent tester.
Hint:
Please refer to the intelligent tester operator's manual for further details.
- Check actuator motor operation
Notice:
Do not keep a motor relay on for more than 5 seconds. When operating it consecutively, wait 20 seconds between each operation.
- Turn the motor relay on and check the actuator motor operation noise.
- Turn the motor relay off.
- Fully depress the brake pedal and hold it for approximately 15 seconds. Check that the pedal's initial depth is maintained for the entire 15 seconds.
- Turn the motor relay on and check that the pedal does not pulsate.
- Turn the motor relay off and release the pedal.
- Check brake actuator solenoid (for front right wheel)
Notice:
- Be sure to follow the procedures below when turning on a solenoid.
- Do not keep a solenoid on for more than 10 seconds. When operating it consecutively, wait 20 seconds between each operation.
- Do not keep a motor relay on for more than 5 seconds. When operating it consecutively, wait 20 seconds between each operation.
- With the pedal depressed as much as possible, perform the following operations.
- Turn the sfrh and sfrr solenoids on simultaneously, and check that the pedal cannot be depressed further.
- Turn the sfrh and sfrr solenoids off simultaneously, and check that the pedal can be depressed further.
- Turn the motor relay on. Check that the pedal returns to the "depressed as much as possible" position.
- Turn the motor relay off and release the pedal.
- Check brake actuator solenoid (for front left wheel)
- Use the same procedures described for the front right wheel to check the solenoids of the front left wheel.
Hint:
Front left wheel: sflh, sflr
- Check brake actuator solenoid (for rear right wheel)
- Use the same procedures described for the front right wheel to check the solenoids of the rear right wheel.
Hint: rear right wheel: srrh, srrr
- Check brake actuator solenoid (for rear left wheel)
- Use the same procedures described for the front right wheel to check the solenoids of the rear left wheel.
Hint: rear left wheel: srlh, srlr
- Check and clear dtc
- Check and clear the dtc (see page bc-47).
 Abs and traction actuator
Components
...
 Removal (2005/11-2006/01)
Disconnect cable from negative battery
terminal
Caution:
Wait at least 90 seconds after disconnecting the
cable from the negative (-) battery terminal to
prevent airbag and seat belt prete ...
Other materials:
Installation
Install crankshaft position sensor
Notice:
Make sure that the o-ring is not cracked or jammed
when installing it.
Apply a light coat of engine oil to the o-ring of the
sensor.
Install the sensor with the bolt.
Torque: 9.0 N*m (90 kgf*cm, 80 in.*Lbf)
Install the wire ha ...
Cooling fan system
Parts location
System diagram
On-vehicle inspection
Hint:
It is normal for the cooling fan to sometimes rotate when the
ignition switch is turned from acc to on.
Check cooling fan operation at low temperatures (below 94°c (201°f))
Turn the ignition switch on with the a/c ...
Adjusting the position of and opening and closing the air outlets
Front center outlets
Direct air flow to the left or
right, up or down.
Turn the knobs to open or
close the vents.
Turn the knob to open or
close the vent for rear seat
occupants.
Đś
Direct air flow to the left or right,
up or down.
Open the vent.
Close the vent.
...
