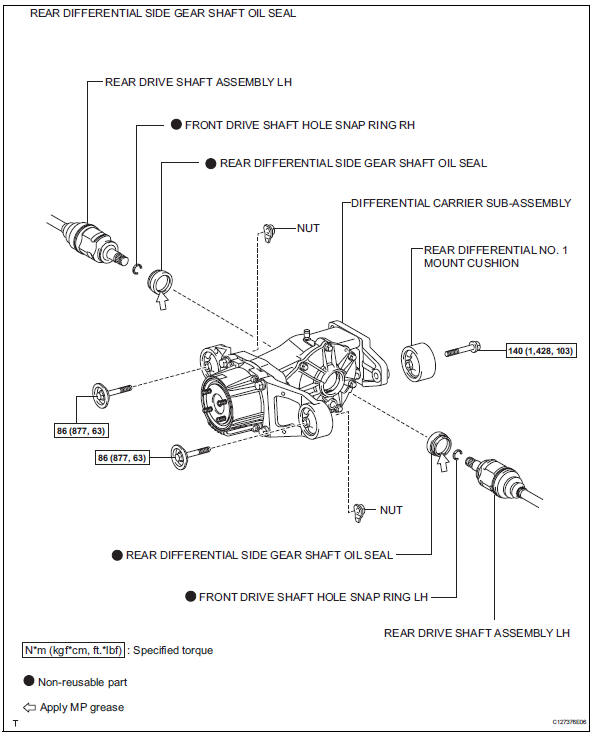
Toyota RAV4 (XA40) 2013-2018 Service Manual: Rear differential side gear shaft oil seal
Components
Removal
- Drain differential oil (see page df-10)
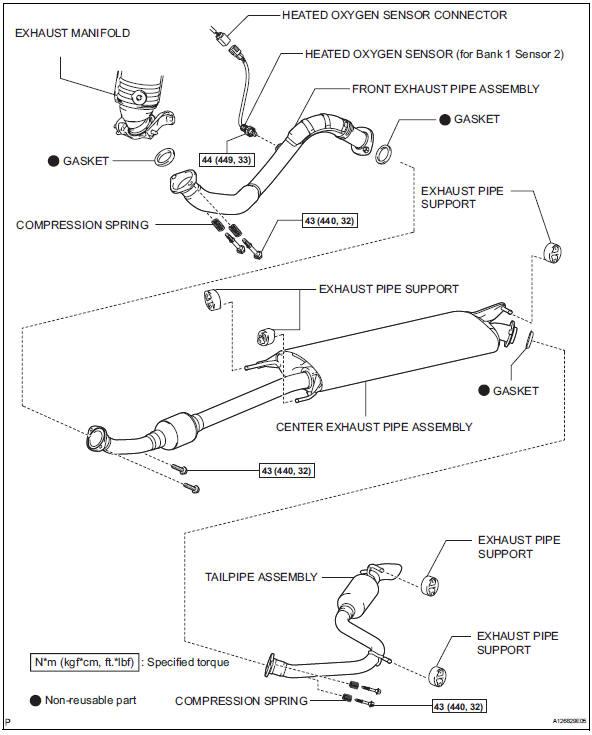
- Remove tailpipe assembly
- Remove the tailpipe (see page ex-2).
- Remove center exhaust assembly
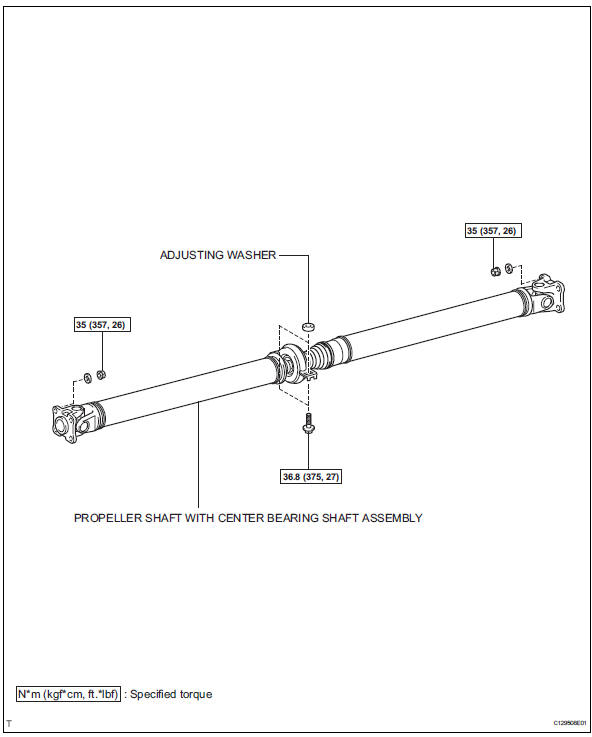
- Remove propeller with center bearing shaft assembly (see page pr-3)
- Remove rear differential carrier subassembly (see page df-18)
- Remove rear differential side gear shaft oil seal
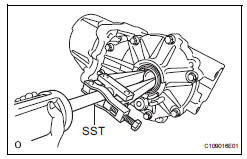
- Using a sst, tap out the 2 oil seals.
Sst 09308-00010
Installation
- Install rear differential side gear shaft oil seal
- Apply a light coat of mp grease to the lip of a new rear differential side gear shaft oil seal.
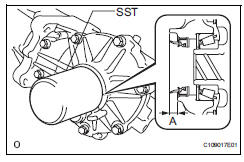
- Using sst and a hammer, tap the 2 rear differential side gear shaft oil seals into the rear differential carrier and differential side bearing retainer according to the specification.
Sst 09223-00010
Standard oil seal tapping amount (a value): 7.2 +-0.5 Mm (0.28 +-0.02 In.)
- Install rear differential carrier assembly (see page df-44)
- Temporarily install propeller with center bearing shaft assembly (see page pr-5)
- Tighten propeller with center bearing shaft assembly (see page pr-6)
- Inspect and adjust joint angle (see page pr- 4)
- Install center exhaust pipe assembly
- Install the center pipe (see page ex-5).
- Install tailpipe assembly
- Install the tailpipe (see page ex-6).
- Add differential oil
- Add differential oil (see page df-3).
- Check for differential oil leakage
- Check for exhaust gas leakage
If gas is leaking, tighten the areas necessary to stop the leak. Replace damaged parts as necessary.
 Differential oil
On-vehicle inspection
Check differential oil
Stop the vehicle on a level surface.
Using a 10 mm socket hexagon wrench, remove the
rear differential filler plug and gasket.
...
 Diaphragm oil seal
Components
Removal
Drain differential oil
Using a 10 mm socket hexagon wrench, remove the
rear differential drain plug and gasket, and drain the
oil.
Install a new gasket to t ...
Other materials:
Gauges and meters (with 12.3-inch multi-information display)
The meters display various drive information.
Meter display
â– Locations of gauges and meters
The meter type can be changed on
of the multi-information display.
Type 1/Type 2
The units of measure may differ depending on the intended destination of
the vehicle.
Multi-information display
Presen ...
Terminals of ecu (2006/01- )
Check air conditioning amplifier
Measure the voltage and resistance of the
connectors.
Hint:
Check from the rear of the connector while it is
connected to the air conditioning amplifier.
Hint:
*: For 2gr-fe
Using an oscilloscope, check waveform 1.
Can communi ...
Problem symptoms table (2006/01- )
Hint:
Use the table below to help determine the cause of the
problem symptom. The potential causes of the symptoms
are listed in order of probability in the "suspected area"
column of the table. Check each symptom by checking the
suspected areas in the order they are listed. Re ...
