Toyota RAV4 (XA40) 2013-2018 Service Manual: Reassembly
- Install sliding roof drive cable
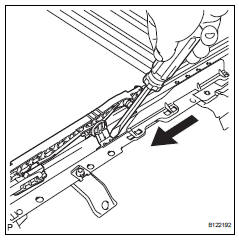
- Using a screwdriver, slide the sliding roof drive cable sub-assemblies in the direction indicated by the arrow in the illustration to install them.
Hint:
Tape the screwdriver tip before use.

- Engage the 2 claws and install the sliding roof drip channel.
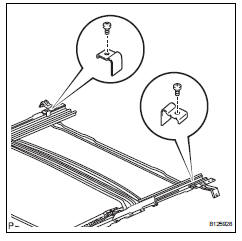
- Install the 2 sliding roof side stoppers with the 2 screws.
Torque: 2.0 N*m (20 kgf*cm, 18 in.*Lbf)
- Adjust fully closed position
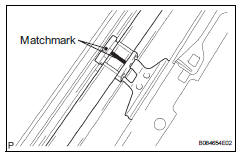
- Using a screwdriver, slide the sliding roof drive cable lh and rh to align the matchmarks.
Hint:
Tape the screwdriver tip before use.
- Install sunshade trim sub-assembly
- Insert the sunshade trim into the sliding roof housing.
- Install sliding roof drain hose joint lh

- Install the joint with the screw.
Torque: 2.0 N*m (20 kgf*cm, 18 in.*Lbf)
- Install sliding roof drain hose joint rh
Hint:
Use the same procedures described for the lh side.
- Install sliding roof drive gear subassembly
- Install the drive gear with the 2 bolts.
Torque: 5.4 N*m (55 kgf*cm, 48 in.*Lbf)
- Attach the claw and install the sliding roof drive gear bracket.
 Disassembly
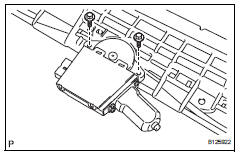
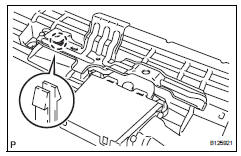
Remove sliding roof drive gear subassembly
Remove the claw and room light bracket.
Remove the 2 bolts and drive gear.
Remove sliding roof drain hose joint lh
Rem ...
 Installation (2005/11-2006/01)
Install sliding roof weatherstrip
Install the sliding roof weatherstrip.
Position the joint of the weatherstrip at the rear
center.
Align the marks on the weatherstrip with the
...
Other materials:
On-vehicle inspection
Check throttle body
Check the throttle control motor operating sounds.
Turn the ignition switch on.
When pressing the accelerator pedal, check
the operating sound of the running motor. Make
sure that no friction noises emit from the motor.
If friction noise exists, replace t ...
Rear window wiper and
washer
The rear window wiper and
washer can be used by
operating the lever.
NOTICE
ÔľáWhen the rear window is dry
Do not use the wiper, as it may
damage the rear window.
Operating the wiper lever
Operating the switch
operates the rear wiper as follows:
*1 or
*2 Off
*1 or
*2 Intermittent
operation
...
Connecting a bluetooth®
device
Up to 5 bluetooth® devices (phones (hfp) and audio players
(avp)) can be registered.
If more than 1 bluetooth® device has been registered, select
which device to connect to.
Press the ÔÇťsetupÔÇŁ button.
Select ÔÇťbluetooth*ÔÇŁ.
*: Bluetooth is a registered trademark of bluetooth sig ...
