Toyota RAV4 (XA40) 2013-2018 Service Manual: Transmission wire
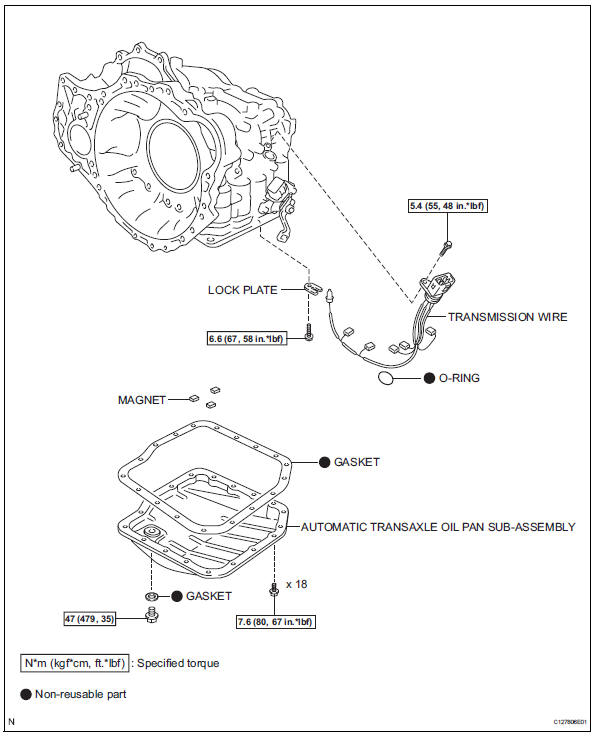
Components
Removal
- Disconnect cable from negative battery terminal
Caution:
Wait at least 90 seconds after disconnecting the cable from the negative (-) battery terminal to prevent airbag and seat belt pretensioner activation.
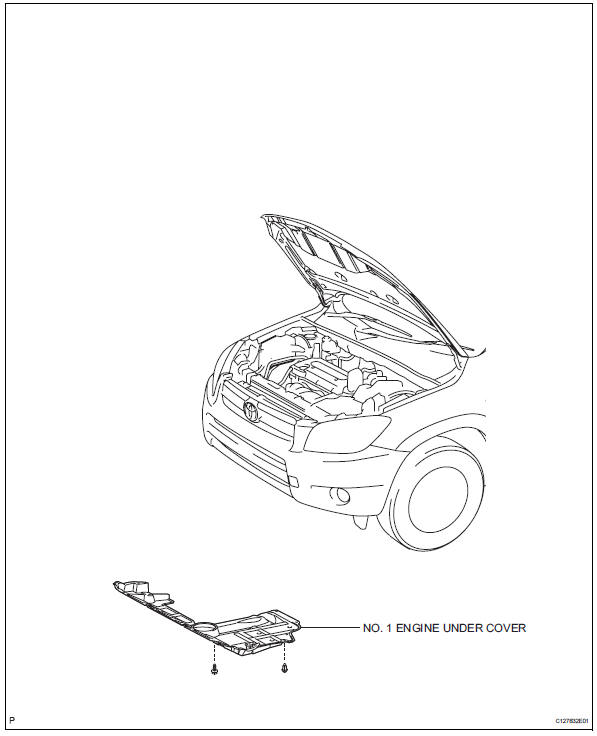
- Remove no. 1 Engine under cover
- Drain automatic transaxle fluid
- Remove the drain plug and gasket, and drain atf.
- Install a new gasket and the drain plug.
Torque: 47 n*m (479 kgf*cm, 35 ft.*Lbf)
- Remove automatic transaxle oil pan subassembly
- Remove the 18 bolts, oil pan and gasket.
Notice:
Some fluid will remain in the oil pan. Carefully remove the oil pan.
- Remove the 3 magnets from the oil pan.
- Examine particles in the pan.
- Use the removed magnets to collect any steel
chips. Look carefully at the chips and particles
in the pan and on the magnet to anticipate what
type of wear you will find in the transaxle.
Steel (magnetic): bearing, gear and plate wear brass (non-magnetic): bush wear
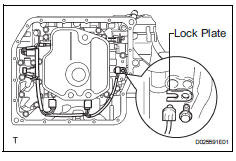
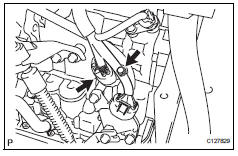
- Remove transmission wire
- Disconnect the 5 shift solenoid valve connectors.
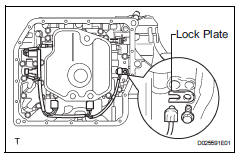
- Remove the bolt, lock plate and atf temperature sensor.
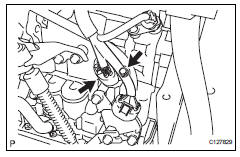
- Disconnect the transmission wire connector.
- Remove the bolt and transmission wire.
- Remove the o-ring from the transmission wire.
Inspection
- Inspect transmission wire
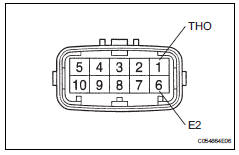
- Disconnect the b27 wire connector.
- Measure the resistance of the transmission wire.
Standard resistance 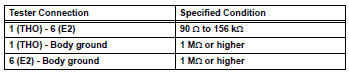
Hint:
If the resistance is not as specified for either of the atf temperatures shown in the table below, the driveability of the vehicle may decrease.
Standard resistance 
Installation
- Install transmission wire
- Coat a new o-ring of the transmission wire connector with atf.
- Install the transmission wire.
- Install the bolt.
- Connect the connector.
- Coat the o-ring of the atf temperature sensor with atf.
- Install the atf temperature sensor with the lock plate and bolt.
Torque: 6.6 N*m (67 kgf*cm, 58 in.*Lbf)
- Connect the 5 shift solenoid valve connectors.
- Install automatic transaxle oil pan subassembly
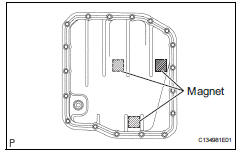
- Install the 3 magnets in the oil pan.
- Install a new gasket and the oil pan with the 18 bolts.
Torque: 7.6 N*m (77 kgf*cm, 67 in.*Lbf)
- Install no. 1 Engine under cover
- Connect cable to negative battery terminal
- Add automatic transaxle fluid
Fluid type: toyota genuine atf ws
- Inspect transaxle fluid level
- Inspect the fluid level (see page ax-102).
- Perform reset memory
- Perform the reset memory procedures (a/t initialization) (see page ax-18).
 Speed sensor
Components
Removal
Disconnect cable from negative battery
terminal
Caution:
Wait at least 90 seconds after disconnecting the
cable from the negative (-) battery terminal to
prevent ai ...
 Valve body assembly
Components
Removal
Disconnect cable from negative battery
terminal
Caution:
Wait at least 90 seconds after disconnecting the
cable from the negative (-) battery terminal to
preven ...
Other materials:
Registration
Notice:
The vehicle identification number (vin) must be input
into the replacement ecm.
Hint:
The vin is a 17-digit alphanumeric number. The intelligent
tester is required to register the vin.
Description
This registration section consists of 3 parts: input
instructions, read vin and wr ...
Ig power source circuit
Description
This is the main power source supplied to the air conditioning amplifier when
the ignition switch is on
(ig). This power source is used for operating components, such as the air
conditioning amplifier and
servo motors.
Wiring diagram
Inspection procedure
Inspect fuse (ec ...
Fuel information
You must only use unleaded gasoline in your vehicle.
Select octane rating 87 (research octane number 91) or higher.
Use of unleaded gasoline with an octane rating lower than 87
may result in engine knocking. Persistent knocking can lead to
engine damage.
At minimum, the gasoline you use sho ...
