Toyota RAV4 (XA40) 2013-2018 Service Manual: Speed sensor
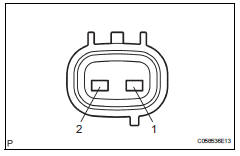
Components
Removal
- Disconnect cable from negative battery terminal
Caution:
Wait at least 90 seconds after disconnecting the cable from the negative (-) battery terminal to prevent airbag and seat belt pretensioner activation.
- Remove battery
- Loosen the nut and remove the bolt and battery clamp.
- Remove the battery.
- Remove the battery tray.
- Remove the 4 bolts and battery carrier.
- Remove the 2 bolts and battery bracket reinforcement.
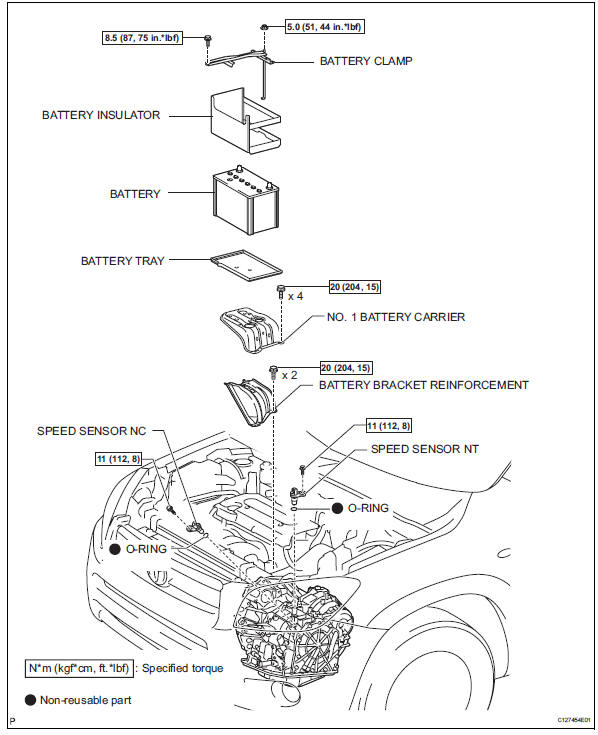
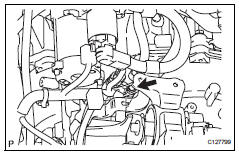
- Remove speed sensor nt
- Disconnect the sensor connector.
- Remove the bolt and sensor.
- Remove the o-ring from the sensor.
- Remove speed sensor nc
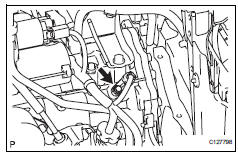
- Disconnect the sensor connector.
- Remove the bolt and sensor.
- Remove the o-ring from the sensor.
Inspection
- Inspect speed sensor nt
Measure the resistance of the sensor.
Standard resistance 
- Inspect speed sensor nc
Measure the resistance of the sensor.
Standard resistance 
Installation
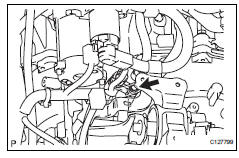
- Install speed sensor nc
- Coat a new o-ring with atf.
- Install the o-ring to the sensor.
- Install the sensor with the bolt.
Torque: 11 n*m (112 kgf*cm, 8 ft.*Lbf)
- Connect the sensor connector.
- Install speed sensor nt
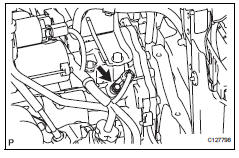
- Coat a new o-ring with atf.
- Install the o-ring to the sensor.
- Install the sensor with the bolt.
Torque: 11 n*m (112 kgf*cm, 8 ft.*Lbf)
- Connect the sensor connector.
- Install battery
- Install the battery bracket reinforcement with the 2 bolts.
Torque: 20 n*m (204 kgf*cm, 15 ft.*Lbf)
- Install the battery carrier with the 4 bolts.
Torque: 20 n*m (204 kgf*cm, 15 ft.*Lbf)
- Install the battery tray.
- Install the battery with the battery clamp.
Torque: 8.5 N*m (87 kgf*cm, 75 in.*Lbf) for bolt
5.0 N*m (51 kgf*cm, 44 in.*Lbf) for nut
- Connect cable to negative battery terminal
 Automatic transaxle fluid
On-vehicle inspection
Check transaxle fluid level
Hint:
Drive the vehicle so that the engine and transaxle are at
normal operating temperature.
Fluid temperature:
70 to 80°c (158 to 176°f ...
 Transmission wire
Components
Removal
Disconnect cable from negative battery
terminal
Caution:
Wait at least 90 seconds after disconnecting the
cable from the negative (-) battery terminal to
preven ...
Other materials:
Engine (ignition) switch
(vehicles with a
smart key system)
Performing the following operations when carrying the electronic
key on your person starts the engine or changes engine
switch modes.
Starting the engine
Check that the parking brake is set.
Check that the shift lever is set in p.
Firmly depress the brake pedal.
The smart key system in ...
Torque converter clutch solenoid circuit
Description
The shift solenoid valve dsl is turned on and off by signals from the ecm to
control the hydraulic
pressure acting on the lock-up relay valve, which then controls operation of the
lock-up clutch.
Fail-safe function:
if the ecm detects a malfunction, it turns the shift sol ...
Stop light switch circuit
Description
When the stop light switch is turned on, current flows to the stop lights to
illuminate them.
Wiring diagram
Inspection procedure
Inspect fuse (stop)
Remove the stop fuse from the instrument panel
junction block.
Measure the resistance of the fuse.
Standard resi ...
