
Toyota RAV4 (XA40) 2013-2018 Service Manual: Vacuum switching valve
Components
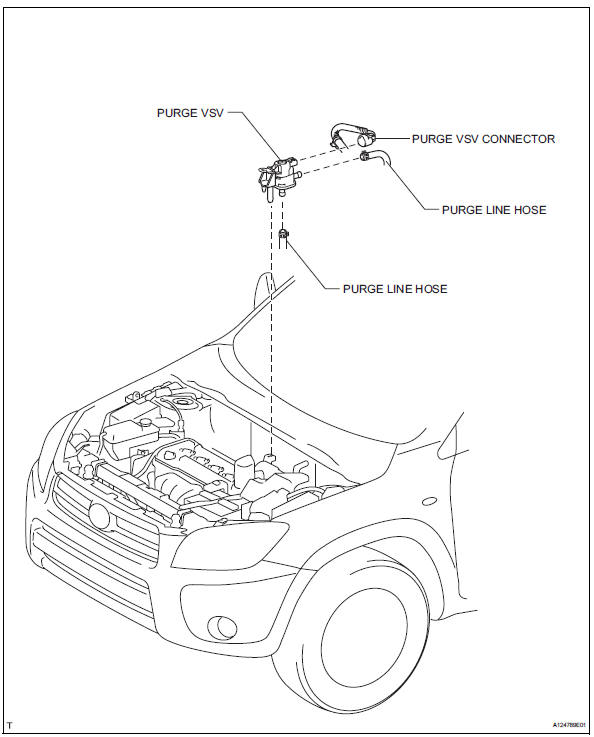
Removal
- Disconnect cable from negative battery terminal
Caution:
Wait at least 90 seconds after disconnecting the cable from the negative (-) battery terminal to prevent airbag and seat belt pretensioner activation.
- Remove purge vsv
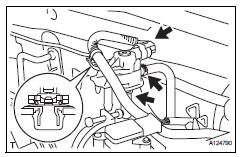
- Disconnect the purge vsv connector.
- Disconnect the wire harness clamp.
- Disconnect the 2 purge line hoses from the purge vsv.
- Remove the purge vsv from the air cleaner hose.
Inspection
- Inspect purge vsv
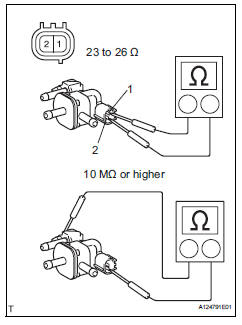
- Measure the resistance of the purge vsv.
Standard resistance 
If the result is not as specified, replace the purge vsv.
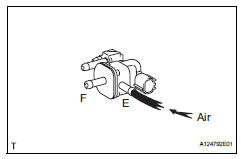
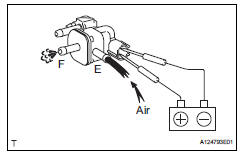
- Check the operation of the purge vsv.
- Check that air does not flow from port e to port f.
- Apply battery voltage across terminals.
- Check that air flows from port e to port f.
If the result is not as specified, replace the purge vsv.
Installation
- Install purge vsv
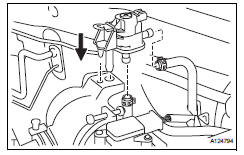
- Install the purge vsv onto the air cleaner hose.
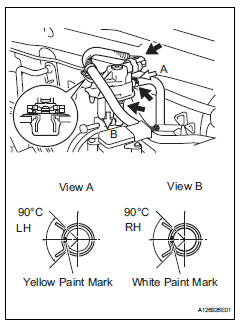
- Connect the 2 purge line hoses to the purge vsv.
- Connect the wire harness clamp.
- Connect the purge vsv connector.
- Connect cable to negative battery terminal
 Canister
Components
removal
Disconnect cable from negative battery
terminal
Caution:
Wait at least 90 seconds after disconnecting the
cable from the negative (-) battery terminal to
prevent ai ...
 Ventilation valve
Components
Removal
Remove no. 1 Engine cover (see page em-22)
Remove ventilation valve sub-assembly
Disconnect the ventilation hose from the ventilation
valve.
Using a ...
Other materials:
Open in abs solenoid relay circuit
Description
The solenoid relay supplies power to the abs solenoid and trc solenoid.
After the ignition switch is turned on, the vehicle speed has reached 6 km/h (4
mph) and the solenoid is
determined to be normal by the initial check self-diagnosis, the relay switches
on. If any open or ...
Installation
Install ecm
Install the 2 brackets to the ecm with the 4 screws.
Torque: 3.0 N*m (30 kgf*cm, 27 in.*Lbf)
Connect the 2 ecm connectors.
Notice:
When connecting the connector, make sure that
dirt, water and other foreign matter does not
become stuck between the connector and ...
Tire information
Typical tire symbols
Full-size tire
Compact spare tire
Tire size
Dot and tire identification number (tin)
Location of treadwear indicators
Tire ply composition and materials
Plies are layers of rubber-coated parallel cords. Cords are the strands
which form the plies in a tire ...
