Toyota RAV4 (XA40) 2013-2018 Service Manual: Ventilation valve
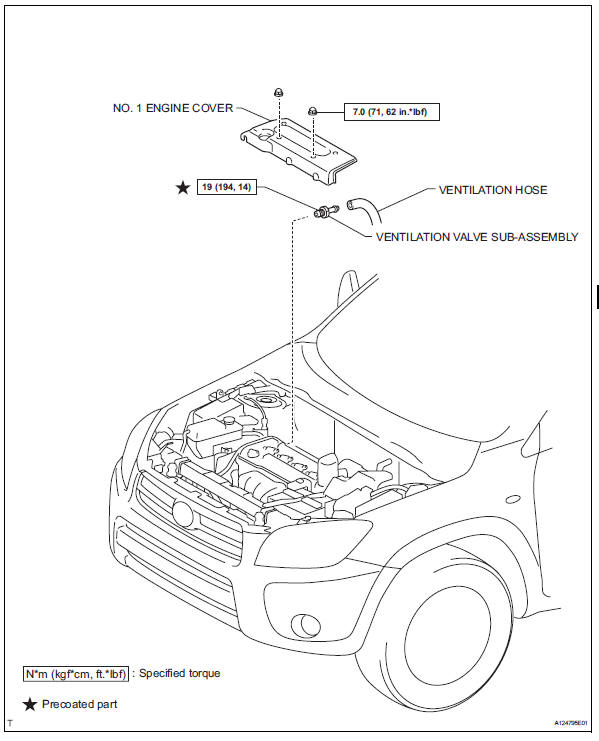
Components
Removal
- Remove no. 1 Engine cover (see page em-22)
- Remove ventilation valve sub-assembly
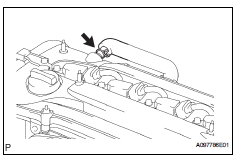
- Disconnect the ventilation hose from the ventilation valve.
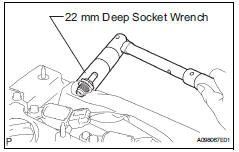
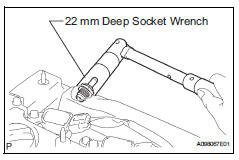
- Using a 22 mm deep socket wrench, remove the ventilation valve.
Inspection
- Inspect ventilation valve sub-assembly
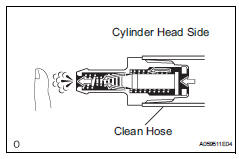
- Install a clean hose to the ventilation valve.
- Check the ventilation valve operation.
- Blow air into the cylinder head side, and check that air passes through easily.
Caution:
Do not suck air through the valve.
Petroleum substances inside the valve are hazardous to your health.
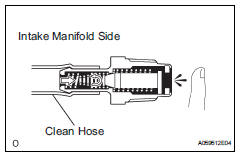
- Blow air into the intake manifold side, and
check that air passes through with difficulty.
If the result is not as specified, replace the ventilation valve sub-assembly.
- Remove the clean hose from the ventilation valve.
Installation
- Install ventilation valve sub-assembly
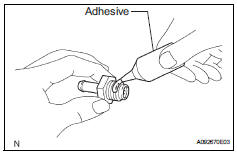
- Apply adhesive to 2 or 3 threads of the ventilation valve.
Adhesive: toyota genuine adhesive 1324, three bond 1324 or equivalent
- Using a 22 mm deep socket wrench, install the ventilation valve.
Torque: 19 n*m (194 kgf*cm, 14 ft.*Lbf)
- Connect the ventilation hose.
- Install no. 1 Engine cover (see page em-43)
- Check for engine oil leaks
 Vacuum switching valve
Components
Removal
Disconnect cable from negative battery
terminal
Caution:
Wait at least 90 seconds after disconnecting the
cable from the negative (-) battery terminal to
prevent ai ...
 Air fuel ratio sensor
Components
On-vehicle inspection
Check air fuel ratio compensation system
Connect the intelligent tester to the dlc3.
Turn the ignition switch on.
Select the following menu item ...
Other materials:
Pressure control solenoid "d" performance (shift solenoid valve slt)
Description
The throttle pressure that is applied to the primary regulator valve (which
modulates the line pressure)
causes the solenoid valve slt, under electronic control, to precisely modulate
and generate the line
pressure according to the extent that the accelerator pedal is depr ...
Only passenger door lock / unlock functions do not operate
Description
The main body ecu receives lock / unlock switch signals and activates the
door lock motor accordingly.
Wiring diagram
Inspection procedure
Read value of intelligent tester (lock position switch)
Use the data list to check if the door lock is
functioning properly.
...
High mounted stop light assembly
Components
Removal
Disconnect cable from negative battery
terminal
Caution:
Wait at least 90 seconds after disconnecting the
cable from the negative (-) battery terminal to
prevent airbag and seat belt pretensioner activation.
Remove back door center garnish (see page
ed-59)
...
