Toyota RAV4 (XA40) 2013-2018 Service Manual: Vanity light
Components
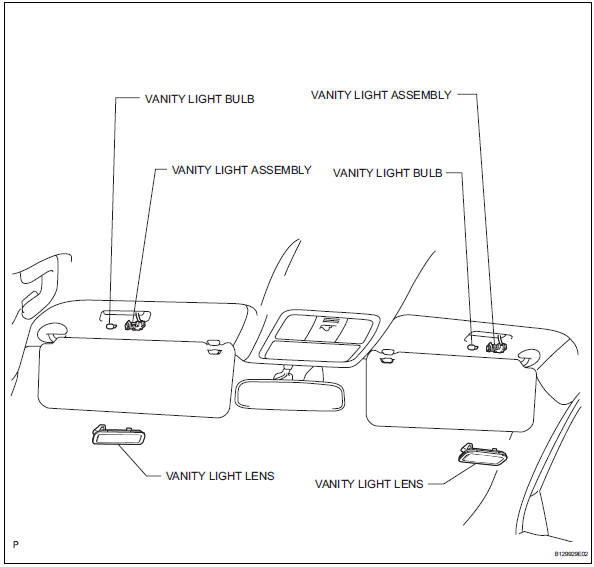
Removal
Hint:
- Use the same procedures for the rh and lh sides.
- The procedures listed below are for the lh side.
- Disconnect cable from negative battery terminal
Caution:
Wait at least 90 seconds after disconnecting the cable from the negative (-) battery terminal to prevent airbag and seat belt pretensioner activation.
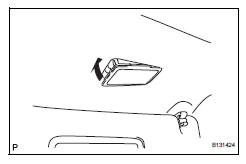
- Remove vanity light assembly
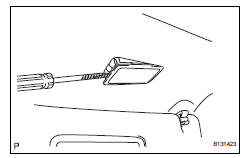
- Using a screwdriver, pry out the vanity light.
Hint:
Tape the screwdriver tip before use.
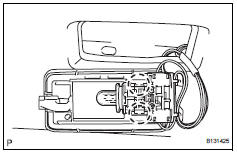
- Remove vanity light bulb
- Remove the light bulb from the vanity light.
Inspection
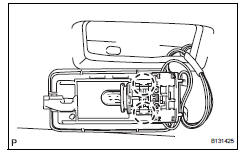
- Inspect visor assembly
- Remove the visor assembly.
- Inspect vanity light switch.
Standard resistance 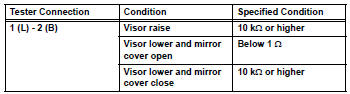
If the result is not as specified, replace the visor assembly.
Installation
- Install vanity light bulb
- Install the light bulb to the vanity light.
- Install vanity light assembly
- Attach the 2 claws and install the vanity light lens to the vanity light.
- Install the vanity light.
- Connect cable to negative battery terminal
 Ignition key cylinder light
Components
Removal
Disconnect cable from negative battery
Caution:
Wait at least 90 seconds after disconnecting the
cable from the negative (-) battery terminal to
prevent airbag and se ...
 Front console illumination
On-vehicle inspection
Inspect front console illumination
Connect the battery's positive (+) lead to terminal 1
and the negative (-) lead to terminal 2, then check
that the light come ...
Other materials:
Emission control system
Parts location
System diagram
On-vehicle inspection
Check fuel cut rpm
Increase the engine speed to at least 3,500 rpm.
Use a sound scope to check for injector operating
noise.
Check that the operating sounds stop momentarily
and then resume when the t ...
Operating a bluetooth® enabled portable player
Power
Volume
Search playback
Next commands, random play
or back button
Repeat play
Fast-forwarding, rewinding or
selecting an album
Changing the audio source/
playback
Playback/pause
Previous commands
Selecting a track
Displaying text message
Selecting an album
P ...
Downhill assist control operation switch (test mode dtc)
Description
The downhill assist control switch is connected to the skid control ecu in
the abs and traction
actuator.
Dtc c1379/74 can be detected when the downhill assist control switch sends the
downhill assist control
switch signal or test mode ends. Dtc c1379/74 is output only in t ...
