Toyota RAV4 (XA40) 2013-2018 Service Manual: Cooling fan motor
On-vehicle inspection
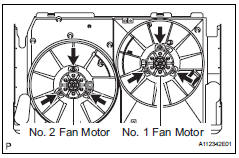
- Inspect no. 1 Cooling fan motor
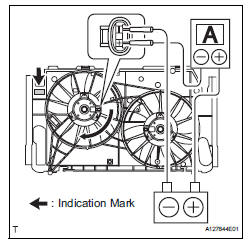
- Disconnect the no. 1 Fan connector.
- Connect the battery and ammeter to the no. 1 Fan motor connector.
- Check that the no. 1 Fan rotates smoothly, and then check the reading on the ammeter.
Standard amperage 
Hint:
Refer to the illustration for the indication mark location.
If the result is not as specified, replace the no. 1 Cooling fan motor.
- Reconnect the no. 1 Fan motor connector.
- Inspect no. 2 Cooling fan motor
- Disconnect the no. 2 Fan connector.
- Connect the battery and ammeter to the no. 2 Fan motor connector.
- Check that the no. 2 Fan rotates smoothly, and then check the reading on the ammeter.
Standard amperage 
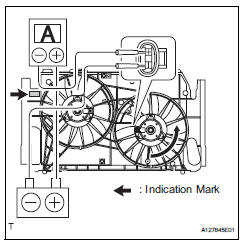
Hint:
Refer to the illustration for the indication mark location.
If the result is not as specified, replace the no. 2 Cooling fan motor.
- Reconnect the no. 2 Fan motor connector.
Removal
- Disconnect cable from negative battery terminal
Caution:
Wait at least 90 seconds after disconnecting the cable from the negative (-) battery terminal to prevent airbag and seat belt pretensioner activation.
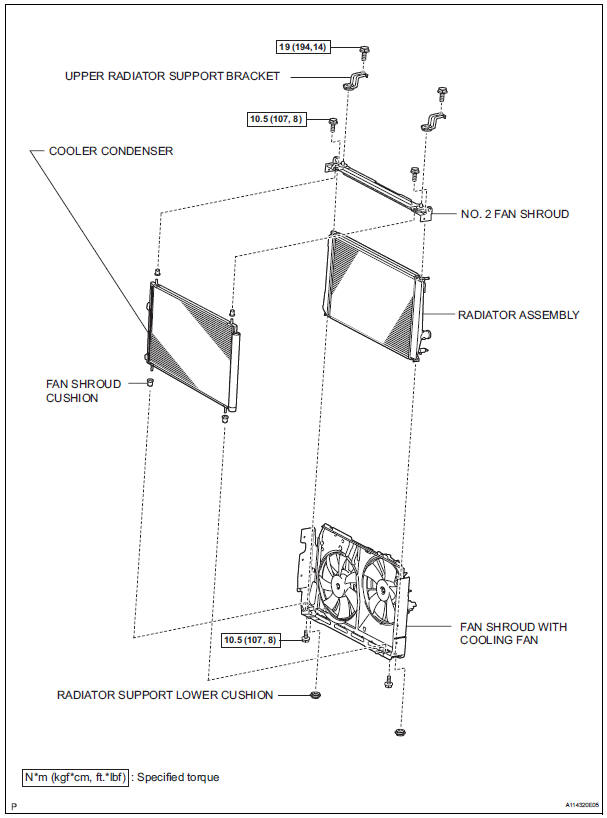
- Remove radiator assembly
- Remove the radiator (see page co-29).
Disassembly
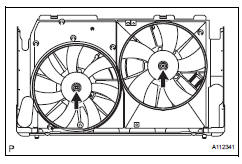
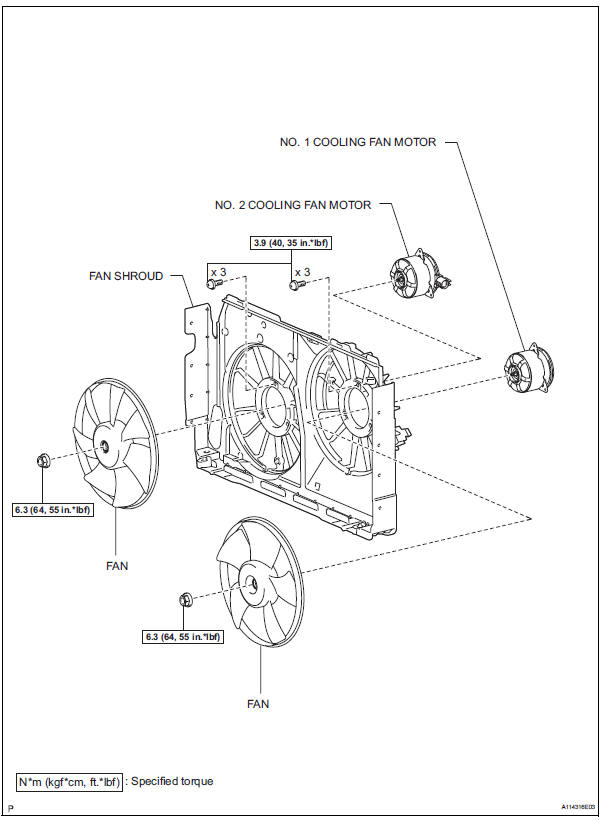
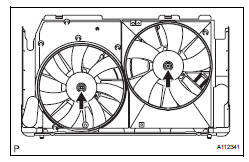
- Remove fan
- Remove the 2 nuts and 2 fans.
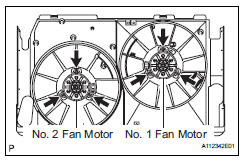
- Remove no. 1 Cooling fan motor
- Remove the 3 screws and fan motor.
- Remove no. 2 Cooling fan motor
- Remove the 3 screws and fan motor.
Reassembly
- Install no. 2 Cooling fan motor
- Install the fan motor with the 3 screws.
Torque: 3.9 N*m (40 kgf*cm, 35 in.*Lbf)
- Install no. 1 Cooling fan motor
- Install the fan motor with the 3 screws.
Torque: 3.9 N*m (40 kgf*cm, 35 in.*Lbf)
- Install fan
- Install the 2 fans with the 2 nuts.
Torque: 6.3 N*m (64 kgf*cm, 55 in.*Lbf)
- Check the fan motor operation.
Installation
- Install radiator assembly
- Install the radiator (see page co-32).
- Connect cable to negative battery terminal
- Add engine coolant (see page co-6)
- Add engine coolant (see page co-6)
 Thermostat
Components
Removal
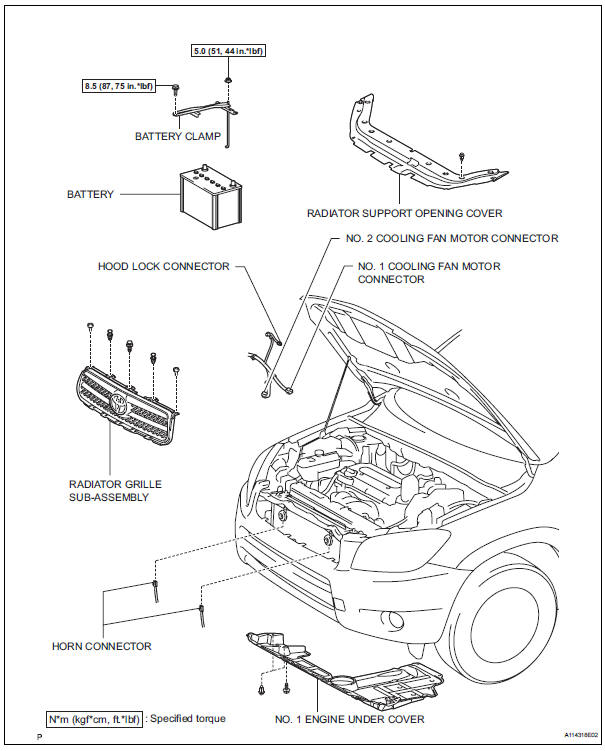
Remove no. 1 Engine under cover
Drain engine coolant (see page co-6)
Remove radiator support opening cover
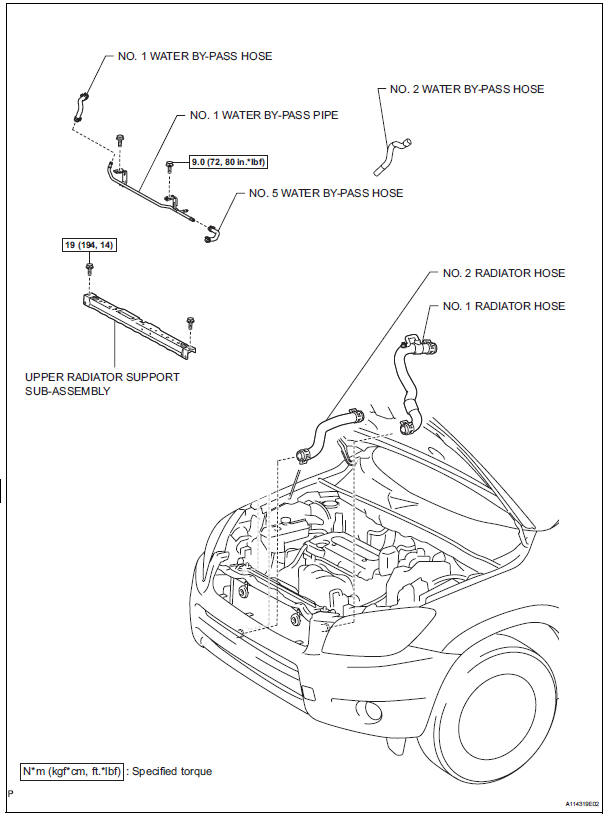
Disconnect no. 2 Radiator hose
Remove water inlet
R ...
 Cooling fan relay
On-vehicle inspection
Disconnect cable from negative battery
terminal
Caution:
Wait at least 90 seconds after disconnecting the
cable from the negative (-) battery terminal to
prevent airb ...
Other materials:
When closing the back door
Lower the back door using the
back door handle.
Vehicles without a power back
door
Make sure to push the back door
down from the outside to close it.
Vehicles with a power back
door
The back door closing assist will
activate, and the back door will
fully close automatically.
...
Oxygen (a/f) sensor pumping current circuit
Description
Refer to dtc p2195 (see page es-292).
Monitor description
The air-fuel ratio (a/f) sensor varies its output voltage in proportion to
the air-fuel ratio. If the a/f sensor
impedance (alternating current resistance) or output voltage deviates greatly
from the standard range ...
Using the automatic air conditioning system
Press .
The dehumidification function begins to operate. Air outlets and fan speed
are automatically adjusted according to the temperature setting and
humidity.
Turn clockwise to
increases the temperature and turn
counterclockwise to decreases
the temperature.
T ...
