Toyota RAV4 (XA40) 2013-2018 Service Manual: Thermostat
Components
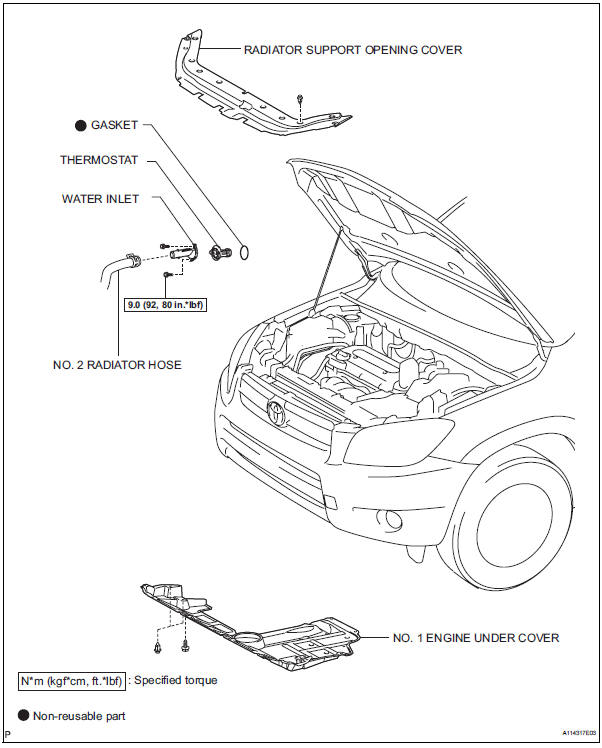
Removal
- Remove no. 1 Engine under cover
- Drain engine coolant (see page co-6)
- Remove radiator support opening cover
- Disconnect no. 2 Radiator hose
- Remove water inlet
- Remove the 2 nuts and disconnect the water inlet from the cylinder block.
- Remove thermostat
- Remove the gasket from the thermostat.
Inspection
- Inspect thermostat
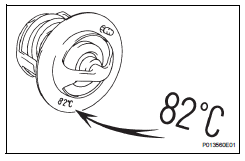
Hint:
The valve opening temperature is inscribed on the thermostat.
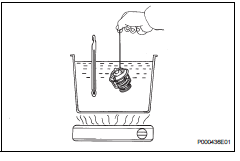
- Immerse the thermostat in water, and then gradually heat the water.
- Check the valve opening temperature of the thermostat.
Standard valve opening temperature: 80 to 84°c (176 to 183°f)
If the valve opening temperature is not as specified, replace the thermostat.
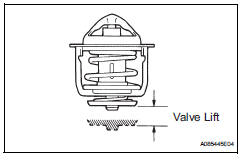
- Check the valve lift.
Standard valve lift: 10 mm (0.39 In.) Or more at 95°c (203°f)
If the valve lift is not as specified, replace the thermostat.
- Check that the valve is fully closed when the thermostat is at low temperatures (below 77°c (171°f).
If it is not fully closed, replace the thermostat.
Installation
- Install thermostat
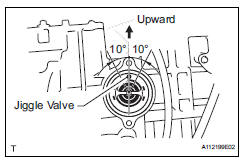
- Install a new gasket onto the thermostat.
- Install the thermostat with the jiggle valve upward.
Hint:
The jiggle valve may be set to within 10° on either side of the prescribed position.
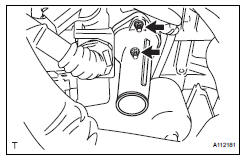
- Install water inlet
- Install the water inlet with the 2 nuts.
Torque: 9.0 N*m (92 kgf*cm, 80 in.*Lbf)
- Connect no. 2 Radiator hose
- Add engine coolant (see page co-6)
- Check for engine coolant leaks (see page co-1)
- Install radiator support opening cover
- Install no. 1 Engine under cover
 Installation
Install water pump assembly
Remove any old seal packing material from the
contact surface.
Apply a continuous line of seal packing as shown in
the illustration.
Seal packing:
to ...
 Cooling fan motor
On-vehicle inspection
Inspect no. 1 Cooling fan motor
Disconnect the no. 1 Fan connector.
Connect the battery and ammeter to the no. 1 Fan
motor connector.
Check th ...
Other materials:
Display contents
Following information is displayed
on the multi-information
display.
Driving support system information
Displays recognized signs while the
RSA system (if equipped) is operating.
Displays an image when the following
systems are operating and a
menu icon other than is
selected:
LTA (Lane Traci ...
Seat position airbag sensor circuit malfunction
Description
The seat position sensor circuit consists of the center airbag sensor and the
seat position sensor.
Dtc b1653/35 is recorded when a malfunction is detected in the seat position
sensor circuit.
Wiring diagram
Inspection procedure
Check for dtc
Turn the ...
Horn system
Parts location
System diagram
Problem symptoms table
Hint:
Use the table below to help determine the cause of the
problem symptom. The potential causes of the symptoms are
listed in order of probability in the "suspected area" column of
the table. Check each symptom by c ...
