Toyota RAV4 (XA40) 2013-2018 Service Manual: Diagnosis system
- Diagnosis
If the skid control ecu detects a malfunction, the abs, vsc and brake warning lights and the slip, downhill assist control and auto lsd indicator lights come on in accordance with the trouble area to warn the driver.
The table below indicates which lights come on when there are malfunctions in particular functions.
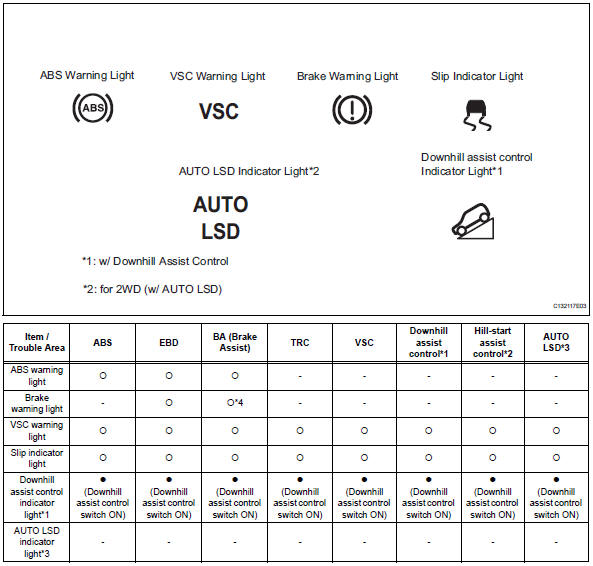
 Light on
 Light on (blinking)
 Light off
Hint:
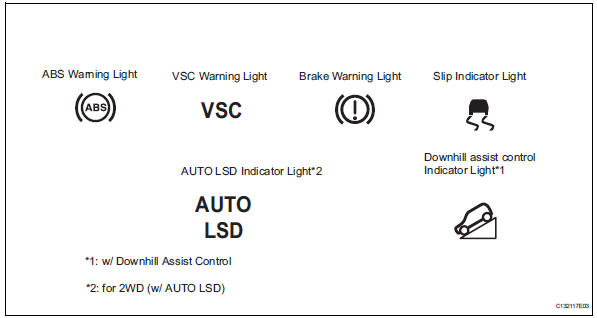
- *1: W/ downhill assist control
- *2: W/ hill-start assist control
- *3: For 2wd w/ auto lsd
- *4: W/ 16-inch disc
- The dtcs can be read by connecting sst (09843- 18040) between the tc and cg terminals of the dlc3 and observing the blinking pattern of the abs and vsc warning lights, or by using an intelligent tester (see page bc-47).
- This system has a sensor signal check function (see page bc-28).
- Check warning light and indicator light
- Release the parking brake lever.
Notice:
Before releasing the parking brake lever, set chocks to hold the vehicle for safety.
Hint:
When the parking brake is applied or the brake fluid level is low, the brake warning light comes on.
- When the ignition switch is turned on, check that the abs, vsc and brake warning lights and the slip, downhill assist control and auto lsd indicator lights come on and go off in about 3 seconds.
Hint:
If the warning lights do not illuminate, confirm whether the bulbs have burned out, and also check for can communication system dtcs, since the skid control ecu and combination meter are connected by the can communication line.
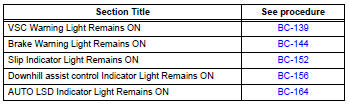
If the warning light remains on, perform relevant
troubleshooting procedures. The relevant
troubleshooting procedures are in the sections listed
in the table below.
 Terminals of ecu
Skid control ecu
Hint:
*1: W/ 16-inch disc
*2: W/ downhill assist control
*3: For 2wd (w/ auto lsd)
Check skid control ecu
Disconnect the a19 ecu connector.
Measure the vo ...
 Dtc check / clear
Check dtc (when using intelligent tester)
Connect the intelligent tester (with can vim) to the
dlc3.
Turn the ignition switch on.
Turn the tester on.
Read the dtcs by following the pr ...
Other materials:
Inside vehicle
General maintenance
Performing the following maintenance checks on the vehicle
is the owner's responsibility. The owner may perform the
maintenance or take the vehicle to a service center. Check
the parts of the vehicle described below on a daily basis. In
most cases, special tools are not requ ...
Dtc check / clear
Notice:
When the diagnosis system is changed from normal
mode to check mode or vice versa, all dtcs and freeze
frame data recorded in normal mode are erased. Before
changing modes, always check and make a note of any
dtcs and freeze frame data.
Hint:
Dtcs which are stored in the ecm can be ...
How to proceed with troubleshooting
Hint:
Use these procedures to troubleshoot the engine immobiliser
system.
*: Use the intelligent tester.
Vehicle brought to workshop
Inspect battery voltage
Standard voltage:
11 to 14 v
If the voltage is below 11 v, recharge or replace the battery
before proceeding.
cran ...
