Toyota RAV4 (XA40) 2013-2018 Service Manual: Disassembly
Caution:
Wear protective gloves. Sharp areas on the seat frame (with adjuster) may injure your hands.
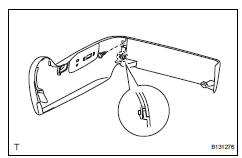
- Remove reclining power seat switch knob
- Using a screwdriver, detach the knob.
Hint:
Tape the screwdriver tip before use.
- Remove slide and vertical power seat switch knob
- Using a screwdriver, detach the knob.
Hint:
Tape the screwdriver tip before use.
- Remove front seat cushion shield lh
- Disconnect the 2 rubber bands of the front seatback board from the front seat frame (with adjuster).
- Remove the 5 screws.
- Using a screwdriver, detach the 3 claws and remove the cushion shield (with front no. 1 Seat cushion inner shield).
Hint:
Tape the screwdriver tip before use.
- Disconnect the connector from the front power seat lumbar switch.
- Remove the front no. 1 Seat cushion inner shield from the cushion shield.
- Remove the screw.
- Using a screwdriver, detach the claw and remove the inner shield.
Hint:
Tape the screwdriver tip before use.
- Remove front power seat lumbar switch
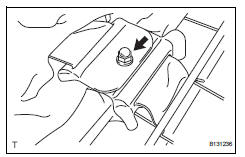
- Remove the 2 screws and switch.
- Remove front seat cushion inner shield lh
- Remove the screw.
- Using a screwdriver, detach the 3 claws.
Hint:
Tape the screwdriver tip before use.
- Using a clip remover, detach the clip and remove the inner shield.
- Remove front seat inner belt assembly lh (see page sb-22)
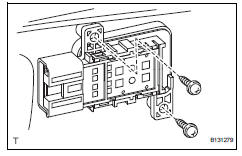
- Remove front power seat switch
- Remove the 3 screws.
- Disconnect the connector and remove the switch.
- Remove front seat cushion cover
- W/ seat heater system: disconnect the connector.
- Using a clip remover, remove the 2 clips.
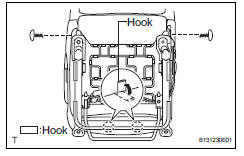
- Detach the 2 hooks on the seat cushion front side.
- Using a screwdriver, detach the hooks and remove the seat cushion cover (with pad).
Hint:
Tape the screwdriver tip before use.
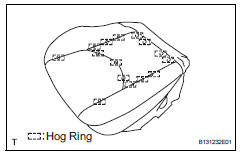
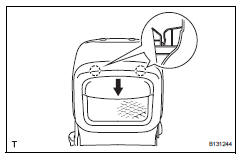
- Remove the 15 hog rings and seat cushion cover from the seat cushion pad.
- Remove front seat cushion heater (w/ seat heater system)
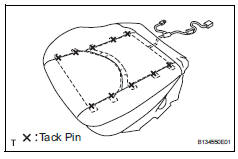
- Cut off the 10 tack pins which fasten the seat heater, and then remove the seat cushion heater from the seat cushion cover.
Notice:
Be careful not to damage the seat cushion cover and seat heater.
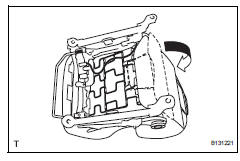
- Remove front seatback board subassembly lh
- Open the lower part of the seatback board. Then remove the 2 screws.
- Pull the seatback board in the direction indicated by
the arrow in the illustration to detach the 2 claws.
Then, remove the seatback board.
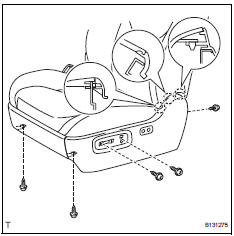
- Remove front seatback cover

- Remove the 5 hog rings.
- Using a screwdriver, detach the hooks.
Hint:
Tape the screwdriver tip before use.
- Detach the 4 claws and remove the 2 headrest supports.
- W/ front seat side airbag: remove the nut and move the 2 seatback cover brackets.
- Remove the seatback cover (with pad) from the seat frame (with adjuster).
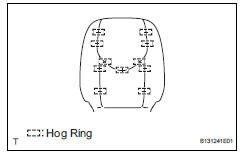
- Remove the 11 hog rings and seatback cover from the seatback pad.
- Remove front seatback heater (w/ seat heater system)
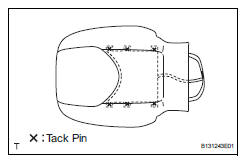
- Cut off the 6 tack pins which fasten the seat heater, and then remove the seat cushion heater from the seat cushion cover.
Notice:
Be careful not to damage the seat cushion cover and seat heater.
- Remove reclining adjuster lower inside cover lh
- Remove the 2 screws.
- Detach the claw and remove the inside cover.
- Remove reclining adjuster lower inside cover rh
Hint:
Use the same procedures described for the lh side.
- Remove reclining adjuster upper inside cover lh
- Remove the screw and inside cover.
- Remove reclining adjuster upper inside cover rh
- Remove the screw and inside cover.
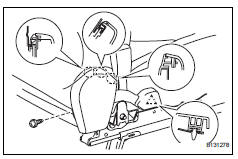
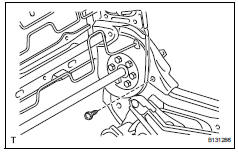
- Remove front seat cushion lower shield lh
- Remove the screw.
- Detach the hook of the lower shield and remove the lower shield.
- Remove front seat cushion lower shield rh
Hint:
Use the same procedures described for the lh side.
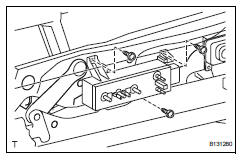
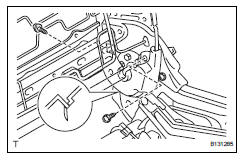
- Remove lumbar support adjuster assembly

- Disconnect the connector.
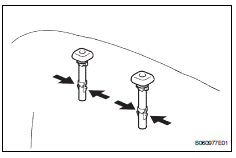
- Remove the 2 screws and lumbar support adjuster.
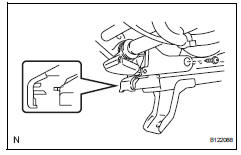
- Remove seat position airbag sensor (see page rs-390)
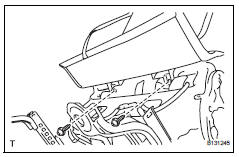
- Remove front seat wire
 Removal
Hint:
Use the same procedures for the rh side and lh side.
The procedures listed below are for the rh side.
Remove front seat headrest assembly
Remove front seat assembly
Opera ...
 Reassembly
Caution:
Wear protective gloves. Sharp areas on the seat frame
(with adjuster) may injure your hands.
Install front seat wire
Install seat position airbag sensor (see
page rs-390)
Install ...
Other materials:
Assist grips
An assist grip installed on the ceiling
can be used to support your
body while sitting on the seat.
Caution
Assist grip
Do not use the assist grip when getting in or out of the vehicle or
rising from
your seat.
Doing so could damage the assist grip, or could cause you to injure yourse ...
Removal (2005/11-2006/01)
Disconnect cable from negative battery
terminal
Caution:
Wait at least 90 seconds after disconnecting the
cable from the negative (-) battery terminal to
prevent airbag and seat belt pretensioner activation.
Remove air cleaner case sub-assembly
Remove the air cleaner case (see ...
Heated steering wheel/seat
heaters/seat ventilators
Heated steering wheel
Warm up the grip of the steering
wheel
Seat heaters
Warm up the seat upholstery
Seat ventilators
Maintain good ventilation by
pulling air through the seat
upholstery
WARNING
â– To prevent minor burn injuries
Care should be taken if anyone in
the following categories ...
