Toyota RAV4 (XA40) 2013-2018 Service Manual: Installation
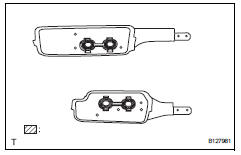
- Replace roof carrier seal
- Remove the seals.
- Install new seals as shown in the illustration.
- Install roof rack leg front lh
- Install the leg cushion front.
- Install the roof rack leg front with the 2 screws.
Torque: 2.8 To 5.0 N*m (29 to 51 kgf*cm, 25 to 44 in.*Lbf)
- Install roof rack leg rear lh
- Install the leg cushion rear.
- Install the roof rack leg rear with the 2 screws.
Torque: 2.8 To 5.0 N*m (29 to 51 kgf*cm, 25 to 44 in.*Lbf)
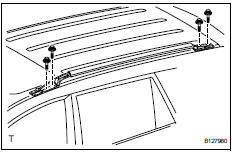
- Install roof rack assembly lh
- Install the roof rack with the 4 bolts.
Torque: 38 n*m (387 kgf*cm, 28 ft.*Lbf)
- Install roof rack leg cover rear lh
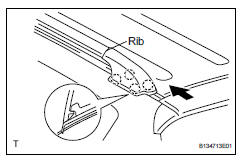
- Install the leg cover.
- Attach the rib to the bar.
- Attach the 4 claws.
- Install roof rack leg cover front lh

- Install the leg cover.
- Attach the rib to the bar.
- Attach the 4 claws.
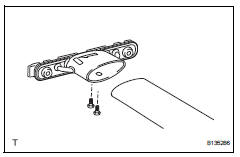
- Install roof rack bar front
- Install the roof rack bar with the 4 screws.
Torque: 1.96 To 2.94 N*m (20 to 30 kgf*cm, 17 to 26 in.*Lbf)
- Install roof rack support sub-assembly center

- Install the roof rack support center with the 4 roof carrier caps.
 Removal
Hint:
Use the same procedures for the rh side and lh side.
The procedures listed below are for the lh side.
Remove roof rack support sub-assembly center
Remove the 4 roof carrier ...
 Front door belt moulding
Components
...
Other materials:
Child restraint systems
Before installing a child
restraint system in the vehicle,
there are precautions
that need to be observed,
different types of child
restraint systems, as well as
installation methods, etc.,
written in this manual.
Use a child restraint system
when riding with a small child
that cannot properly use a ...
Correct use of the seat
belts
Extend the shoulder belt so
that it comes fully over the
shoulder, but does not come
into contact with the neck or
slide off the shoulder.
Position the lap belt as low as
possible over the hips.
Adjust the position of the
seatback.
Sit up straight and well back
in the seat.
Do not twis ...
Removal
Discharge fuel system pressure (see page
fu-9)
Disconnect cable from negative battery
terminal
Caution:
Wait at least 90 seconds after disconnecting the
cable from the negative (-) battery terminal to
prevent airbag and seat belt pretensioner activation.
Remove hood sub-assembly ( ...
