Toyota RAV4 (XA50) 2019-2026 Owners Manual: Interior
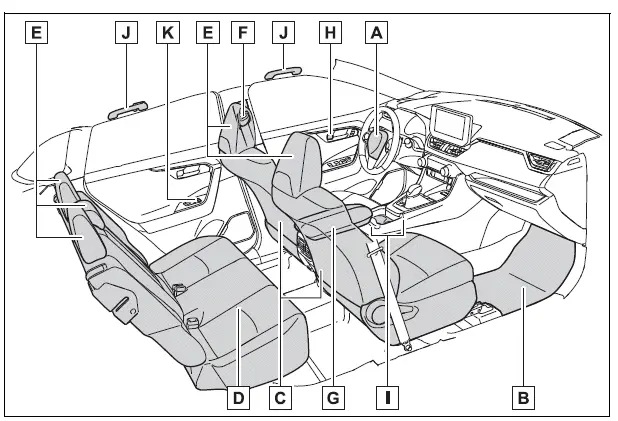
- SRS airbags
- Floor mats
- Front seats
- Rear seats
- Head restraints
- Seat belts
- Console box
- Inside lock buttons
- Cup holders
- Assist grips
- Rear seat heater switches*
*: If equipped
Ceiling
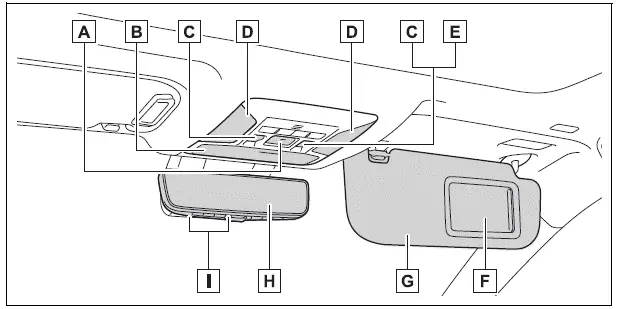
- "SOS" button*1
- Auxiliary box
- Moon roof switches*1
- Interior lights*2 Personal lights
- Electronic sunshade switch*1
- Vanity mirrors
- Sun visors
- Inside rear view mirror*1 Digital Rear-view Mirror*1
- Garage door opener switches*1
*1:If equipped
*2:The illustration shows the front, but they are also equipped in the rear.
 Switches
Driving position memory switches*1
Window lock switch
Power window switches
Door lock switches
Outside rear view mirror switches
"ODO TRIP" switch (vehicles with 7-inch multi-information displ ...

Other materials:
High pitched horn
Components
Removal
Remove radiator support opening cover
(see page et-4)
Remove front fender liner lh (see page et-4)
Remove front fender liner rh (see page et-4)
Remove front bumper cover (see page et-5)
Remove high pitched horn
Disconnect the horn connector.
Remove t ...
Diagnostic trouble code chart
If a dtc is displayed during the dtc check, check the circuit
listed in the table below and proceed to the page given.
Hint:
*1: "Comes on" means the malfunction indicator lamp
(mil) illuminates.
*2: "Dtc stored" means the ecm memorizes the
malfunction code if the ecm ...
Tire information
Typical tire symbols
Full-size tire
Compact spare tire
Tire size
Dot and tire identification number (tin)
Location of treadwear indicators
Tire ply composition and materials
Plies are layers of rubber-coated parallel cords. Cords are the strands
which form the plies in a tire ...
