
Toyota RAV4 (XA40) 2013-2018 Service Manual: Rear combination light assembly
Components
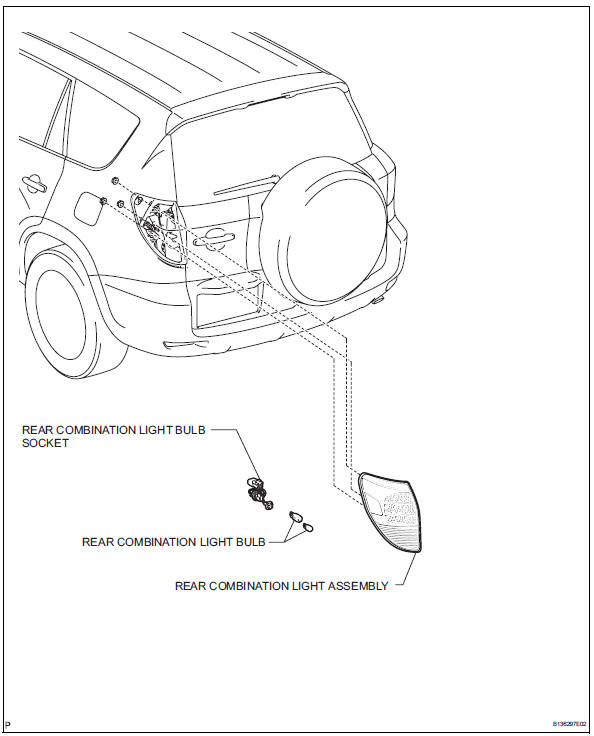
Removal
Hint:
- Use the same procedures for the rh and lh sides.
- The procedures listed below are for the lh side.
- Disconnect cable from negative battery terminal
Caution:
Wait at least 90 seconds after disconnecting the cable from the negative (-) battery terminal to prevent airbag and seat belt pretensioner activation.
- Remove rear combination light assembly
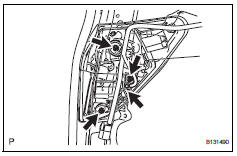
- Remove the 3 nuts and disconnect the connector.
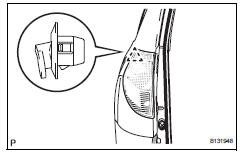
- Detach the clip and remove the light.
Disassembly
Hint:
- Use the same procedures for the rh and lh sides.
- The procedures listed below are for the lh side.
- Remove rear combination light bulb
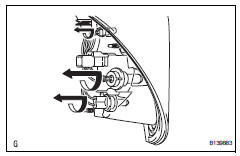
- Turn the 3 bulbs in the direction indicated by the arrows and pull to remove them.
Reassembly
Hint:
- Use the same procedures for the rh and lh sides.
- The procedures listed below are for the lh side.
- Install rear combination light bulb
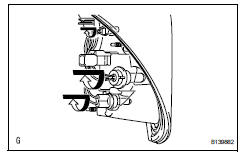
- Turn the 3 bulbs in the direction indicated by the arrows to install them.
 Fog light assembly
Components
Removal
Hint:
Use the same procedures for the rh and lh sides.
The procedures listed below are for the lh side.
Disconnect cable from negative battery terminal
Caution: ...
 License plate light assembly
Components
Removal
Disconnect cable from negative battery
terminal
Caution:
Wait at least 90 seconds after disconnecting the
cable from the negative (-) battery terminal to
prevent ai ...
Other materials:
Dinghy towing
Your vehicle is not designed
to be dinghy towed (with 4
wheels on the ground)
behind a motor home.
NOTICE
â– To avoid serious damage to
your vehicle
Do not tow your vehicle with 4
wheels on the ground.
â– To prevent causing serious
damage to the transmission
and AWD system (AWD models)
2WD models: ...
Back door
The back door can be locked/unlocked and opened/closed by
the following procedures.
Locking and unlocking the back door
Door lock switch
Entry function (if equipped)
Wireless remote control
Opening/closing the back door from inside the vehicle (vehicles
with a power back door)
Press a ...
Freeze frame data
Freeze frame data
Notice:
It is difficult to show the specified values
(judgment values) clearly because freeze frame
data values change significantly due to
differences in measurement conditions,
surroundings, or vehicle conditions. For this
reason, there may be a problem even w ...
