Toyota RAV4 (XA40) 2013-2018 Service Manual: Reassembly
Caution:
Wear protective gloves. Sharp areas on the seatback frame, seat cushion frame and reclining adjuster may injure your hands.
Hint:
A bolt without a torque specification is shown in the standard bolt chart (see page ss-2).
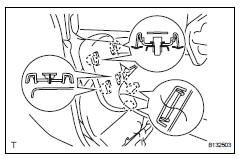
- Install rear seat cover lh

- Attach the 2 claws to install the cover.
- Install the 2 screws.
- Install rear seatback cover lh
- Attach the 2 claws to install the cover.
- Install the 2 screws.
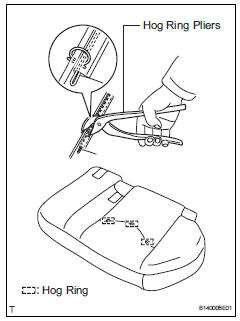
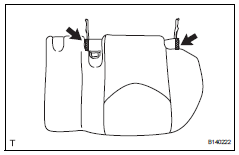
- Install rear no. 1 Seatback cover
Notice:
- Be careful not to damage the cover.
- When installing the hog rings, avoid wrinkling the cover.

- Using hog ring pliers, install the seatback cover to the seatback pad with 3 new hog rings.
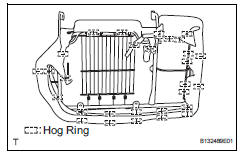
- Install the seatback cover (with pad) to the seatback frame.
- Attach the 4 claws to install the 2 headrest supports.
- Lift up the seatback cover and install the 13 hog rings.
- Install rear seatback protector
- Install the protector with the 2 nuts.
Torque: 20 n*m (204 kgf*cm, 15 ft.*Lbf)
- Attach the clip.
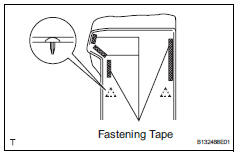
- Attach the clips and close the fastening tape.
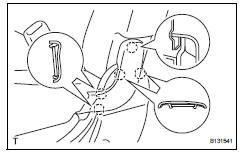
- Install rear seat lap type center belt assembly lh (see page sb-41)
- Install rear no. 1 Seatback assembly lh
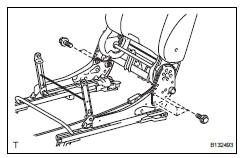
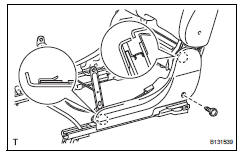
- Install the seatback with the 5 bolts.
Torque: 42 n*m (428 kgf*cm, 31 ft.*Lbf)

- W/o rear no. 2 Seat: attach the 2 clamps and connect the cable to the reclining adjuster.
- Install rear seatback lock control lever base lh

- Attach the 2 claws to install the lever base.
- Install the screw.
- Install rear seat reclining release lever
- Attach the claw to install the release lever.
- Install the cover with the 2 screws.
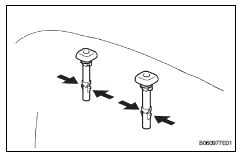
- Install rear seat cushion moulding lh
- Attach the 2 claws to install the moulding.
- Install the screw.
- Install rear seat cushion rear moulding lh

- Attach the claw to install the moulding.
- Install the screw.
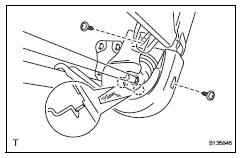
- Install rear seat rear bracket cover lh
- Open the lower part of the seatback cover. Then attach the 4 clips to install the bracket cover.
- Install the 2 screws.
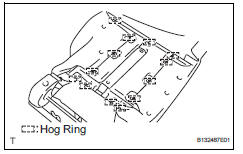
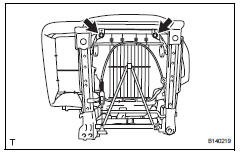
- Install rear no. 1 Seat cushion cover
Notice:
- Be careful not to damage the cover.
- When installing the hog rings, avoid wrinkling the cover.
- Using hog ring pliers, install the seat cushion cover to the seat cushion pad with 3 new hog rings.
- Using hog ring pliers, install the seat cushion cover (with pad) to the seat cushion frame with 29 new hog rings.
- Attach the 2 hooks.
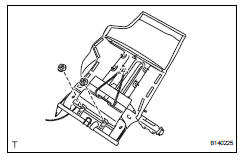
- Install rear no. 1 Seat cushion assembly lh
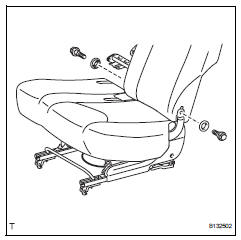
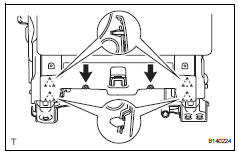
- Install the cushion with the 2 bushes and 2 bolts.
Torque: 21 n*m (214 kgf*cm, 15 ft.*Lbf)
- Install the 2 bolts.
Torque: 21 n*m (214 kgf*cm, 15 ft.*Lbf)
- Connect the rubber band of the seatback cover to the seat cushion frame.
- Install rear seat inner belt assembly rh (see page sb-41)
- Install rear seat cushion lower hinge cover lh
- Attach the 5 claws to install the hinge cover.
- Install rear no. 3 Seat cushion hinge cover
- Attach the 6 claws to install the hinge cover.
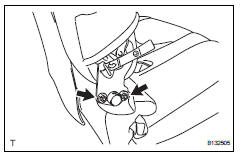
- Install rear no. 1 Seat armrest assembly lh
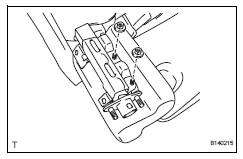
- Install the armrest with the 2 nuts.
Torque: 32 n*m (326 kgf*cm, 24 ft.*Lbf)
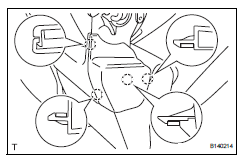
- Install rear seat center armrest cover
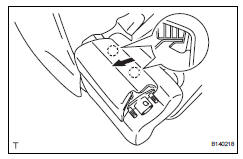
- Push the armrest cover in the direction indicated by the arrow in the illustration to attach the 2 claws.
- Attach the 2 clips to install the armrest cover.
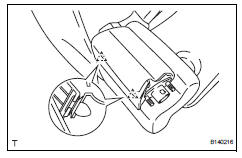
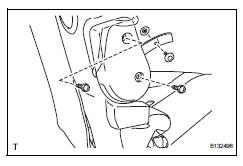
- Install rear seat center armrest assembly
- Install the armrest with the 2 nuts.
Torque: 32 n*m (326 kgf*cm, 24 ft.*Lbf)
- Install center armrest hinge cover lh
- Attach the 4 claws to install the hinge cover.
- Install center armrest hinge cover rh
- Pass the seat lock release strap through the hole in the hinge cover.
- Attach the claw to install the hinge cover.
- Install the 2 screws and 2 rear seatback lock hooks.
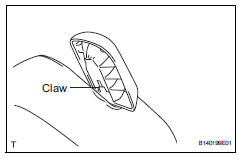
- Install rear seat center headrest assembly
- Install rear seat headrest assembly
 Disassembly
Caution:
Wear protective gloves. Sharp areas on the seatback
frame, seat cushion frame and reclining adjuster may
injure your hands.
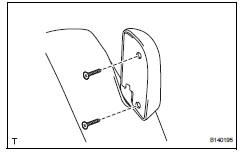
Remove rear seat headrest assembly
Remove rear seat center ...
 Installation
Install rear no. 1 Seat assembly lh (w/o rear no. 2 Seat)
Fully tilt the seatback forward.
Place the seat in the cabin.
Notice:
Be careful not to damage the vehicle body.
Connection ...
Other materials:
Blower resistor
On-vehicle inspection
Inspect blower motor control
Measure the resistance of the blower resistor.
Standard resistance
If the resistance is not as specified, replace the
blower motor control. ...
Symptom simulation
Hint:
The most difficult case in troubleshooting is when no
problem symptoms occur. In such a case, a thorough
problem analysis must be carried out. A simulation of the
same or similar conditions and environment in which the
problem occurred in the customer's vehicle should be
carried out. No ...
Camshaft position "a" actuator circuit (bank 1)
Dtc P0010 Camshaft
position "a" actuator circuit (bank
1)
Description
The variable valve timing (vvt) system includes the ecm, ocv and vvt
controller. The ecm sends a
target duty-cycle control signal to the ocv. This control signal regulates the
oil pressure supplied to the ...
