Toyota RAV4 (XA40) 2013-2018 Service Manual: Underdrive clutch
Components
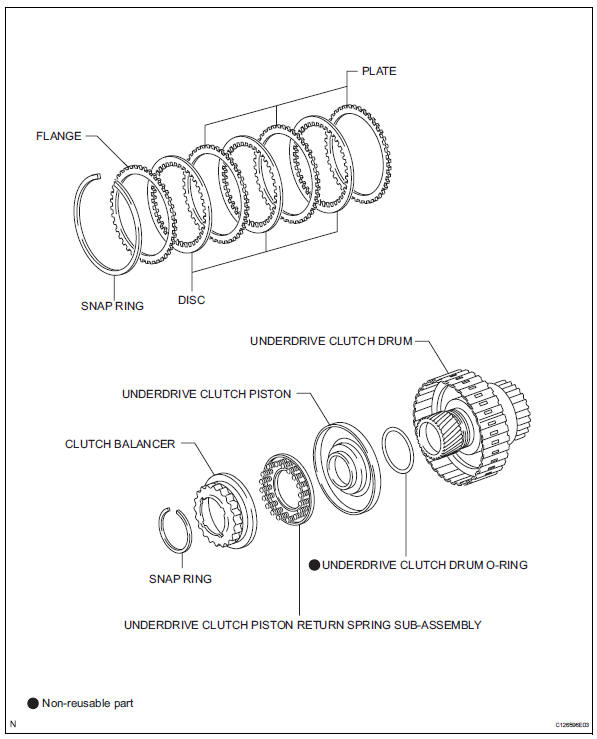
Disassembly
- Inspect pack clearance of underdrive clutch (see page ax-247)
- Remove no. 1 Underdrive clutch disc
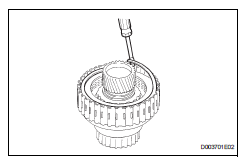
- Using a screwdriver, pry out the underdrive clutch flange snap ring.
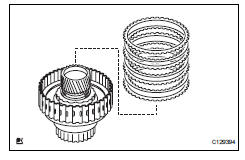
- Remove the flange, 3 discs and 3 plates from the underdrive clutch drum.
- Inspect no. 1 Underdrive clutch disc (see page ax-248)
- Inspect underdrive clutch drum subassembly (see page ax-248)
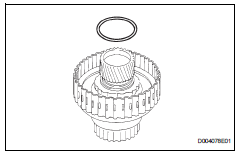
- Remove underdrive clutch drum o-ring
- Remove underdrive clutch piston set
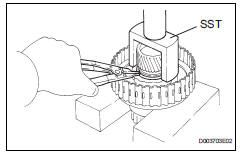
- Place sst on the clutch balancer and compress the spring with a press.
Sst 09350-32014 (09351-32070)
- Using a snap ring expander, remove the snap ring.
Notice:
- Stop the press when the spring sheet is lowered to a position 1 to 2 mm (0.04 To 0.08 In.) From the snap ring groove.
- This prevents the spring sheet from being deformed.
- Do not expand the snap ring excessively.
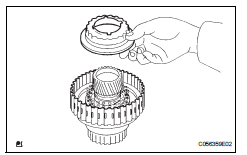
- Remove the clutch balancer from the underdrive clutch drum.
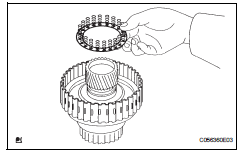
- Remove the piston return spring from the underdrive clutch drum.
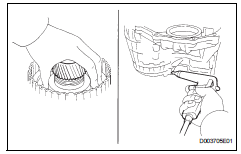
- Install the underdrive clutch to the transaxle.
Notice:
Be careful not to damage the oil seal rings.
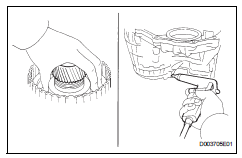
- Holding the underdrive clutch piston with your hand, apply compressed air (392 kpa, 4.0 Kgf/cm2, 57 psi) to the transaxle case to remove the underdrive clutch piston.
- Inspect underdrive clutch return spring sub-assembly (see page ax-248)
Inspection
- Inspect underdrive clutch pack clearance
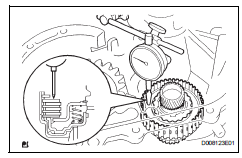
- Install the underdrive clutch to the transaxle.
Notice:
Be careful not to damage the oil seal rings.
- Install a dial indicator as shown in the illustration.
- Measure the underdrive clutch pack clearance while applying and releasing compressed air (392 kpa, 4.0Kgf/cm2, 57 psi)
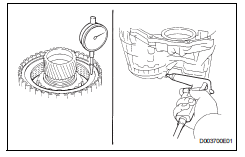
Standard pack clearance: 1.51 To 1.90 Mm (0.0594 To 0.0748 In.)
If the pack clearance is not as specified, inspect the discs, plates and flange.
- Inspect no. 1 Underdrive clutch disc
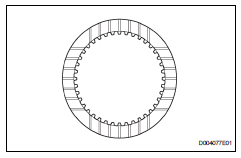
- Check to see if the sliding surface of the disc, plate and flange are worn or burnt. If necessary, replace them.
Hint:
- If the lining of the discs is peeling off or discolored, or even if a part of the printed mark is defaced, replace all discs.
- Before assembling new discs, soak them in atf for at least 15 minutes.
- Inspect underdrive clutch drum subassembly
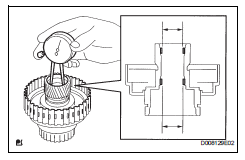
- Using a caliper gauge measure the inside diameter of the underdrive clutch drum bush.
Standard drum bush: 37.06 To 37.08 Mm (1.4591 To 1.4598 In.)
Maximum drum bush: 37.13 Mm (1.4618 In.)
If the inside diameter is greater then the maximum, replace the underdrive clutch drum sub-assembly.
- Inspect underdrive clutch return spring sub-assembly
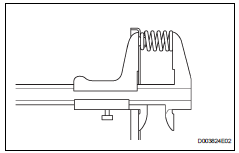
- Using a vernier caliper, measure the free length of the spring together with the spring seat.
Standard free length: 17.14 Mm (0.6752 In.)
Installation
- Install underdrive clutch piston set
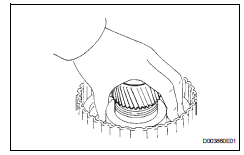
- Coat the underdrive clutch piston with atf, and install it to the underdrive clutch piston drum.
Notice:
Be careful not to damage the o-ring.
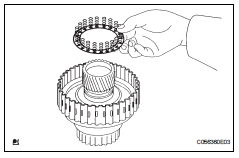
- Install the piston return spring to the underdrive clutch drum.
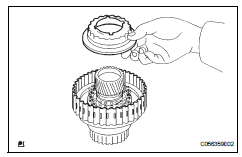
- Install the clutch balancer to the underdrive clutch drum.
Notice:
Be careful not to damage the lip seal of the clutch balancer.
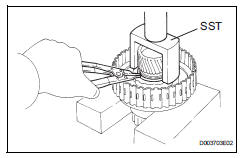
- Place sst on the clutch balancer and compress the piston return spring with a press.
Sst 09350-32014 (09351-32070)
- Using a snap ring expander, install the snap ring to the underdrive clutch drum.
Notice:
- Be sure the end gap of the snap ring is not aligned with the clutch balancer's claw.
- Stop the press when the spring sheet is lowered to a position 1 to 2 mm (0.039 0.078 In.) From the snap ring groove.
- This prevents the spring sheet from being deformed.
- Do not expand the snap ring excessively.
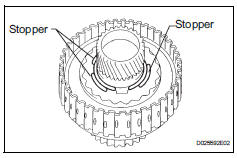
- Set the end gap of the snap ring in the underdrive clutch drum shown in the illustration.
Notice:
The end gap of the snap ring should not coincide with any of the stopper.
- Install underdrive clutch drum o-ring
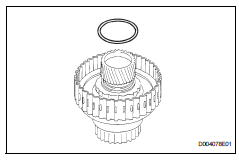
- Coat the new o-ring with atf, and install it to the underdrive clutch drum.
- Install no. 1 Underdrive clutch disc
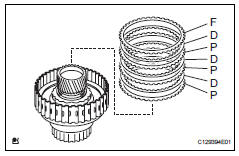
- Install the 3 plates, 3 discs and flange to the underdrive clutch drum.
Install in order: p - d - p - d - p - d - f
Hint:
P = plate
D = disc
F = flange
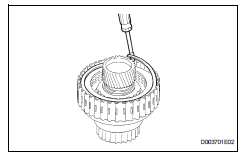
- Using a screwdriver, install the underdrive clutch flange hole snap ring.
- Check that the end gap of the snap ring is not aligned with one of the cutouts.
- Inspect underdrive clutch pack clearance
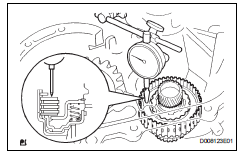
- Install the underdrive clutch to the transaxle.
Notice:
Be careful not to damage the oil seal rings.
- Set a dial indicator as shown in the illustration.
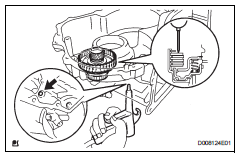
- Measure the underdrive clutch piston stroke while applying and releasing compressed air (392 kpa, 4.0 Kgf/cm2, 57 psi).
Standard pack clearance: 1.51 To 1.90 Mm (0.0594 To 0.0748 In.)
If the pack clearance is less than the minimum, parts may have been assembled incorrectly, so check and reassemble again.
If the park clearance is not as specified, select another flange.
Hint:
There are 3 flanges in different thickness.
Standard flange thickness

 Underdrive planetary gear
Components
Disassembly
Remove underdrive planetary gear
preload (see page ax-240)
Remove underdrive input shaft nut
Sst 09930-00010 (09931-00010, 09931-00020),
09387-00050, 09564-1602 ...
 Valve body
Components
Disassembly
Remove shift solenoid valve slt
Remove the bolt, plate and shift solenoid valve slt
from the valve body.
Remove shift solenoid valve sl1
Rem ...
Other materials:
Winter driving tips
Carry out the necessary
preparations and inspections
before driving the
vehicle in winter. Always
drive the vehicle in a manner
appropriate to the prevailing
weather conditions.
Pre-winter preparations
Use fluids that are appropriate
to the prevailing outside temperatures.
Engine oil
Engine c ...
General maintenance (2006/01- )
General notes
Maintenance requirements vary depending on the
country.
Check the maintenance schedule in the owner's
manual supplement.
Following the maintenance schedule is mandatory.
Determine the appropriate time to service the vehicle
using either miles driven or time elapsed ...
Starter relay
On-vehicle inspection
Disconnect cable from negative battery
terminal
Caution:
Wait at least 90 seconds after disconnecting the
cable from the negative (-) battery terminal to
prevent airbag and seat belt pretensioner activation.
Remove starter relay
Remove the starter relay fr ...
