Toyota RAV4 (XA40) 2013-2018 Service Manual: Disassembly
Hint:
- Use the same procedures for the rh side and lh side.
- The procedures listed below are for the lh side.
- Remove no. 1 Rear seat reclining cover lh
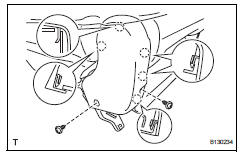
- Remove the 2 screws.
- Using a screwdriver, detach the 5 claws and remove the cover.
Hint:
Tape the screwdriver tip before use.
- remove no. 2 rear seat reclining cover lh
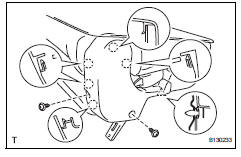
- Remove the 2 screws
- Using a screwdriver, detach the 5 claws and clip, and remove the cover.
Hint:
Tape the screwdriver tip before use.
- Remove rear no. 2 Seat cushion assembly

- Using a clip remover, remove the 2 clips of the seat cushion back side. Then open the seat cushion cover.
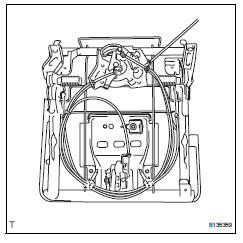
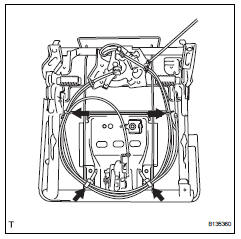
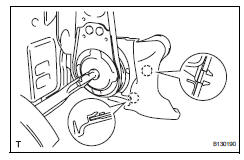
- Disconnect the seat lock control cable on the back side from the seat cushion as shown in the illustration.
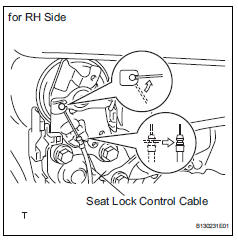
- Disconnect the seat lock control cable on the rh side from the seatback as shown in the illustration.
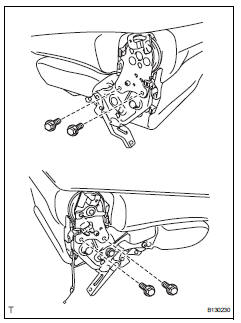
- Remove the 4 bolts and seat cushion.
- Remove rear no. 2 Seat inner belt assembly lh (see page se-110)
- Remove rear no. 2 Seat cushion cover lh
- Using a clip remover, remove the 2 clips.
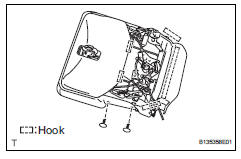
- Using a screwdriver, detach the 5 hooks.
Hint:
Tape the screwdriver tip before use.
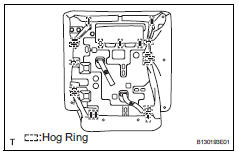
- Using a screwdriver, detach the hooks and remove the seat cushion cover (with pad) from the seat cushion spring.
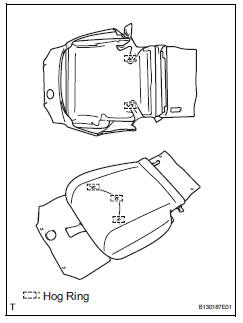
- Remove the 5 hog rings and seat cushion cover from the seat cushion pad.
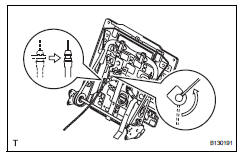
- Remove seat lock control cable assembly
- Using a screwdriver, detach the 2 clamps of the cable tie.
- Cut the 4 cable ties.
- Remove the 5 cables from the seat cushion spring.
- Remove rear seat cushion wire subassembly
- Remove the nut and wire.
- Remove rear no. 2 Seat headrest assembly
- Remove rear seatback lock control bezel

- Remove the 4 seatback lock hooks.
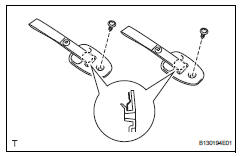
- Remove the 2 screws.
- Detach the 2 claws and remove the bezel.
- Remove rear seatback board carpet assembly lh
- Using a clip remover, detach the 9 clips and remove the seatback board carpet.
Notice:
Be careful not to damage the seatback board carpet.
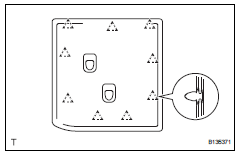
- Remove rear no. 2 Seatback cover
- Remove the 19 hog rings.
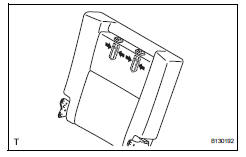
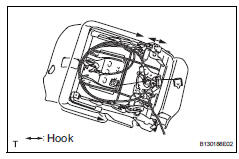
- Detach the 4 claws and remove the 2 headrest supports.
- Remove the seatback cover (with pad) from the seatback frame.
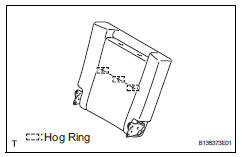
- Remove the 3 hog rings and seatback cover from the seatback pad.
- Remove rear seat reclining inner cover lh
- Using a screwdriver, detach the 2 claws and remove the inner cover.
Hint:
Tape the screwdriver tip before use
- Remove rear seat reclining inner cover rh
Hint:
Use the same procedures described for the lh side.
- Remove seatback lock control cable assembly
- Remove the cable from the seatback frame as shown in the illustration.
- Remove reclining lock release band
- Remove the nut and band.
- Remove seat lock release band
- Remove the nut and band.
 Removal
Hint:
Use the same procedures for the rh side and lh side.
The procedures listed below are for the rh side.
Remove no. 2 Seat hinge cover lh
Fully tilt the seatback forward.
At ...
 Reassembly
Hint:
Use the same procedures for the rh side and lh side.
The procedures listed below are for the lh side.
Install seat lock release band
Install the band with nut.
Hint:
After ...
Other materials:
Starting system
Parts location
System diagram
The starting system rotates the starter motor according to the
signals from the ignition switch and pnp switch.
...
Horn relay
On-vehicle inspection
Remove engine room no. 1 Relay block cover
Inspect integration relay (unit a: horn relay)
Using a screwdriver, detach the 2 claws and
disconnect the integration relay from the engine
room junction block.
Hint:
Tape the screwdriver tip before use.
Mea ...
Oxygen (a/f) sensor heater control circuit
Hint:
Although the dtc titles say oxygen sensor, these dtcs relate to the
air-fuel ratio (a/f) sensor.
Sensor 1 refers to the sensor mounted in front of the three-way
catalytic converter (twc) and
located near the engine assembly.
Description
Refer to dtc p2195 (see page es-292 ...
