Toyota RAV4 (XA40) 2013-2018 Service Manual: Inspection
- Inspect automatic transaxle oil panel sub-assembly
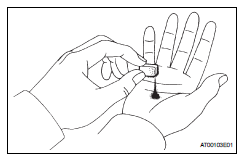
- Remove the magnets and use them to collect any
steel chips. Examine the chips and particles in the
pan and on the magnet to determine what type of
wear has occurred in the transaxle.
Steel (magnetic): bearing gear and plate wear brass (non-magnetic): bush wear
- Inspect input shaft end play
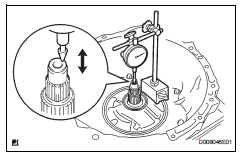
- Using a dial indicator, measure the input shaft end play.
Standard end play: 0.262 To 1.249 Mm (0.0103 To 0.0492 In.)
- Inspect multiple disc clutch hub
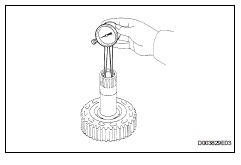
- Using a caliper gauge, measure the inside diameter of the forward clutch hub bushing.
Standard inside diameter: 23.025 To 23.045 Mm (0.9065 To 0.9073 In.)
Maximum inside diameter: 23.09 Mm (0.9091 In.)
Notice:
- When the diameter is over the maximum, replace the multiple disc clutch hub with a new one.
- Check the contact surface of the bush in the direct clutch shaft. If any scratch or discolor is identified, replace the direct clutch subassembly with a new one.
If the inside diameter is greater then the maximum, replace the forward clutch hub.
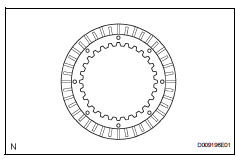
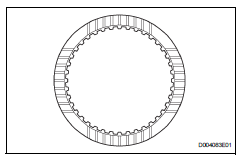
- Inspect no. 2 Underdrive clutch disc
- Check to see if the sliding surface of the disc, plate
and flange are worn or burnt.
If necessary, replace them.
Notice:
- If the lining of the disc is peeling off or discolored, or even if a part of the groove is defaced, replace all discs.
- Before assembling new discs, soak them in atf for at least 15 minutes.
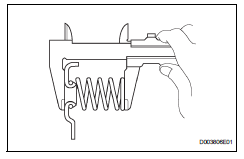
- Inspect underdrive brake return spring sub-assembly
- Using a vernier caliper, measure the free length of the spring together with the spring seat.
Standard free length: 14.04 Mm (0.5528 In.)
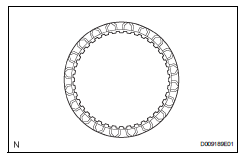
- Inspect 2nd brake clutch disc
- Check to see if the sliding surface of the disc, plate
and flange are worn or burnt.
If necessary, replace them.
Notice:
- If the lining of the disc is peeling off or discolored, or even if a part of the printed number is defaced, replace all discs.
- Before assembling new discs, soak them in atf for at least 15 minutes.
- Inspect 1st and reverse brake clutch disc
- Check to see if the sliding surface of the disc, plate
and flange are worn or burnt.
If necessary, replace them.
Notice:
- If the lining of the disc is peeling off or discolored, or even if a part of the groove is defaced, replace all discs.
- Before assembling new discs, soak them in atf for at least 15 minutes.
- Inspect 1st and reverse brake return spring sub-assembly

- Using a vernier caliper, measure the free length of the spring together with the spring seat.
Standard free length: 15.51 Mm (0.6106 In.)
- Inspect underdrive 1-way clutch assembly
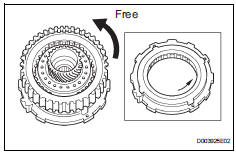
- Install the underdrive clutch assembly to the 1-way clutch. Rotate the underdrive clutch assembly to check the rotating direction for the lock or free operation.
 Disassembly
Remove park/neutral position switch assembly
Remove the nut, washer and control shaft lever.
Using a screwdriver, pry off the lock plate.
Remove the nut and lock plate.
...
 Reassembly
Bearing position
Standard bearing position
Install differential gear lube apply tube
Install the apply tube and clamp to the transaxle
housing with the bolt.
Torque: ...
Other materials:
Data list / active test
Read data list
Hint:
Using the intelligent tester's data list allows switch,
sensor, actuator and other item values to be read without
removing any parts. Reading the data list early in
troubleshooting in one way to save time.
Connect the intelligent tester (with can vim) to the
dlc3 ...
Active test
Hint:
Performing an active test enables components
including the relays, vsv (vacuum switching valve) and
actuators, to be operated without removing any parts.
The active test can be performed with the intelligent
tester. Performing the active test as the first step of
troubleshooting is one ...
Identification information
Vehicle identification and serial numbers
Vehicle identification number
The vehicle identification number is stamped on the
vehicle identification number plate and on the
certification label, as shown in the illustrations.
Vehicle identification number plate
Certification label ...
