
Toyota RAV4 (XA40) 2013-2018 Service Manual: Terminals of ecm
- Check ecm
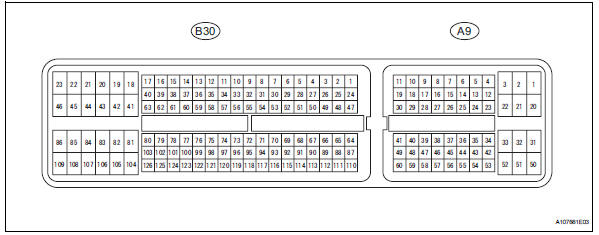
- Measure the voltage of the ecm connector.
Hint:
Each ecm terminal's standard voltage is shown in the table below.
In the table, first follow the information under "condition". Look under "symbols (terminal no.)" For the terminals to be inspected. The standard voltage between the terminals is shown under "specified condition".
Use the illustration above as a reference for the ecm terminals.
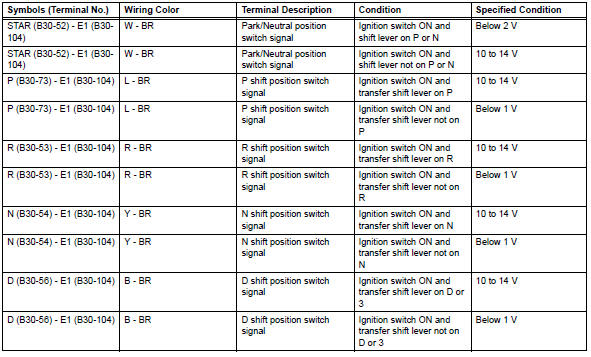
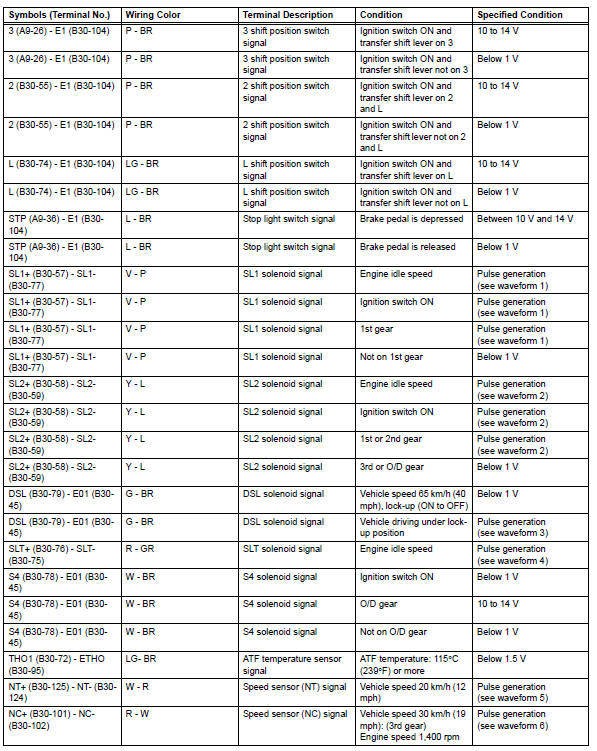
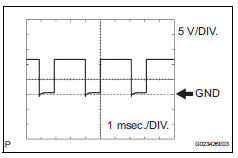
- Using an oscilloscope, check the waveform 1.
Waveform 1 (reference) 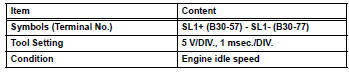
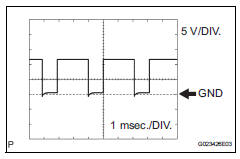
- Using an oscilloscope, check the waveform 2.
Waveform 2 (reference) 
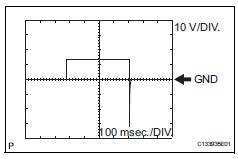
- Using an oscilloscope, check the waveform 3.
Waveform 3 (reference) 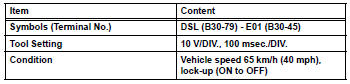
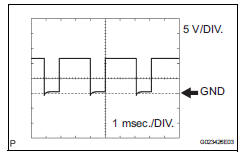
- Using an oscilloscope, check the waveform 4.
Waveform 4 (reference) 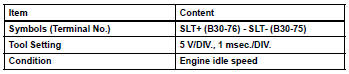
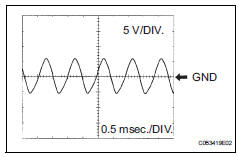
- Using an oscilloscope, check the waveform 5.
Waveform 5 (reference) 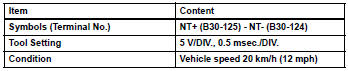
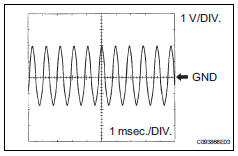
- Using an oscilloscope, check the waveform 6.
Waveform 6 (reference) 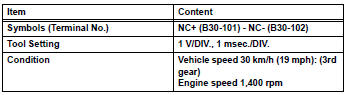
 Problem symptoms table
Hint:
Use the table below to help determine the cause of the
problem symptom. The potential causes of the symptoms
are listed in order of probability in the "suspected area"
column ...
 Diagnosis system
Description
When troubleshooting on-board diagnostic (obd
ii) vehicles, the vehicle must be connected to the
obd ii scan tool (complying with sae j1987).
Various data output from the ...
Other materials:
Rear airbag sensor
Components
On-vehicle inspection
Check rear airbag sensor (vehicle not
involved in collision)
Perform a diagnostic system check (see page rs-
49).
Check rear airbag sensor (vehicle
involved in collision and airbag has not
deployed)
Perform a diagnostic system check ...
Blower resistor
On-vehicle inspection
Inspect blower motor control
Measure the resistance of the blower resistor.
Standard resistance
If the resistance is not as specified, replace the
blower motor control. ...
Mass or volume air flow circuit
Description
The mass air flow (maf) meter is a sensor that measures the amount of air
flowing through the throttle
valve.
The ecm uses this information to determine the fuel injection time and to
provide the appropriate air-fuel
ratio.
Inside the maf meter, there is a heated platinu ...
